
www.digisportinternational.com
INSTRUCTION MANUAL
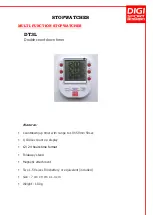
TIMER DT3L
FEATURES:
Tri-display count down
Maximum count down / up 19hr 59min 59sec
1/100 second count up display
12 / 24 hours time format
Foldaway stand
Magnetic attachment
SPECIFICATION:
Maximum count down / up range
19 hours 59 minutes 59 seconds
Count down display resolution
1 second
Count up display resolution
1/100 second
Display size
42 (W)
45 (H) mm
Digit size
6 (W)
12 (H) mm
Battery
1.5 volt, size LR44 or equivalent
2 pieces (included)
Product size
70 (W)
90 (H)
14 (D) mm
INSTALLATION:
1. Slide down battery cover
2. Install batteries with correct polarity positioning
3. Put back battery cover
4. Peel off display protective sheet
5. Press and hold [CLOCK/TIMER] until display flashing
6. Press [12 / 24] button on the back to select 12 or 24 hours time format
7. Press [HR], [MIN] and [SEC] to set the correct time*
8. Press [CLOCK/TIMER] to finish clock setting
COUNT DOWN TIMER:
1. Press [CLOCK/TIMER] to select timer mode
2.
Press and hold [T1] until “TIMER 1” icon flashing
3. Press [HR], [MIN] and [SEC] to set the desired count down time*
4. Press [T1] to finish TIMER 1 setting
5. Repeat above procedures 2
– 4 to set TIMER 2 and 3
6. Press [START/STOP/MEMORY] to start
all timers’ count down simultaneously
7. Press the button again to pause
8. Press the button once more to resume count down
9.
The timer will sound when each setting’s display value becomes 0:00 00 and will be counting up to show the elapsed time
10. Press [START/STOP/MEMORY] will stop TIMER 1, press the button again will stop TIMER 2 and press the button once more will stop TIMER 3
11. Press [CLEAR] to clear all values
12. Press [START/STOP/MEMORY] will display the memorized preset values
13. To operate each timer individually, press T1, T2 or T3 respectively to start or stop the timer, or recall the memorized preset values after pressing
the [CLEAR] button.
COUNT UP TIMER:
1. Press [CLOCK/TIMER] to select clock mode
2. Press [CLEAR] to clear display
’s values
3. Press [START/STOP/MEMORY] to start count up
4. Press the button again to pause
5. Press the button to resume count up
* During setting the values, press and hold the [HR], [MIN] or [SEC] button will increase the values automatically.
CARE OF YOUR STOPWATCH:
SHOCK
- Be careful not to drop your stopwatch or hit it against hard subjects as it may cause a mechanical damage.
TEMPERATURE
- Do not leave your stopwatch under direct sunlight or in very high temperatures for a long time, or the display may become black. Do not leave your
stopwatch in very low temperature as this may cause a slight time loss or gain and the change of digits become slow. In both cases the above conditions
will be corrected when the stopwatch returns to normal temperature.
WATER-RESISTANCE
- The stopwatch is designed to withstand accidental contact of water such as splashes or raindrops, but is not for use under water.
STATIC ELECTRICITY
- The integrated circuit in your stopwatch can be affected by static electricity. IF the static is very strong a permanent damage can be incurred. Be careful
of the screen of the TV set and the wearing of clothing made of synthetic material in dry weather, in such cases a very strong static electricity can be
generated.
MAGNETISM
- Not affected
CHEMICALS
- Do not expose your stopwatch to solvents such as gasoline and alcohol, spray of cosmetics, cleaners, paints etc as they may cause damage to the
stopwatch.
BATTERY CHANGE
- When the display becomes dim of faded out, battery replacement is necessary.
1. Unscrew and remove back cover.
2. Replace with 1 pc fresh V13GA 1.5V (Dia. 11.6x5.4mm) or equivalent.
3. Don't use any metal tweezer to handle the battery or it may cause a short-circuit.
4. Rescrew the back cover, making sure that the gasket is in the correct position.
Use a battery of quality.
THE WARRANTY DOES NOT COVER THE BATTERY.