background image


5

3.


Installation & Operation 

Precautions 

„


Keep the product out of direct sunlight.  Direct exposure to the 

sun or excessive heat may cause damage to the unit. 

„


Do not install the product in a humid or dusty place. 

„


Be sure to use the proper AC power source. 

„


Place the product securely on an even, flat surface.  Tilted or 

uneven surfaces may cause mechanical or paper-feeding 

problems. 

„


Retain the product box and packing materials for shipping 

purposes. 

3.1


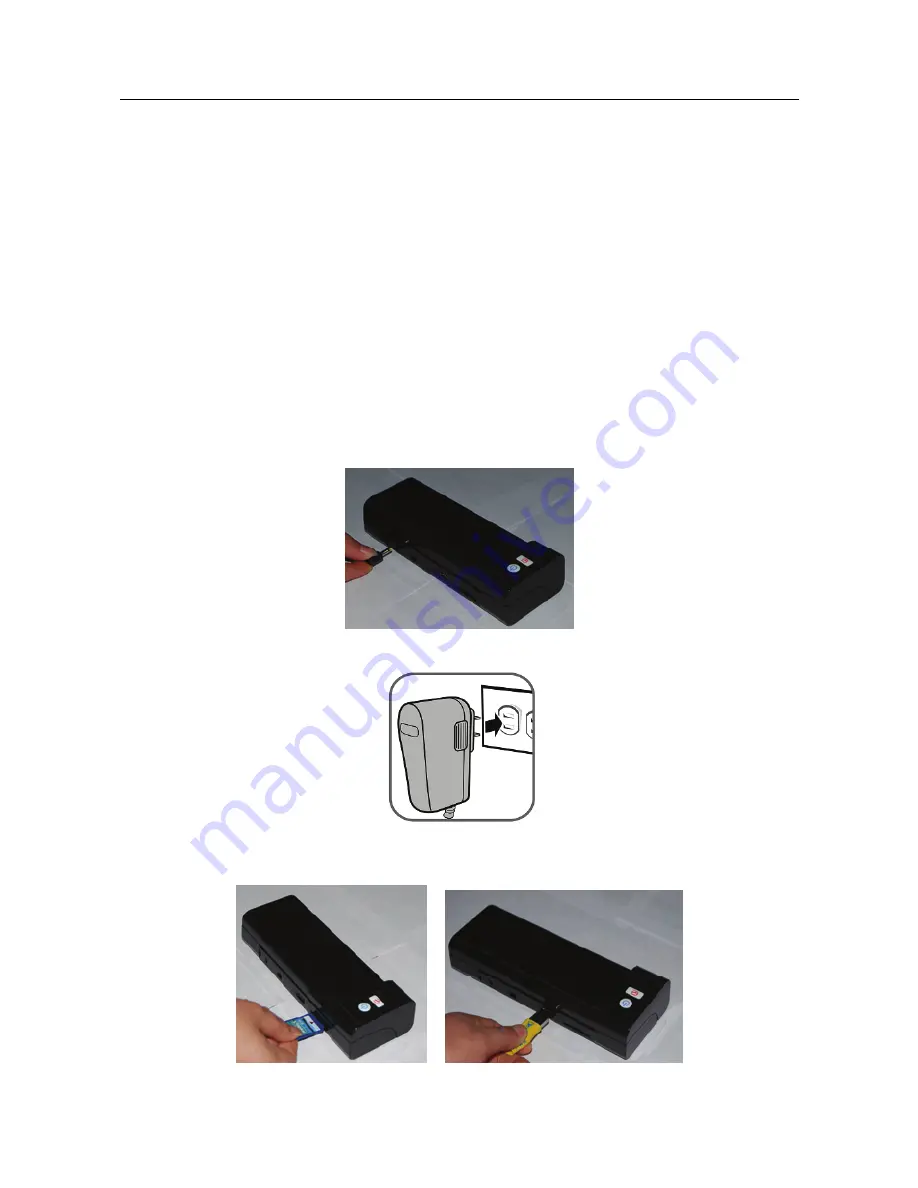
Initial Setup 

1.


Connect the plug on the power adapter cable to the power 

connector on the scanner. 


2.


Plug the power adapter into a power outlet. 


3.


Insert a memory card into the memory card slot or a USB into the 

USB slot. 


Summary of Contents for Photo Scanner

Page 1: ...Photo Scanner User Guide...

Page 2: ...Adapter CD containing User Guide Scan To PC software on CD Calibration Card Roller Cleaning Tool Sensor Cleaning Swab 2 x Plastic Sheaths USB Cable Supported Memory Cards SD SDHC MMC PC System Require...

Page 3: ...to a Computer 10 4 1 How to connect to a computer 10 4 2 Disconnecting the scanner from a computer 11 5 Scanning To PC Manager 12 5 1 Starting the Scan To PC Utility 12 5 2 Uninstalling the Scan To P...

Page 4: ...er and power it on When the scanner is ready feed your printed photo into the scanner and your images will be stored in the memory card or USB If you want to store your photos directly into your compu...

Page 5: ...for various sized originals to ensure the proper alignment 4 Indicator light Indicates the operating status of the scanner 5 Feeding Slot Insert an original to begin scanning 6 Power connector For con...

Page 6: ...AC power source Place the product securely on an even flat surface Tilted or uneven surfaces may cause mechanical or paper feeding problems Retain the product box and packing materials for shipping p...

Page 7: ...process is complete before using the scanner Busy scanning and storing image files Please wait until the process is complete before scanning another original Sensor cleaning in progress Please wait u...

Page 8: ...your memory card or flash card which will hold the first 9999 scans Then Photo2 folder will be created for the next 9999 scans and so on Each scanned image is given a file name with the prefix img fol...

Page 9: ...de first image facing up Note z Keeping the original flat and level when feeding prevents possible jamming z Keep originals free from finger prints oil dirt and dust for optimum scanned image quality...

Page 10: ...e shorter than 55mm Originals with lots of black or dark colors Originals with dark colors surrounding the edges Transparencies filmstrips celluloid etc Printed images pictures on newspapers magazines...

Page 11: ...ning your scanned images into the memory card slot 2 Connect the mini end of the USB cable included with scanner to the Mini USB connector on the scanner 3 When the scanner connects successfully with...

Page 12: ...1 On the Windows System Tray click the hardware removal icon 2 Click the Safely remove USB mass Storage device message with the corresponding Drive 3 When the Safe to Remove Hardware message appears y...

Page 13: ...s an Icon on your Desktop 3 Right click the icon in the system tray and select SETTING or Double Click on the Desktop Icon to Open the Scan To PC Utility screen as shown below 4 To save the scanned im...

Page 14: ...he system tray and select Exit Note z If you have not inserted a memory card to the scanner engine a Removable Disk drive will still be shown in Explorer window though you can not access anything from...

Page 15: ...rst using only the recommended and supplied tools 2 Connect the power supply to the scanner 3 Press and hold the power button for about 0 5 seconds to power the scanner on 4 Insert SD card or USB devi...

Page 16: ...brating the scanner If the scanned image looks fuzzy or there are strange stripes on it the scan engine may need calibrating in order for the sensor to resume its original precision To calibrate the s...

Page 17: ...mended and supplied tools 2 please turn the power off first then take the adaptor off place the supplied senor cleaning tool on the feeding slot 3 Put the cleaning from one side to other side lightly...

Page 18: ...ack out the original so you can remove the jammed original from the output slot Question The status indicator blinks rapidly and no scan is possible Answer Check the following Is the memory card inser...

Page 19: ...ice Specification Sheet fed type Photo Scanner Acceptable paper size 2 x 2 4 x 6 Output image formats JPEG with compression Flash 512KB Memory Internal 64MB DDRI Scanned image 300 dpi dots per inch Re...

Reviews: