background image

Installation of your Notebook

Installation of your Notebook

1)

Place the Notebook power supply in the rear pocket of the bottom part of the case.

2)

Now connect the 220 V plug with the Notebook’s power supply.

3)

Route the low voltage power supply outlet cable beneath the flap lid through the 
designated groove, so that the cable can not be damaged when the lid is closed!

4)

The power supply outlet plug is now connected with the Notebook.

Now you have two options of fastening your Notebook:

1)

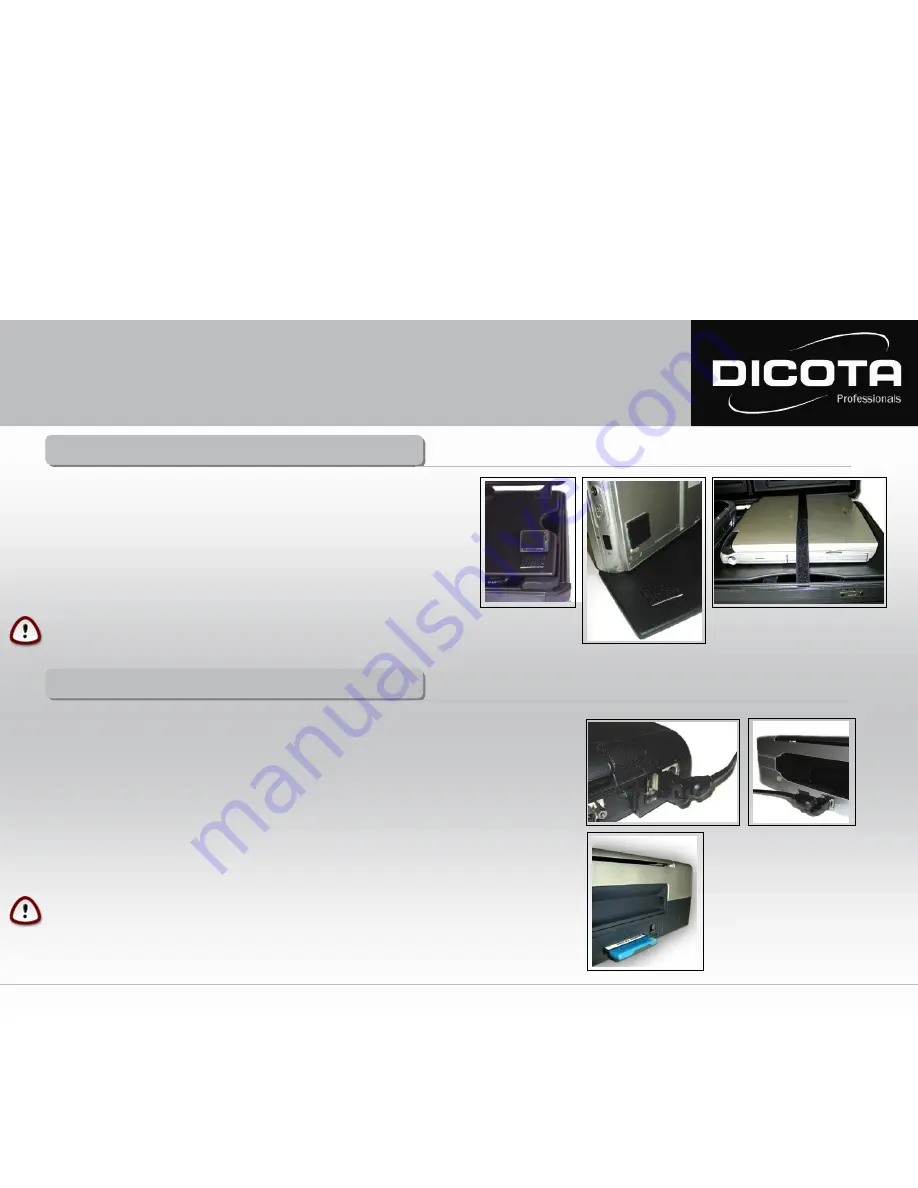
Either you use the four synthetic corners which are provided within the scope of supply 
and fasten them by using the eight self-adhesive 3M Velcro pads (Fig. 1) or

2)

you use the self-adhesive 3M Velcro pads and adhere these in pairs directly onto the
case lid and the bottom side of your Notebook.

During transport always fasten your Notebook with the Velcro strap 
(transport protection) on the upper side of the flap lid (Fig. 3)

Fig. 1

Fig. 2

Connection: Notebook - printer

Connection: Notebook - printer

Two options of connecting Notebook and printer:

1)

Connect your HP DJ 450 and your Notebook by using the USB cable which is provided in the scope of supply.

Ensure a clean cable routing here as well! Either route the USB printer cable around or underneath 

the printer.

Furthermore, make sure that the USB printer cable does not interfere with the printer paper output, 

thus preventing paper jams!

2)

Data transfer between printer and Notebook via Bluetooth:
Bluetooth is a new radio standard for cableless data transfer. The Notebook establishes the data 
connection via Bluetooth through an internal interface or a PC card module. The printer can be connected 
with a compact flash module, for example.

Fig. 3

e.g.: Bluetooth

CAUTION !

Make sure that no cables are pinched when closing the case!

User Manual DataDesk 450

8

Summary of Contents for DataDesk 450

Page 1: ...Gebrauchsanleitung DataDesk 450 Seite 1 User Manual DataDesk 450 Page 5 Mode d emploi DataDesk 450 Page 9 DataDesk 450...

Page 2: ...n Ihres Attach koffers DataDesk 450 immer darauf dass die Kofferschale mit dem Koffergriff oben liegt Falls Sie Ihre DataDesk 450 ohne Kofferoberschale nutzen wollen k nnen Sie diese wie folgt entfern...

Page 3: ...rdeckel Abb 1 1 Dokumenten Druckpapier Fach 2 Zubeh rfacher Kofferboden Abb 2 1 Passform f r Ihren Drucker HP DJ 450 2 Kabelf hrungshilfe 3 Staufach f r CD ROM 3 5 FDD etc 4 Staufach f r ausgedrucktes...

Page 4: ...n Sie das Notebook Netzteil in das hintere Fach der Kofferunterschale 2 Verbinden Sie nun den 220 V Stecker mit dem Notebook Netzteil 3 F hren Sie anschlie end das Niedervolt Netzteilausgangskabel unt...

Page 5: ...chlie en Ihres Koffers stets darauf dass kein Kabel eingeklemmt ist Gebrauchsanleitung DataDesk 450 4 Verbindung Notebook Drucker Verbindung Notebook Drucker Zwei Optionen um Drucker und Notebook zu v...

Page 6: ...perated on a steady non skid surface Especially avoid working surfaces in dusty or damp environments When opening your DataDesk 450 attach case please make sure that the case shell with the case handl...

Page 7: ...the power supply system The DataDesk 450 should always be opened during the recharging procedure of the equipment Scope of supply DataDesk 450 Scope of supply DataDesk 450 1 1 x 220 V IEC plug 2 1 x U...

Page 8: ...Flap lid not seen in Fig 2 Installation of your mobile printer Installation of your mobile printer Open your DataDesk 450 1 Remove the flap lid from the bottom part of the case which functions as you...

Page 9: ...ransport always fasten your Notebook with the Velcro strap transport protection on the upper side of the flap lid Fig 3 Fig 1 Fig 2 Connection Notebook printer Connection Notebook printer Two options...

Page 10: ...tte 11 Fond de la mallette 11 Installation de votre imprimante portable 11 Installation de votre ordinateur portable 12 Connexion ordinateur portable imprimante 12 Informations g n rales DataDesk 450...

Page 11: ...temp rature de l environnement de travail Le couvercle de la mallette doit tre imp rativement ouvert lorsque vous utilisez votre ordinateur et votre imprimante Lorsque les appareils ont t utilis s de...

Page 12: ...tion 7 Sangle 8 Couvercle rabattable n appara t pas sur la figure n 2 Fig N 1 2 3 1 Installation de votre imprimante portable Installation de votre imprimante portable Ouvrez votre DataDesk 450 1 Reti...

Page 13: ...ro sur le dessus du couvercle en cas de transport figure n 3 Fig N 1 Fig N 2 Deux possibilit s de connections au choix 1 Raccordez votre imprimante HP DJ 450 et votre ordinateur portable l aide du c b...

Reviews:

Related manuals for DataDesk 450