


11
12
Product Operation
Product Operation
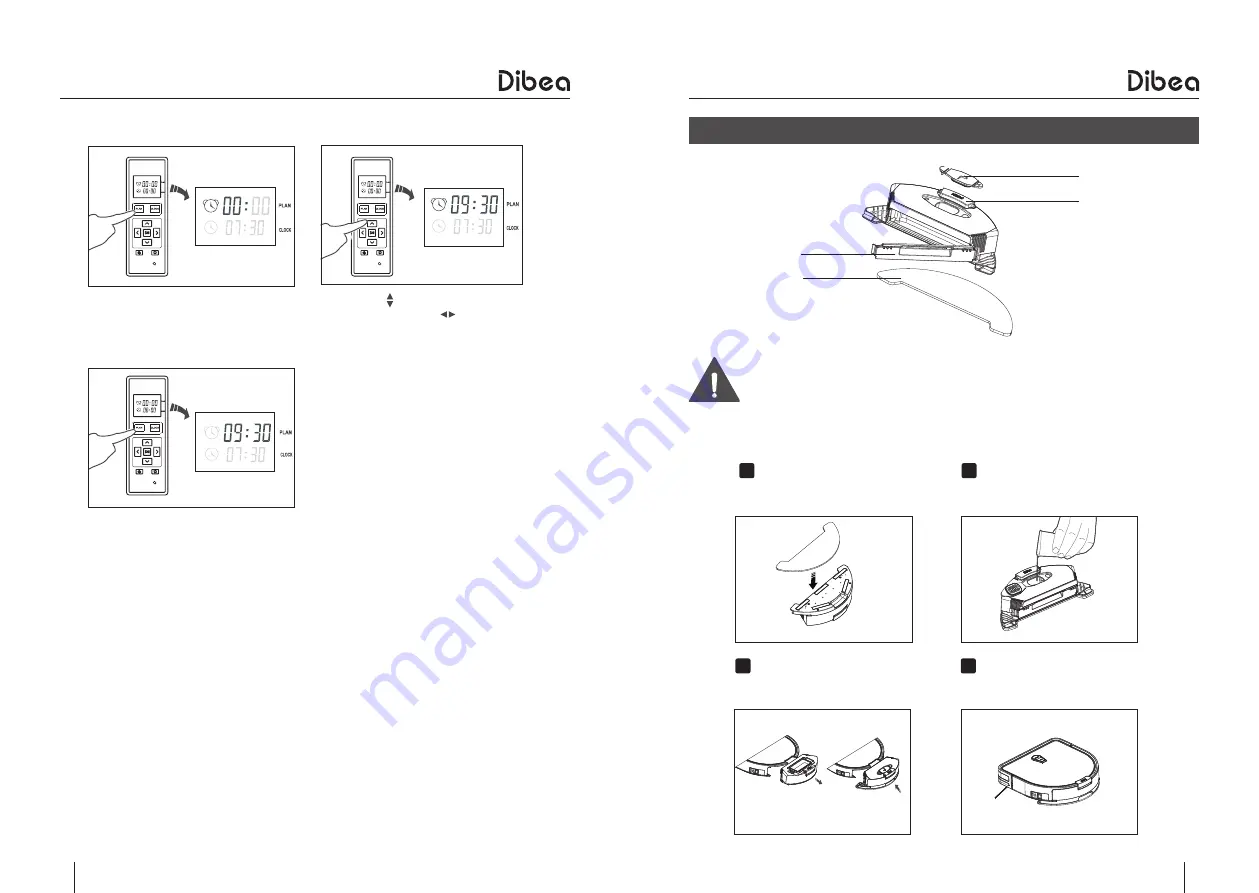
Set the scheduling time
Cancel the scheduling
●
Set the scheduling time as”00:00” and save the setting, the previous scheduling
will be canceled.
●
When setting the clock and scheduling time, there will be beep tone. If you don’t
hear a tone, the setting may be unsuccessful.
●
When replacing a new remote control battery, you need to reset the time as
showed above.
◆ Do not use mopping fuction on carpets or rugs.
◆ When the robot is mopping, please pay attention to the water and add
more when needed.
◆ Do not install the water tank with water when the robot is charging
Install the mop
Attach the mop to the bottom of
the water tank
Install water tank accessories
Press to take out the dust bin, and
install the water tank
Add water
Add enough water through the
inlet
Start mopping
Start auto cleaning, and it will mop
at the same time
Press the PLAN button and the
left 00 of the 00:00 will flash.
After finishing the setting, press
the PLAN button to save the
setting.
Press the to set the hour and
minute, press the to change
between the hour and minute.
●
Water tank (optional)
1
2
3
4
Water tank plug
Water tank button
Water tank cover
Mop cloth


