Diamond GC1500 User Manual Download Page 12

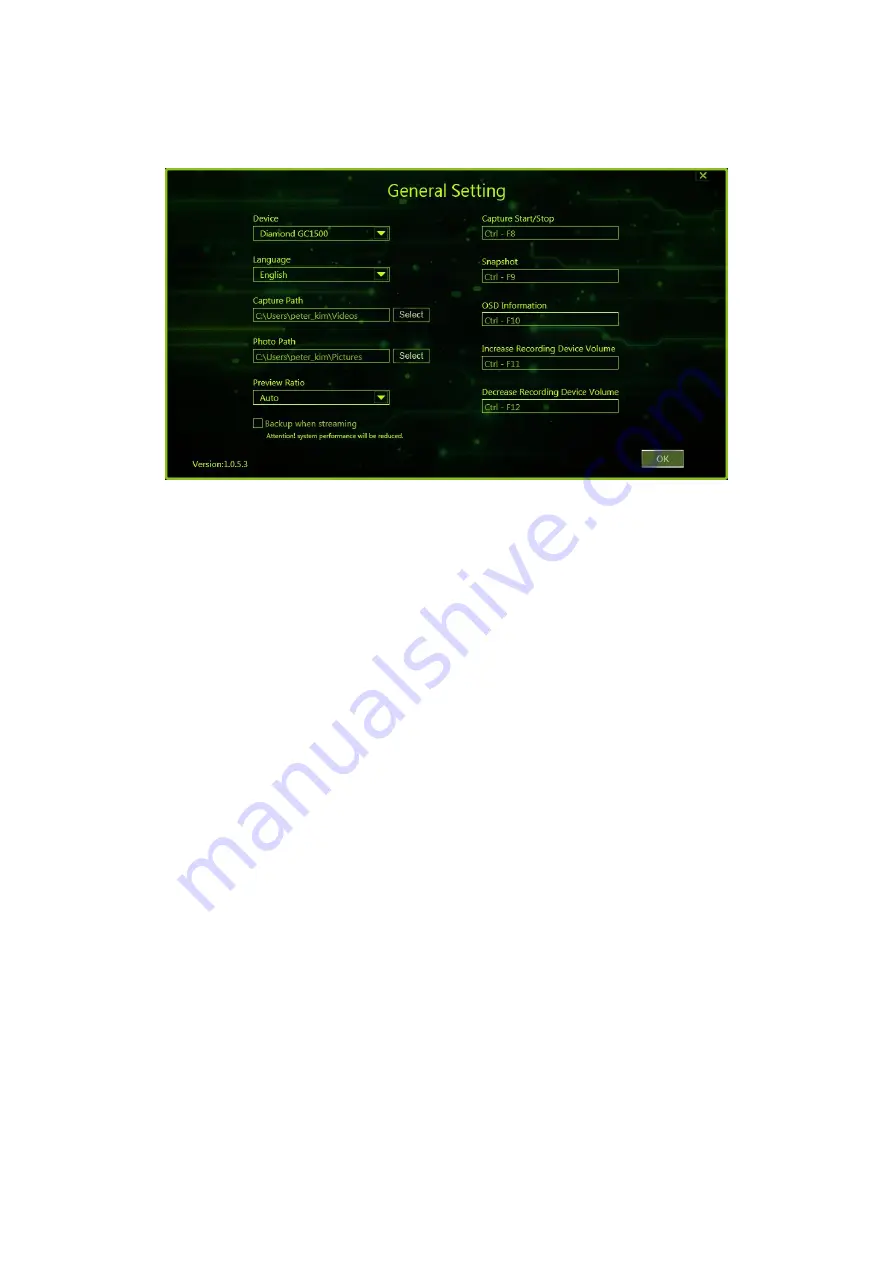
Settings Options: (General application settings)


Device:


Here will show the Device you connected.


Language:


Default language is English.


File Path / Photo Path:


You can leave the default or you can change the file path to 

the directory of your choice. This is where all your recorded videos or 

snap shots will be saved.


Preview Ratio:


You could adjust the preview aspect ratio in Auto, 4:3, or 16:9 


Backup When Streaming:


This will capture your live streams to a recorded file. 


Capture Start/Sop:


This is the hot keys used to start and stop recording. Default 
is Ctrl – F8


Snapshot:


This is the hot key used to create screen snap shots with in the 

application. Default is Ctrl- F9. 


OSD: 

  On Screen Display information hotkey (Ctrl –F10) 


Increase Recording Device Volume:


This is the hot key to increase recording 

volume. (Ctrl – F11) 

Decrease Recording Device Volume:

  This is the hot key to decrease recording 

volume. (Ctrl –F12) 

Summary of Contents for GC1500

Page 1: ...GC1500 GameShare User Manual Version 1 0...

Page 2: ...s the connection chart for PC Game or Game Console modes 3 Information Displays the platform information General function Capture and record video to your PC Stream your video to the RTMP social media...

Page 3: ...like a screen recorder Step 1 Confirm you have the device connected as shown below and click Load button If the preview page shows the video it means the device connection is working Step 2 Click the...

Page 4: ...tart the recording and the GameShare icon will flash until the recording stops Game Console If you want to capture the video from game console please follow below steps Step 1 Confirm you have the dev...

Page 5: ...de and the application workspace window will open a new window to show the video of game console Icon Function Icon Function Audio on Recording Audio off Snapshot Record ready Step 3 Click the Record...

Page 6: ...ll display NTSC or PAL Audio Source Select HDMI or Audio LR depending on what you have connected to your Video Audio source Live Commentary Enable Live Commentary Check Enable to allow for localized c...

Page 7: ...and recording volume Encoding Video Settings Video Format Choose MPEG4 or TS DVD ready file Resolution Choose your desired resolution Max 1080P Note if the source device you are recording from changes...

Page 8: ...live broadcast channel please follow below steps Step 1 Confirm you have the device connected as shown below and click the Load button If the preview page shows the video the device connection is wor...

Page 9: ...r login and password If you do not have an account yet you can click on Apply to create one Once you have successfully setup the account the account info will show on the page as below photo Step 4 Cl...

Page 10: ...t you see on your screen and what your viewer see on your streaming channel Icon Function Icon Function Audio on Streaming Audio off Snapshot R Steaming ready As the streaming light flashing means you...

Page 11: ...tab Step 2 Choose the video desired for playback Note Play back functions will open your default media player application for playback Example if Windows Media player is your default player your file...

Page 12: ...review aspect ratio in Auto 4 3 or 16 9 Backup When Streaming This will capture your live streams to a recorded file Capture Start Sop This is the hot keys used to start and stop recording Default is...

Reviews: