background image


GHID OPERATIONAL 
 
 
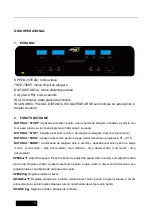
1.  ECRANUL


SPEED (VITEZA): Indica viteza   

TIME (TIMP): Indica timpul de alergare   

DIST (DISTANTA): Indica distanta parcursa 

CAL (CALORII): Indica caloriile 
INCL (Inclinatie): arata gradul de inclinare   
INCLINAREA, PULSUL, DISTANTA SI CALORIILE ARSE sunt indicate de ledul aprins in 
dreptul acestora. 


2.  FUNCTII BUTOANE 

BUTONUL “START”: 

Apasati acest buton pentru a porni banda de alergare, aceasta va porni la cea 

mai joasa viteza sau la viteza programului initial dupa 3 secunde; 

BUTONUL “STOP”: 

Apasati acest buton pentru a opri banda de alergare, acesta va incetini usor.     

BUTONUL “PROG”:


Apasati acest buton pentru a alege modul manual sau programele P1----P15; 

BUTONUL “MODE”: 

Cand banda de alergare este in  stand-by, apasati acest buton pentru a alege 

modul:  modul  timp 

–  timp  descrescator,  mod  distanta  -  timp  descrescator,  mod  calorii  -  timp 

descrescator. 

SPEED

▲▼:

 Adjust the speed. Press the button to adjust the speed when running, and adjust the data 

when stop; Reglarea vitezei. Apasati acest buton pentru a regla viteza in timpul antrenamentului, sau 

reglati valoarea cand banda de alergare este oprita; 

SPEED(5)

Reglarea rapida a vitezei; 

INCLINE

▲▼:

  Reglarea gradului de  inclinare.  Apasati  acest  buton pentru a  regla  inclinarea in  timpul 

antrenamentului, puteti reglati valoarea si atunci cand banda de alergare este oprita; 

INCLINE (5)

Reglarea rapida a gradului de inclinare; 


Summary of Contents for DHS 5450

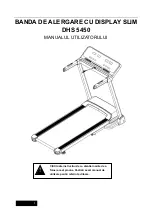
Page 1: ...BANDA DE ALERGARE CU DISPLAY SLIM DHS 5450 MANUALUL UTILIZATORULUI Cititi toate instructiunile cu atentie inainte de a folosi acest produs Pastrati acest manual de utilizare pentru referinta viitoare...

Page 2: ...e ati mancat asteptati 40 minute inainte de a incepe antrenamentul 8 Acest produs a fost creat pentru a fi folosit doar de catre adulti Tinerii trebuie sa fie insoti de catre adulti in timpul antrenam...

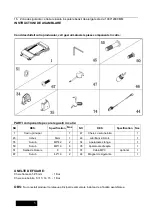
Page 3: ...Nos NO DES Specification Nos 1 Cadru principal 1 47 Cheie cu surubelnita 1 45 Imbus 5mm 1 46 Lubrifiant siliconic 1 55 Surub M8 42 2 34 Aparatoare stanga 1 50 Surub M8 16 6 35 Aparatoare dreapta 1 51...

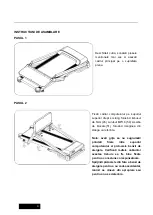
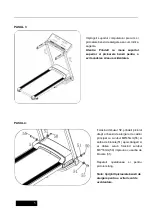
Page 4: ...45 surubul M8 16 50 si saiba de blocare 51 folosind imaginea din stanga ca referinta Nota aveti grija sa nu sugrumati prindeti firele intre suportul computerului si picioarele benzii de alergare Verif...

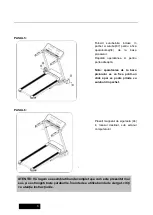
Page 5: ...ba de blocare 51 Repetati operatiunea si pentru piciorul stang Nota Sprijiniti picioarele benzii de alergare pentru a evita riscul de accidentare Impingeti suportul computerului precum si picioarele b...

Page 6: ...i sus i s strangeti toate uruburile nainte de a utiliza banda de alergat citi i cu aten ie instruc iunile Folositi surubelnita inclusa in pachet si surubul 67 pentru a fixa aparatoarea 34 de la baza p...

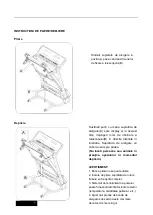
Page 7: ...sau animale in preajma aparatului in momentul deplierii AVERTISMENT 1 Banca pliata nu se poate utiliza 2 Inainte de pliere suprafata de rulare trebuie sa fie oprita complet 3 Sistemul de monitorizare...

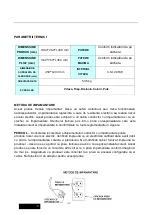
Page 8: ...ti impreuna cu un electrician calificat daca aveti dubii cu privire la impamantarea corecta a produsului Nu modificati cablul furnizat impreuna cu produsul daca nu se va potrivi cu priza trebuie sa av...

Page 9: ...PROG Apasati acest buton pentru a alege modul manual sau programele P1 P15 BUTONUL MODE Cand banda de alergare este in stand by apasati acest buton pentru a alege modul modul timp timp descrescator m...

Page 10: ...impul fixat 20 Apasati butonul START banda va functiona cu primul nivel al vitezei Cand sectiunea s a terminat va intra in urmatoarea sectiune automat viteza va creste la urmatorul nivel Cand terminat...

Page 11: ...mult de 10 minute fara a fi utilizata sistemul nu va mai afisa nici o valoare intrand in stadiul de hibernare Prin apasarea oricarui buton sistemul va reporni 7 FUNCTIA MAGNETULUI DE SIGURANTA Daca t...

Page 12: ...7 7 8 8 9 9 6 6 5 4 4 P08 SPEED 2 3 3 6 7 7 4 6 7 4 6 7 4 4 4 2 3 4 4 2 INCLINE 4 5 5 5 6 6 6 7 8 9 9 9 10 10 10 12 12 8 6 3 P09 SPEED 2 4 4 7 7 4 7 8 4 8 9 9 4 4 4 5 6 3 3 2 INCLINE 5 5 5 6 6 6 4 4...

Page 13: ...te sa parcurgeti 1 km Daca va simtiti in siguranta la viteza constanta puteti mari viteza si sa inclinati aparatul dupa 30 de minute pentru a avea un exercitiu corect In acest moment nu puteti mari vi...

Page 14: ...diat daca simtiti ca nu puteti respira durere in piept batai neregulate ale inimii dificultati de respiratie ameteala sau orice alta senzatie de disconfort in timpul antrenamentului In aceste cazuri t...

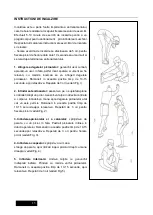
Page 15: ...relaxati va Repetati de 3 ori vedeti Fig l 2 Intinderea tendoanelor asezati va pe o suprafata plana si intindeti drept un picior Asezati va talpa in directia contrara a corpului Intindeti va mana spre...

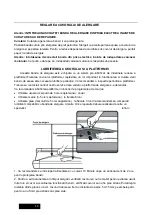
Page 16: ...ceea este necesara lubrifiere periodica Va recomandam o inspectie periodica a platformei Trebuie sa contactati centrul nostru service daca vedeti ca platforma de alergare s a deteriorat Va recomandam...

Page 17: ...rea covorului de alergare FIG A Daca coborul de alergare se misca spre stanga trageti blocajul de siguranta si rotiti 1 4 in sensul acelor de ceasornic boltul stang de reglaj apoi porniti banda de ale...

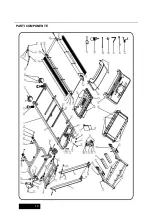
Page 18: ...18 PARTI COMPONENTE...

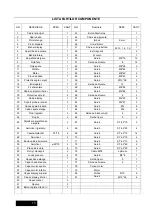
Page 19: ...re 6 3 19 Cablu display 1 61 Surub M6 30 4 20 Suport picioare lateral 2 62 Surub M6 37 4 21 Capac spate dreapta 1 63 Surub M6 8 22 Capac spate stanga 1 64 Surub M8 6 23 Picior reglabil 2 65 Saiba de b...

Page 20: ...ecta i cablul Daca becul senzorului nu lumineaza schimbati becul 2 Verifica i dac senzorul de vitez a fost deteriorat schimba i cu unul bun E05 Protectie supracurent 1 Supra solicitarea sau blocarea m...

Page 21: ...21 MOTORIZED TREADMILL WITH SLIM DISPLAY USER S MANUAL Read all instruction carefully before use this product Retain this owner s manual for the future s reference...

Page 22: ...ing workout 7 Don t exercise in 40 Mints after dinner 8 The equipment is suitable for adults Juveniles need be accompanied with adults while workout 9 You must hold on to the handrails until you becom...

Page 23: ...th screw driver 1 45 5 Allen wrench 5mm 1 46 Silicone oil 1 55 Bolt M8 42 2 34 Left base cover 1 50 Bolt M8 16 6 35 Right base cover 1 51 Lock washer 8 8 74 MP3 wire option 1 67 Bolt 4 2 19 2 44 Safet...

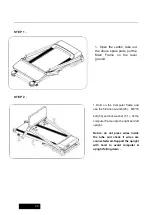
Page 24: ...ound 1 Hold on the Computer frame and use the 5 Allen wrench 45 M8 16 bolt 50 and lock washer 51 fix the computer frame onto the right and left upright Notice do not press wires inside the tube and ch...

Page 25: ...1 then lock upright onto base frame by bolt M8 16 50 and lock washer 51 Left side is same assembly way as right side Notice Support the upright with hand to avoid falling down to have any hurt 1 Push...

Page 26: ...ock all the bolt Do the following operation after checking everything is OK Before you use the treadmill please read the instruction carefully 1 Use the wrench with screw driver lock the left base cov...

Page 27: ...ill should not be operated 2 Toallow the running surface to come to a complete stop before folding 3 WARNING Heart rate monitoring systems may be inaccurate Over exercising may result in serious injur...

Page 28: ...ded with the product if it will not fit the outlet have a proper outlet installed by a qualified electrician This product is for use on a nominal 220 240 100 120 volt please choose the correct voltage...

Page 29: ...al mode P1 P15 MODE button When machine in standby state press this button to choose the mode manual mode time count down mode distance count down mode calories count down SPEED Adjust the speed Press...

Page 30: ...ration speed and incline at the same time automatically adjust the value for the segment Finished running all segments Program ended the speed slow down to stop the treadmill incline return to 0 Durin...

Page 31: ...All the windows display All normal operation must be in the state of safety key locked 8 MP3 FUNCTION Optional When the power on Contacting the external MP3 equipment the computer will play The voice...

Page 32: ...7 7 8 8 9 9 6 6 5 4 4 P08 SPEED 2 3 3 6 7 7 4 6 7 4 6 7 4 4 4 2 3 4 4 2 INCLINE 4 5 5 5 6 6 6 7 8 9 9 9 10 10 10 12 12 8 6 3 P09 SPEED 2 4 4 7 7 4 7 8 4 8 9 9 4 4 4 5 6 3 3 2 INCLINE 5 5 5 6 6 6 4 4...

Page 33: ...8 km h in 2 minutes then add the speed to 5 3 km h and keep walking in 2 minutes then add to 5 8km h and walk in 2 minutes After that add up 0 3 km h in each 2 minutes until rapid breath but not feel...

Page 34: ...mal walking speed or the jogging speed if you always take workout with treadmill If you don t have enough experiences or confirm the testing velocity you can follow the instruction Speed 0 8 3 0KM H n...

Page 35: ...ide leg straight hand try to touch the toes Maintain 10 to 15 seconds then relax Repeat for each leg do three times see Figure 2 3 Legs and feet tendon stretch two on the Rotary wall or tree stand one...

Page 36: ...us requiring periodic lubrication We recommend a periodic inspection of the deck You need contact with our service center if you find the damage of the deck We recommend lubrication of the deck accord...

Page 37: ...il centering the belt PIC A If the belt has drifted to the left pull out of the safety clock and switch turn the left adjusting bolt 1 4 turn clockwise then start running until centering the belt PIC...

Page 38: ...38 Exploded Parts Diagram...

Page 39: ...top wire 1 63 Bolt M6 8 20 Side rail 2 64 Bolt M8 6 21 Right back end cap 1 65 Lock washer C level 8 2 22 Left back end cap 1 66 Standard spring washer 8 2 23 Adjustable foot pad 2 67 Bolt ST 4 2 19...

Page 40: ...sensor signal check if sensor signal light are shining or not if it burn change the signal light 2 Check if the speed sensor plug connect well or magnet sensor damage connect it well or change the ma...

Reviews: