background image

2

4 ENGLISH

(

)

PROGRAMME GUIDE

DTV

803

Data

19 Apr 2008  04:58

00:00-0 0:00

DTV

19 Apr

04:30

05:30

001  BBC 1

002  BBC 2

003  ITV

004  

CH


4

No Information

No Information

No Information

No Information

EXIT

INFO

DATE

OK

LOCK

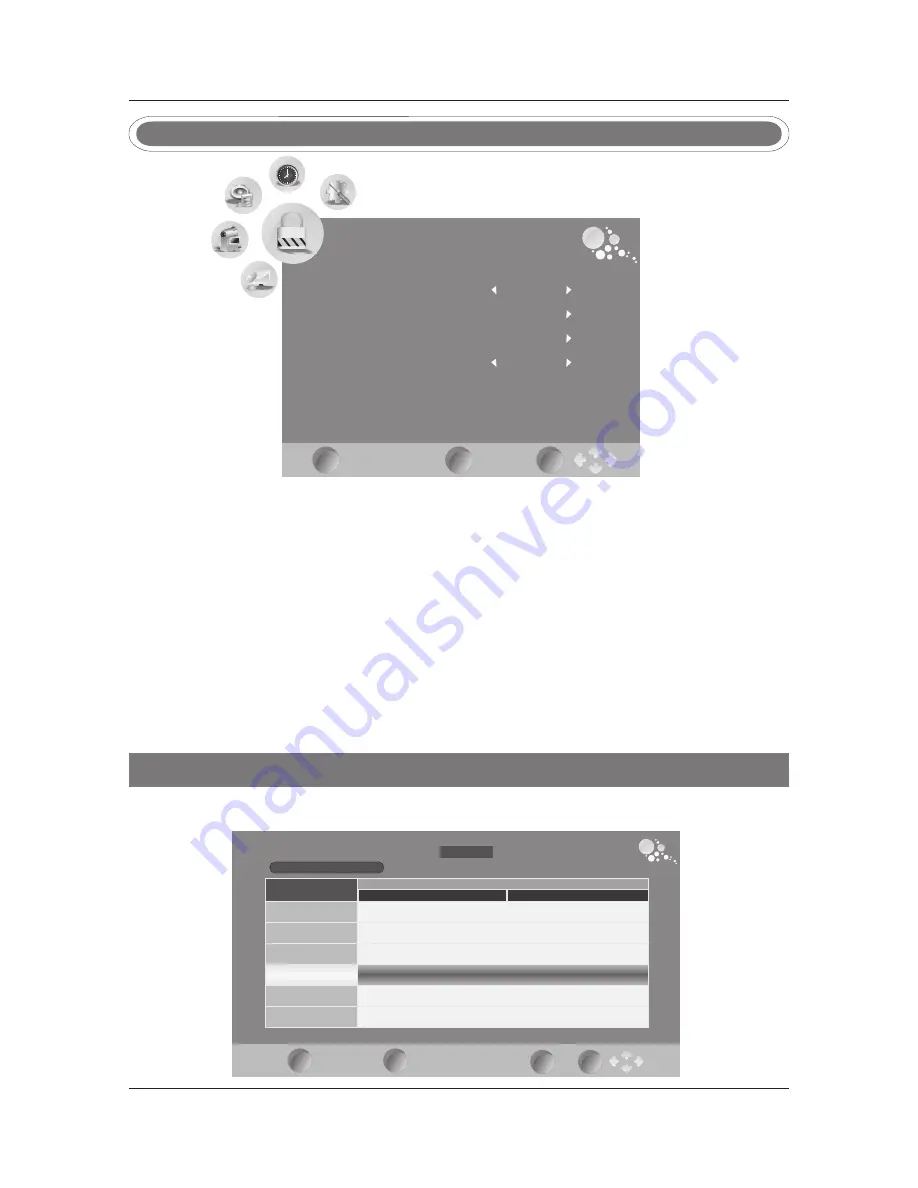
Lock Channel

Parental Guidance

Off

Set Password

Block Program

Off

LOCK   menu 

EXIT

MENU

OK

EPG Menu


 Us e EPG button on the rem ote cont rol to display the EPG menu di rec tly as bel ow:


(this only wor ks 


in DTV  mode)

Lock Channel   

Press


◄►


to select on or off

Set Password   

Press ►and enter a new 4 digit password. 

Press MENU to display the menu,


press ◄► to select the LOCK menu, press▼ the  

default


password is "0000",   a

  nd ▲▼ to 


select


the submenu.

Press MENU to return to the main menu from the submenu. 

Block  Program

Select CHANNEL LOCK and press ► This will display the Channel list. Select the channel to 
lock using the ▲/▼ buttons, and press GREEN. A Lock will be displayed along side the locked 
channel. To unlock, press GREEN again.

Parental Guidance

In DTV mode

,

 press


◄►


to select Parental Guidance

'

s


grade.

Summary of Contents for LTV-4251W

Page 1: ......

Page 2: ...TIONS PR CAUTIONS DE S CURIT 2 1 PR FACE 7 OPERATIONS DU MENU CONTR LES DE DEVANT CONNEXIONS DE DERRI RE 4 ACCESSOIRES 3 8 DIAGNOSTIC DES PANNES ET CONSEIL 6 5 CONNECTIONS D INSTALLATION DE LA TELEVIS...

Page 3: ...ng to the model 2 SAFETY PRECAUTIONS Power cord and cables must be properly routed and protected to prevent people from stepping on them and causing the TV to fall Minimum distances 10cm 20cm 10cm 5cm...

Page 4: ...TV to clean Only clean the TV with a soft and dry cloth In case of troubleshooting do not use spare parts other than those suggested by the manufacturer Using inadequate spare parts can shocks short...

Page 5: ...Cord AAA Batteries 1 5V 1 5V POWER MUTE SOURCE PMODE SMODE AUDIO SLEEP 1 2 3 4 5 6 7 8 OK ENTER 0 TV MENU 10 V P SUBTITLE HOLD SIZE REVEAL I II V P EXIT 10 9 TEXT DISPLAY MIX INDEX FAV SUBPAGE PROGRA...

Page 6: ...RT 10 9 13 COAX Connect the audio amplifier MENU POWER SOURCE V V P P IR ON OFF LED Back View and Control Connections Front View COAX 5 VCR VIDEO Connect the Video output jack of DVD or 7 RF IN Connec...

Page 7: ...cord correctly as shown Press the POWER switch of your LCD V to switch The power indicator on the front panel lights up in T the unit on Green To ensure good picture and sound TV antenna system needs...

Page 8: ...Back TV Back HDMI OUT HDMI Cable HDMI2 PC IN HDMI1 TV Back HDMI connection allows the user to transfer all audio video control signals through one cable only These signals are transferred in digital C...

Page 9: ...Connect the Audio output of the DVD or VCR to the Audio input jacks on the set using the RCA cable Match the jacks colors Y is green Pb is blue Pr is red Y L IN is white and Y R IN is red Select YPbPr...

Page 10: ...on the tv The SCART lead operates as an Input Output connection If the tv does not select the SCART input automatically select SCART using the SOURCE button on the remote control or tv PC AUDIO PC AUD...

Page 11: ...PORT 1 2 ENGLISH COAX Cable COAX COAX Connection the audio amplifier back Audio amplifier Connect the audio amplifier RF IN S VIDEO HDMI2 PC AUDIO PC IN Pb Y Pr VIDEO HDMI1 L R L R SCART1 SCART2 AC IN...

Page 12: ...to the screen P P Press to scan through channels V V Press to increase decrease the sound level LIST Press to display the TV program list Return to the previous channel viewed DISPLAY INFO Press to di...

Page 13: ...EPG Launches the EPG Electronic Program Guide FAV Press to increase decrease your favourite program COLOR BUTTONS Select 4 Preferred TELETEXT pages SUBTITLE To display subtitle menu TV RADIO Selects...

Page 14: ...ween TV and Teletext mode or DTV and Teletext mode SUBPAGE TELETEXT Subpage MIX TV and TXT pictures are mixed together in transparent background HOLD Freeze the current page SIZE Press to magnify text...

Page 15: ...within the battery compartment 3 Replace the battery cover To prevent battery leakage which may result in bodily injury or damage to the remote 1 Install all batteries correctly and as marked on the...

Page 16: ...update info Country Selection UK CHANNEL Menu Auto tuning EXIT MENU OK EXIT MENU Auto Tuning Start Cancel OK CI Information Press to select the item required and or OK to confirm Press MENU to return...

Page 17: ...Storage TO System Current CH Search Fine Tune Skip Frequency 1 I No 600 00 1 DTV Manual Tuning NO SIGNAL Bad Normal Good UHF CH 52 Please select channel then Press OK to search EXIT EXIT MENU OK Press...

Page 18: ...UK it is I Western Europe B G Eastern Europe D K Parts of France L or LL Current Channel Press to select the current channel number Search Press to search up or down Press MENU or EXIT to stop search...

Page 19: ...lect the channel you want to rename Press Green Rename to mark the selected channel Press to select the position in the word then press to select the letter or number required To exit press EXIT or wa...

Page 20: ...Adjust Horizontal Pos Vertical Pos Size 50 50 0 EXIT MENU OK Phase 60 Screen Only available in PC mode Auto Adjust Select Auto Adjust and press the unit will automatically adjust and press RIGHT the...

Page 21: ...display the menu press to select the SOUND menu Press to enter the submenu Press to return to the main menu from the submenu MENU MENU Press to select sound mode Music Movie Sport User Press o confirm...

Page 22: ...ing Press to select on press to enter the setup item use be turned off to set the time you want the TV to Sleep Timer Allows you to set up the sleep timer from 10min 20min 30min 60min 90min 120min 180...

Page 23: ...his only wor ks in DTV mode Lock Channel Press to select on or off Set Password Press and enter a new 4 digit password Press MENU to display the menu press to select the LOCK menu press the default pa...

Page 24: ...OK BBC 1 BBC 2 ITA Channel4 Channel List DTV DTV DTV DTV EXIT Fast Channel List INPUT SOURCE SCART2 HDMI2 AV Press SOURCE to display the input source press press OK to confirm to select the main sourc...

Page 25: ...in Adjust the contrast color and brightness Maybe result from a lighting signal from car motor neon light and other electrical devices or appliances Maybe the result of an electrical wave disturb from...

Page 26: ...dio Videos Video PC This manual is only for your reference any change to the design and specification will not be advised 640 480 60Hz 800 600 60Hz 1024 768 60Hz X X X 1920 X 1080 60Hz Weight Dimensio...

Page 27: ......

Reviews: