Welcome to the DFRobot blog
:
www.dfrobot.com/blog-tag-microbit.html
23
/
86
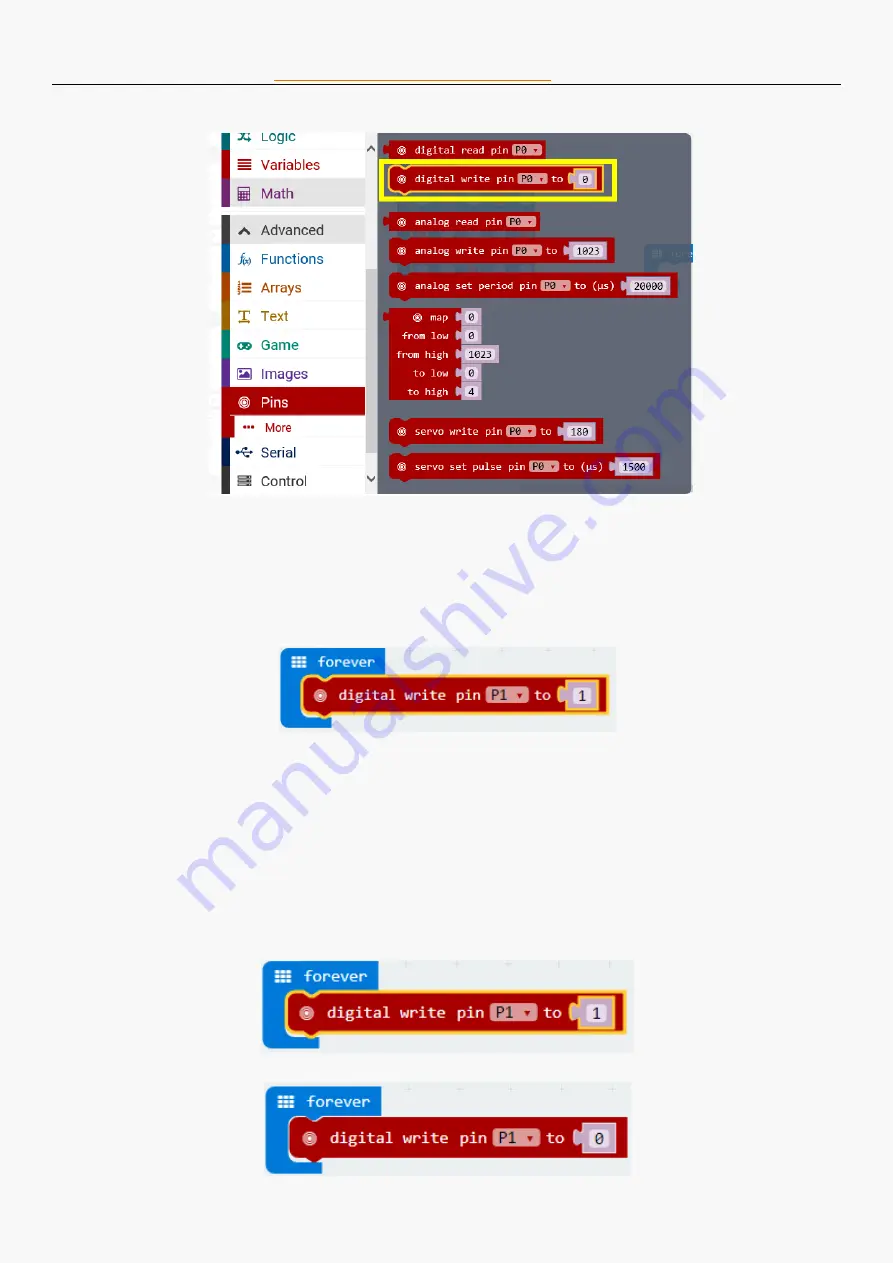
STEP 3: Put the function “digital write” into "forever" loop (the “forever” loop will show up in the area
once create a new program, it can also be found in “Basic”) and the LED connected to P1 lights
up. It will be finished as below:
Task 2: Flashing LED
Goal: After we know how to light an LED, we will take a further step to learn how to make it blink.
STEP 1: Start a new project. You may always go back to the STEP 3 in chapter 1 if you forget how to
do this.
STEP 2: Set the pin status of micro: bit to either turn on and off the LED. LEDs in this experiment
belong to digital output. Click the "Advance"->"Pins", set “digital write pin p1” to (0). The pin value
can only be 0 or 1. When it is 1, the light stays on. When it is 0, the light stays off.
Set the value of Pin P1 to high (1) and the LED will light up
Set the value of Pin P1 to low (0) and the LED will turn off


