


3
Quick Installation Guide |
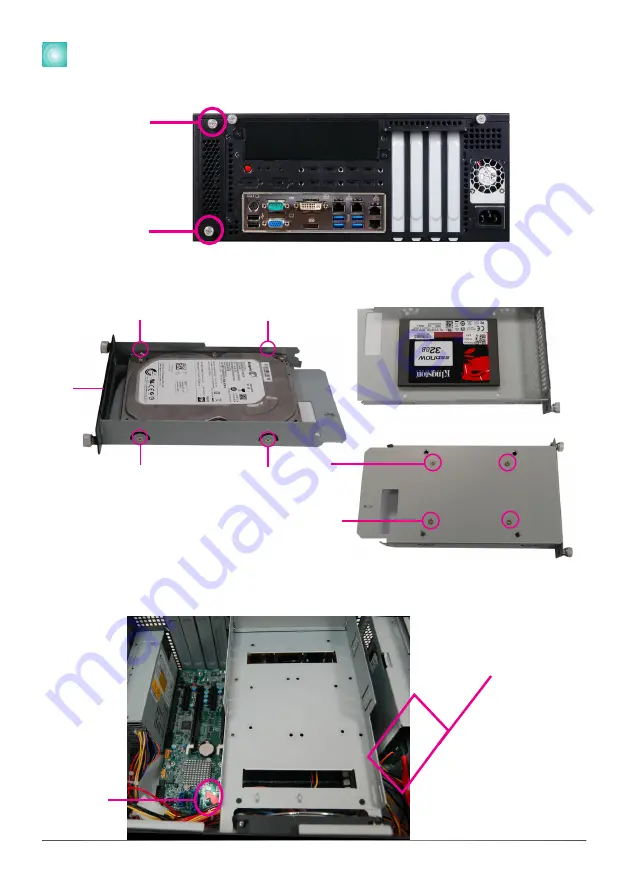
Installing a 3.5" or 2.5" SATA Drive
1. Remove the thumb screws that secure the HDD drive bay to the chassis and remove the drive bay.
3.5" SATA Drive
2. Secure the hard drive to the drive bay. Align the mounting holes on the SATA drive with the
mounting holes on the HDD drive bay. Use 4 mounting screws to install the hard drive onto the
HDD drive bay.
Drive bay
Mounting screw
Mounting screw
Thumb screw
2.5" SATA Drive
3.
Slide the HDD drive bay back to the system and secure it
with the thumb screws.
4. Connect the SATA data cable and power cable to the
connectors on the SATA drive. And connect the other end
of the SATA data cable on the motherboard.
SATA data &
power cable
SATA Port
Mounting screw