background image

English

12

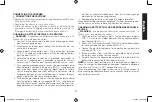
CHARGING WITH THE TERMINAL RINGS

 1. With the ring terminals connected to the battery and with ring 

terminal connector held as far away from the battery as practical, 

insert the double barrel tip of the terminal ring cable into the double 

barrel tip of the battery charger cable (male-to-female and female-

to-male). Then plug the battery charger’s power cord into an AC 

outlet. The power LED will light blue to indicate that the charger is 

plugged in and ready.

NOTE: 

If the Power LED does not come on, check connection 

with the AC outlet. Make sure the AC outlet is functional.

 2. When the unit is properly connected and charging, the battery 

charging LED ( ) will light yellow to indicate the battery is charging.

   NOTES:

A.  If the terminal rings are incorrectly connected with regard to 

polarity, the Reverse Polarity/Fault LED ( ) will light. Unplug 

the charger; then remove the terminal rings. Reconnect the 

terminal rings properly.

B.  If the Charging LED did not come on, check the connection 

to the battery. If the terminal rings are properly connected, 

the battery may be in fault condition. Manufacturer suggests 

to have the battery tested by a qualified battery service 

technician.

  3. When the charging complete LED ( ) lights green, the battery is 

fully charged.

When the battery is completely charged, the unit automatically goes into 

Float Charge Mode. In this mode, the unit monitors the battery voltage 

and charges as necessary to assure the selected battery maintains a full 

charge. The unit remains in Float Charge Mode as long as the charger 

is connected to the battery and plugged into a functioning AC outlet.
When disconnecting charger, disconnect AC cord, and then remove 

the terminal rings from battery terminals.

Care and Maintenance

CLEANING AND STORAGE

To reduce the risk of electric shock, unplug the battery charger from 

the outlet before attempting any maintenance or cleaning. Turning off 

the controls will not reduce this risk.
• Store the unit in a clean, dry, cool place when not in use.
• Clean the unit casing and cords (as necessary) with a dry (or slightly 

damp) cloth. Ensure that unit is completely disconnected from battery 

and power source before cleaning.

• To maintain the operating condition and maximize the life of the 

charger cords, always coil them loosely for storage. Do not wrap 

them around the unit or crimp them with a tight band.

Troubleshooting

Problem

Possible Solution

Unit not charging

Check that the charger is properly 

connected to a live AC outlet.
 If the battery to be charged has fallen 

below 2 volts, the battery cannot be 

recharged with this unit.

Accessories

 WARNING: 

Since accessories, other than those offered by DeWALT, 

have not been tested with this product, use of such accessories with 

this unit could be hazardous. To reduce the risk of injury, only DeWALT 

recommended accessories should be used with this product. 
If you need assistance regarding accessories, please contact the 

manufacturer at 1-888-394-3392 or CustomerService@dewalt12volt.

com.

DXAEWPC4_ManualENSP_Type2_010920.indd   12

1/9/2020   2:20:29 PM

Summary of Contents for DXAEWPC4

Page 1: ...28 DXAEWPC4_ManualENSP_Type2_010920 indd 28 1 9 2020 2 20 27 PM ...

Page 2: ...ermeable de 4 Amp INSTRUCTION MANUAL MANUAL DE INSTRUCCIONES If you have questions or comments contact us Pour toute question ou tout commentaire nous contacter Si tiene dudas o comentarios contáctenos 1 888 394 3392 SD010920 BC DXAEWPC4_ManualENSP_Type2_010920 indd 1 1 9 2020 2 20 27 PM ...

Page 3: ...DXAEWPC4_ManualENSP_Type2_010920 indd 2 1 9 2020 2 20 27 PM ...

Page 4: ... Keep children away from the charging area Keep the charger away from children This is not a toy 6 Store indoors When not in use battery chargers should be stored indoors in dry and high or locked up places out of the reach of children 7 Unplug the battery charger when not in use 8 Stay alert Use common sense Do not operate this equipment when you are tired or impaired 9 Only use attachments acces...

Page 5: ...s to be used Receptacles are available having built in GFCI protection and may be used for this measure of safety Extension Cords An extension cord should not be used unless absolutely necessary Use of an improper extension cord could result in a risk of fire and electric shock and will void warranty If an extension cord must be used make sure your extension cord is in good condition When using an...

Page 6: ...end to use in the vicinity of the battery Review cautionary markings on these products and on the engine This equipment employs parts switches relays etc that produce arcs or sparks Therefore if used in a garage or enclosed area the unit MUST be placed not less than 18 inches above the floor THIS UNIT IS NOT FOR USE BY CHILDREN AND SHOULD ONLY BE OPERATED BY ADULTS WARNING To reduce the risk of fi...

Page 7: ... follow these instructions and those published by the battery manufacturer and manufacturer of any equipment you intend to use with this unit Review cautionary markings on this product and on the engine Specific Safety Instructions for Using the Unit in Wet Environments The housing of this unit is rated to IP67 dust proof and waterproof standards However it is recommended that you observe the foll...

Page 8: ...le 360º Rotating Hook B Mounting Holes C Power LED D Reverse Polarity Fault LED E Charging LED F Charging Complete LED C D E F B B A Back of Unit Fig 2 G Hook Release Button H Hook Slot G H DXAEWPC4_ManualENSP_Type2_010920 indd 7 1 9 2020 2 20 28 PM ...

Page 9: ...ssive gas from cells Do not overfill For a battery without cell caps maintenance free carefully follow manufacturer s charging instructions 6 Study all battery manufacturer s specific precautions such as removing or not removing cell caps while charging and recommended rates of charge 7 Determine the voltage of the battery to be charged by referring to the vehicle manual This unit is for charging ...

Page 10: ...e connect the negative black clamp from the battery charger to the negative NEG N ungrounded post of battery Connect positive red clamp to vehicle chassis or engine block away from battery Do not connect clip to carburetor fuel lines or sheet metal body parts Connect to a heavy gauge metal part of the frame or engine block 7 See operating instructions for length of charge information When disconne...

Page 11: ...e wall anchors are fully and securely inserted into the wall 4 Make sure the unit is mounted in the correct direction Align and screw one PA3x60 screw not Included into each of the wall anchors through the four screw holes on the front of the unit Do not over tighten as this will damage the housing Using the Hanging Hook The hanging hook allows you to position the battery charger for convenient ha...

Page 12: ...LED will light Unplug the charger then remove the clamps Reconnect the clamps properly 4 When the charging complete LED lights green the battery is fully charged When the battery is completely charged the unit automatically goes into Float Charge Mode In this mode the unit monitors the battery voltage and charges as necessary to assure the selected battery maintains a full charge The unit remains ...

Page 13: ...ary to assure the selected battery maintains a full charge The unit remains in Float Charge Mode as long as the charger is connected to the battery and plugged into a functioning AC outlet When disconnecting charger disconnect AC cord and then remove the terminal rings from battery terminals Care and Maintenance CLEANING AND STORAGE To reduce the risk of electric shock unplug the battery charger f...

Page 14: ...ies bulbs fuses and batteries defects resulting from normal wear and tear accidents damages sustained during shipping alterations unauthorized use or repair neglect misuse abuse and failure to follow instructions for care and maintenance for the product This warranty gives you the original retail purchaser specific legal rights and you may have other rights which vary in certain states or province...

Page 15: ...14 DXAEWPC4_ManualENSP_Type2_010920 indd 14 1 9 2020 2 20 29 PM ...

Page 16: ...estas instrucciones 2 Obedezca todas las advertencias 3 Siga todas las instrucciones 4 Limpie únicamente con un trapo seco 5 Mantenga a los niños lejos de la zona de carga Mantenga el cargador lejos de los niños Esto no es un juguete 6 Almacene bajo techo Cuando no esté en uso los cargadores de batería deben ser almacenados dentro en lugares secos y altos o inmovilizados fuera del alcance de niños...

Page 17: ...Nunca transporte el aparato por el cable ni lo jale para desconectarlo del tomacorriente Mantenga el cable alejado del calor el aceite y los bordes afilados Tire del enchufe y no del cable al desconectar la unidad La protección del interruptor de corte por falla a tierra GFCI debe aplicarse a los circuitos o los tomacorrientes que se utilizarán Hay tomacorrientes con protección GFCI incorporada qu...

Page 18: ...a utilice cuando esté húmeda ADVERTENCIA Riesgo de gases explosivos Trabajar cerca de una batería de plomo ácido es peligroso Las baterías generan gases explosivos durante su funcionamiento normal Por esta razón es muy importante que lea este manual siempre antes de utilizar la batería de urgencia y que siga las instrucciones con exactitud Para reducir el riesgo de explosión de la batería siga est...

Page 19: ...restrinja la ventilación de alguna forma Apague siempre el cargador de batería desenchufándolo al no ser utilizado No abra el cargador de batería no hay piezas que el usuario pueda reparar en su interior Abrir el cargador de batería anulará la garantía del fabricante Opere la unidad solamente como se describe en este manual de instrucciones Revise el cargador de batería y sus componentes periódica...

Page 20: ...o GUARDE ESTAS INSTRUCCIONES PARA USO FUTURO Componentes de la unidad principal Fig 1 A Gancho giratorio 360º desmontable B Huecos para montaje C Indicador LED de encendido D Indicador LED de polaridad reversa de falla E Indicador LED de la batería cargando F Indicador LED que cargando está completa C D E F B B A DXAEWPC4_ManualENSP_Type2_010920 indd 19 1 9 2020 2 20 30 PM ...

Page 21: ...anura de gancho G H Conectores y cables Fig 3 I Conectador del cargador del barril doble conecta con las pinzas o los juntas tóricas J Enchufe de CA K Juntas tóricas para terminales de la batería L Pinzas de batería I J K L DXAEWPC4_ManualENSP_Type2_010920 indd 20 1 9 2020 2 20 31 PM ...

Page 22: ...la batería Nunca opere el cargador en un área cerrada ni restrinja la ventilación de manera alguna Las baterías marinas se pueden retirar y cargar en tierra PRECAUCIONES CON LA CONEXIÓN Nunca permita que las pinzas se toquen entre sí Conecte las pinzas a la batería y al chasis como se indica en la sección apropiada batería instalada en el vehículo o batería fuera del vehículo CARGAR UNA BATERÍA IN...

Page 23: ...n a la batería al realizar la conexión final 5 Conecte cuidadosamente la pinza negativa negra del cargador al extremo libre del cable de la batería conectado al terminal negativo NOTA Una batería marina de bote se debe retirar y cargar en tierra Cargarla a bordo exige equipos diseñados especialmente para uso marino Esta unidad NO está diseñada para tal uso Cuando desconecta el cargador hágalo siem...

Page 24: ...l cargador de los cables eléctricos o cualquier cosa que no es seguro Sólo use el gancho colgante para colgar el cargador El gancho colgante no está diseñado para soportar el peso adicional No cuelgue nada adicional al gancho colgante o un riesgo de rotura puede ocurrir Instrucciones de operación Carga y mantenimiento de la batería con las pinzas de batería suministradas ADVERTENCIA Para reducir e...

Page 25: ... bastidor del vehículo y luego retire la pinza del terminal de la batería Cuando desconecte el cargador desconecte el cable de la CA y después quite el enchufe accesorio de 12 voltios de CC de la toma de accesorios de 12 voltios CC del vehículo Conectando y carga mantenimiento de la batería con los anillos terminales CONEXIÓN DEL CARGADOR CON LOS ANILLOS TERMINALES Los conductores de salida del ca...

Page 26: ...Fabricante sugiere de tener la batería probada por un técnico cualificado de la batería 3 Cuando el indicador LED de completo de carga se encenderá en verde la batería se cargan completamente Cuando la batería está completamente cargada la unidad entra automáticamente en el modo de carga flotante En este modo la unidad monitorea el voltaje de la batería y carga según sea necesario para asegurar qu...

Page 27: ... por el fabricante 2 Devuelva el producto a la tienda donde el producto fue comprado para un intercambio siempre y cuando se trate de un minorista participante Devoluciones al minorista deben hacerse dentro del plazo de póliza de devoluciones del minorista para intercambios solamente por lo general 30 a 90 días después de la fecha de compra La prueba de compra puede ser requerida por el minorista ...

Page 28: ...ww dewalt12volt com 1 888 394 3392 Derechos Reservados 2020 Baccus Global LLC DeWALT y el logotipo son marcas comerciales de DeWALT el DeWALT Industrial Tool Co o una filial de la misma y se utilizan bajo licencia El esquema de color amarillo y negro es una marca comerciale de herramientas y accesorios de DeWALT DXAEWPC4_ManualENSP_Type2_010920 indd 27 1 9 2020 2 20 31 PM ...

Reviews: