25
E N G L I S H
The charger then automatically switches to the pack
charging mode. This feature ensures maximum
battery life. The red indicator blinks long, then short
while in the Hot/Cold Pack Delay mode.
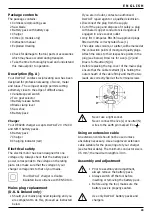
Replacing the saw blade (fig. C)
• Move the blade clamp lever (4) up to release the
blade clamping mechanism.
• Insert the saw blade into the holder (10) until it
engages. The blade can be installed with the
teeth pointing down or up.
• Move the blade clamp lever (4) down to lock the
blade clamping mechanism.
• To remove the saw blade, proceed in reverse
order.
Saw blades
A wide variety of dedicated saw blades is available
as an option.
Always select your saw blade with great
care.
Instructions for use
• Always observe the safety instructions
and applicable regulations.
• Ensure the material to be sawn is
secured in place.
• Apply only a gentle pressure to the tool
and do not exert side pressure on the
saw blade. If possible, work with the saw
shoe pressed against the workpiece.
This prevents damage to the blade and
stops the tool from jerking and vibrating.
• When sawing in walls or floors be aware
of the location of pipework and wiring.
Always hold the tool by its handle.
• Avoid overloading.
Prior to operation:
• Make sure your battery pack is (fully) charged.
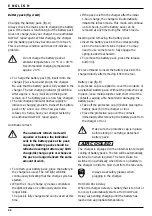
Two gear selector (fig. A)
Your tool is fitted with a two gear selector (2).
• Use the high speed setting for cutting wood.
• Use the low speed setting for cutting metal and
plastics.
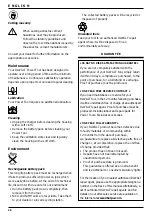
Switching on and off (fig. A)
• To run the tool, press the variable speed switch (1).
The pressure exerted on the variable speed switch
determines the tool speed.
• To stop the tool, release the switch.
Cutting wood
• Clamp the workpiece securely and remove all
nails and metal objects.
• Holding the tool with both hands, work with the
saw shoe pressed against the workpiece.
Plunge cutting in wood
• Rest the saw shoe on the workpiece in such
a position that the blade forms an appropriate
angle for the plunge cut.
• Switch the tool on and slowly feed in the blade.
Make sure that the saw shoe remains in contact
with the workpiece at all times.
Pocket cuts
• Measure and mark the required pocket cut.
• Using a narrow saw blade rest the bottom of the
saw shoe on the workpiece and make sure that
the blade is positioned on the cutting line.
If necessary, e.g. in confined spaces, use the
outer edge of the saw shoe as your guideline.
• Switch on the tool and feed the blade into the
material at full speed, holding the tool firmly
against the workpiece.
Cutting metal
• When cutting thin metal always stabilize the
workpiece with wood on both sides.
This guarantees clean cuts and prevents
damaging of the material.
• For long, straight cuts draw a line on the workpiece.
• Apply a thin film of lubricant along the cutting
line, switch on the tool and follow the cutting line.
Cutting plastics
• Always work at reduced speed. Carry out a test
cut to check whether the material is sensitive to
heat.

