1.
MALE JOINT
Prepare the male worktop
with the laminate face down.
2. Insert 2 pins in holes marked
♂
45°.
3. Refer to the page on ‘cutting to length’ on page
15 to find out where to mark the pencil line to
determine the position of the jig along the
length of the worktop.
4. Make sure the 2 pins in the holes marked
♂
45°
are firmly pushed against the post formed
edge (see diagram Q)
5. Clamp the jig to the worktop checking that both
pins are still against the worktop. Make sure the
clamps will not obstruct the router path.
6. Follow steps 6 to 10 for cutting the worktop.
7.
CUTTING METHOD
Position the router
in the far left side of the slot. Set the router
to cut a depth of 10mm.
8.
IMPORTANT - Position the router in
the slot and cut from left to right, pulling
the router against the edge of the slot
closest to you.
9. Remove the router, and start again from
the far left of the central slot, but increase
the depth a further 10mm.
10. Follow steps
7
–
9
, until cut is complete.
11. For the final finishing cut, position
the router again in the far left side of the
slot, and set the router to cut at the full
depth of the worktop. Again, cut from left
to right but apply the pressure to the
edge furthest away from you.
12.
MALE BOLT RECESSES
Pre-
pare the male worktop with the laminate
face down.
13. Insert 3 pins in the holes marked
’B’
.
14. Make sure the 3 pins are firmly
pushed against the front cut out and the
edge of the worktop (see diagram S).
15. Clamp the jig to the worktop check-
ing that all 3 pins are still firmly against
the worktop. Make sure the clamps will
not obstruct the router path.
16. You will need a depth of 20mm for
the worktop connectors. Do not exceed
10mm per cut.
17. Cut the bolt recesses out, each time
clearing the waste material after each
cut.
Left Hand 45° Male Joints
Page 12
DIAGRAM Q
MALE JOINT -
LAMINATE FACE DOWN
DIAGRAM R
DIAGRAM S
MALE BOLT RECESS -
LAMINATE FACE DOWN
Safety Notes
This jig will enable you to cut …….
Before starting ……...
•
Never cut worktop to length until all joints are complete and have been checked for
correct fit.
•
Make sure the worktop is secured firmly to the bench or trestle.
•
Ensure that the jig is firmly secured to the worktop.
•
Ensure there are no obstructions in the path of the router e.g. clamps or bench.
•
Always use good quality sharp router bits
•
Always wear eye protection when cutting.
•
Always wear ear protection if cutting for long periods
•
Always cut from left to right.
•
Always cut into post formed edge to avoid breakout or chipping.
•
Always keep the router vertical to the jig and worktop.
•
Never exceed 10mm depth of cut in one pass.
•
Never remove the router from the jig or position the router whilst cutter is still rotating.
The cutter may cut into the jig and damage the bush location faces.
Page 5
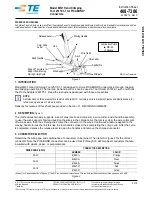
CORNER JOINT -
USING THE RIGHT HAND
AND LEFT HAND 45°
JOINTS
STANDARD LEFT & RIGHT HAND 90° JOINTS
45° JOINTS -
RIGHT AND LEFT
HAND
Female Male
Male
Female
Female
Female
Female
Female
Male
Male
Male