background image

13

English

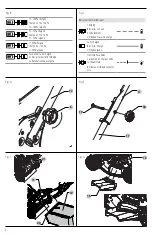
Installing and Removing the Battery Packs 

(Fig. J)


DANGER:


MAKE CERTAIN THE SAFETY KEY IS 

REMOVED TO PREVENT ACTUATION BEFORE 

REMOVING OR INSTALLING BATTERIES.

This mower is designed to operate on two battery packs 
of equal capacity. The mower will not operate on a single 
battery pack, and If using different capacity battery packs, the 
smaller capacity battery pack, when depleted, will cause the 
unit to turn off. 

nOTE:

 For best results, make sure the battery packs are 

fully charged.

To Install the Battery Packs

1.  Lift and hold the battery port cover 

 9 

 up to expose the 

battery port 

 23 

.

2.  Slide a battery pack 

 24 

 into the battery port 

 23 

 until 

an audible click is heard (Fig. J). Repeat for the second 
battery port. 

nOTE:

 Ensure the battery packs are fully seated and fully 

latched into position before starting mower.

READ THIS INSTRUCTION MANUAL BEFORE 

OPERATING YOUR MOWER


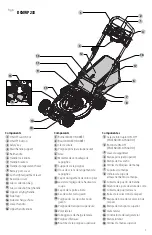
Refer to Figure A at the beginning of this manual for a complete 
list of components. Save this manual for future reference.


DANGER:


Sharp moving blade

. Do not operate the 

mower in mulching mode if the rear door and side 
discharge door are not closed under spring tension 
as serious injury could result. Take your mower to the 
nearest service center for repair.


DANGER:


Do not operate mower unless handle is 

locked into position.


DANGER: Sharp moving blade. 

Never operate the 

mower in bagging mode unless the bag lugs on the grass 
collection bag are seated properly on the mower and the 
rear discharge door rests firmly against the top of the 
grass collection bag as serious injury could result.


WARNING:

 Let the mower work at its own pace. Do 

not overload.

Proper hand position requires both hands grasping the main 
handle 

 4 

, and bail handle 

 5 

.

Proper Hand Position (Fig. L)


WARNING: 

To reduce the risk of serious personal injury, 

ALWAYS

 use proper hand position as shown.


WARNING:

 To reduce the risk of serious personal 

injury, 

ALWAYS

 hold securely in anticipation of a 

sudden reaction.

OPERATION


DANGER: To reduce the risk of serious personal 

injury, turn unit off and remove the safety key and 

battery packs before making any adjustments or 

removing/installing attachments or accessories.


An accidental start‑up can cause injury.

Adjusting Mower Height (Fig. H)


DANGER: Never attempt to adjust mower height 

with the motor running.

The height of cut is adjusted by the front and rear cut height 
adjustment levers 

 10 

.

nOTE:

 If you are not sure what height to cut at, begin mowing 

with the front and rear cut height adjustment levers 

 10 

positioned at the highest settings and adjust the height down 
as needed for your application.

To Set the Height of Cut

1.  Pull the rear cut height adjustment lever 

 10 

 out of the 

locking notch 

 22 

.

2.  Move the lever towards the front of the appliance to raise 

the height of cut as desired.

3.  Move the lever towards the rear of the appliance to lower 

the height of cut as desired.

4.  Push the cut height adjustment lever 

 10 

 into one of the 

locking notches 

 22 

 to set the height.

5.  Repeat for the front cut height adjustment lever 

 10 


except that the lever is moved towards the rear of 
the appliance to raise the height of cut, and towards 
the front of the appliance to lower the height of 
cut. 

nOTE: 

For best results, the front and rear cut 

height adjustment levers 

 10 

 should be set to the 

same cut height as indicated by the number next to 
the notch.

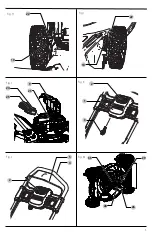
Mulching (Fig. A, F, G)


DANGER:

 Turn unit off and remove safety key and 

battery packs.

1.  To operate mower in mulching mode, remove the grass 

collection bag 

 12 

.

2.  Be sure rear door cover 

 11 

 is closed.

3.  If installed, remove side discharge chute 

 16 

 and make 

sure side flap

 15 

 is fully down.

Side Discharge (Fig. A, G)


DANGER:

 Turn unit off and remove safety key and 

battery packs.

1.  To operate mower in side discharge mode, remove the 

grass collection bag 

 12 

.

2.  Be sure rear door cover 

 11 

 is closed.

3.  Lift the side flap 

 15 

 and hook side discharge chute 

 16 


onto the mower.

4.  Release the side flap and ensure the side discharge 

chute 

 16 

 holds in place before turning mower on.

Grass Collection Bag (Fig. F, G)


DANGER:

 Turn unit off and remove safety key and 

battery packs.

1.  Lift the rear door cover 

 11 

 and place the grass collection 

bag 

 12 

 onto the mower so the bag lugs 

 20 

 slide 

into the slots 

 21 

 on the inside plastic surfaces of the 

handle brackets as shown in Fig. F, G. Then lower the rear 
door cover.

2.  If installed, remove side discharge chute 

 16 

 and make 

sure side flap

 15 

 is fully down.

Summary of Contents for DCMWP233

Page 1: ... question ou tout commentaire nous contacter Si tiene dudas o comentarios contáctenos 1 800 4 DeWALT DCMWP233 2 x 20V Max Push Mower Tondeuse poussée 2 x 20 V Max Podadora de Empuje 2 x 20 V Max Instruction Manual Guide D utilisation Manual de instrucciones ...

Page 2: ...English original instructions 6 Français traduction de la notice d instructions originale 18 Español traducido de las instrucciones originales 31 ...

Page 3: ...eur de coupe 11 Capot de la porte arrière 12 Sac de collecte du gazon 13 Poignée du sac de collecte du gazon 14 Poignée de transport supérieure 15 Volet latéral 16 Toboggan la décharge latérale 17 Poignée inférieure 18 Boutons de la poignée supérieure Componentes 1 Caja de interruptor ON OFF ENCENDIDO APAGADO 2 Botón de ON OFF ENCENDIDO APAGADO 3 Llave de seguridad 4 Manija principal superior 5 Ma...

Page 4: ...a 50 charged Chargé de 50 50 cargada Pack needs to be charged Le bloc piles doit être rechargé La batería tiene que cargarse Indicators Témoin Indicador Charging Bloc piles en Cours de Chargement Unidad en Proceso de Carga Fully Charged Bloc piles Chargé Unidad Cargada Hot Cold Pack Delay Suspension de Charge Contre le Chaud Froid Restraso por Unidad Caliente Fría ...

Page 5: ...3 Fig J Fig K Fig M Fig L Fig H Fig I 22 10 22 25 24 23 9 3 1 2 4 5 26 29 28 10 2 33 ...

Page 6: ...4 31 29 32 29 31 33 Fig O Fig N 30 27 Fig P ...

Page 7: ...5 Fig Q ...

Page 8: ...ear loose clothing or jewelry Keep your hair clothing and gloves away from moving parts Loose clothes jewelry or long hair can be caught in moving parts g If devices are provided for the connection of dust extraction and collection facilities ensure these are connected and properly used Use of dust collection can reduce dust related hazards GENERAL POWER TOOL SAFETY WARNINGS WARNING Read all safet...

Page 9: ...y principles A careless action can cause severe injury within a fraction of a second 4 Power Tool Use and Care a Do not force the power tool Use the correct power tool for your application The correct power tool will do the job better and safer at the rate for which it was designed b Do not use the power tool if the switch does not turn it on and off Any power tool that cannot be controlled with t...

Page 10: ...ttery packs then check for the cause immediately Vibration is generally a warning of trouble Keep Children Away All visitors should be kept a safe distance from work area Dress Properly Do not wear loose clothing or jewelry They can be caught in moving parts Use of rubber gloves and footwear is recommended when working outdoors Use Safety Glasses Always use face or dust mask if operation is dusty ...

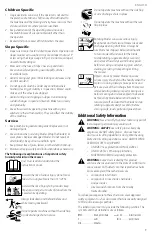
Page 11: ...these chemicals wear approved safety equipment such as dust masks that are specially designed to filter out microscopic particles Children Specific 1 Tragic accidents can occur if the operator is not alert to the presence of children Children are often attracted to the machine and the mowing activity Never assume that children will remain where you last saw them 2 Keep children out of the operatin...

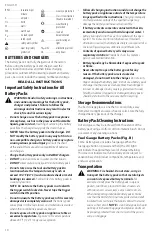
Page 12: ...cted and well insulated from materials that could contact them and cause a short circuit NOTE Li ion battery packs should not be put in checked baggage on airplanes and must be properly protected from short circuits if they are in carry on baggage READ ALL INSTRUCTIONS Important Safety Instructions for All Battery Packs WARNING Read all safety warnings instructions and cautionary markings for the ...

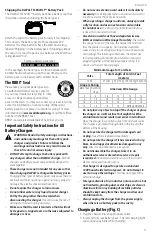
Page 13: ...pply when there is no battery pack in the cavity Charging a Battery Fig C 1 Plug the charger into an appropriate outlet 2 Insert and fully seat battery pack The red charging light will continuously blink while charging Important Safety Instructions for All Battery Chargers WARNING Read all safety warnings instructions and cautionary markings for the battery pack charger and product Failure to foll...

Page 14: ...tallic brush Do not use water or any cleaning solutions 3 Charging is complete when the red charging light remains continuously ON Battery pack can be left in charger or removed Some chargers require the battery pack release button to be pressed for removal 4 Charger will not charge a faulty battery pack which may be indicated by the light staying OFF Take charger and battery pack to an authorized...

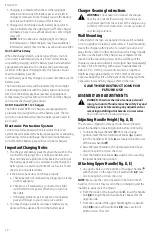
Page 15: ...nts or removing installing attachments or accessories An accidental start up can cause injury Adjusting Mower Height Fig H DANGER Never attempt to adjust mower height with the motor running The height of cut is adjusted by the front and rear cut height adjustment levers 10 NOTE If you are not sure what height to cut at begin mowing with the front and rear cut height adjustment levers 10 positioned...

Page 16: ...ons do not try to remove too much grass at one time Slow down your cutting pace or raise the cut height Starting Mower Fig J L DANGER Sharp moving blade Never attempt to override the operation of the switch box and safety key system as serious injury could result NOTE Mower is operational when battery packs and safety key are installed 1 Lift and hold the battery port cover 9 up to expose the batt...

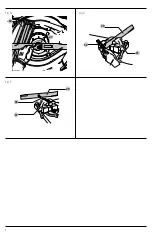
Page 17: ...ether as necessary 6 Position piece of wood to keep blade from turning as shown in Fig N Install blade bolt 26 and securely tighten the blade 29 with a 5 8 wrench 27 Removing and Installing Blade Fig M N DANGER RISK OF INJURY WHEN REASSEMBLING THE BLADE SYSTEM ENSURE EACH PART IS REINSTALLED CORRECTLY AS DESCRIBED BELOW IMPROPER ASSEMBLY OF THE BLADE OR OTHER PARTS OF THE BLADE SYSTEM MAY CAUSE SE...

Page 18: ...he Federal Consumer Safety Act Register online at www dewalt com Repairs The charger and battery pack are not serviceable There are no serviceable parts inside the charger or battery pack WARNING To assure product SAFETY and RELIABILITY repairs maintenance and adjustment including brush inspection and replacement when applicable should be performed by a DeWALT factory service center or a DeWALT au...

Page 19: ...ts sold in Latin America see country specific warranty information contained in the packaging call the local company or see website for warranty information FREE WARNING LABEL REPLACEMENT If your warning labels become illegible or are missing call 1 800 4 DeWALT 1 800 433 9258 for a free replacement ...

Page 20: ...cool ou de médicaments Un simple moment d inattention en utilisant un outil électrique peut entraîner des blessures corporelles graves b Utiliser des équipements de protection individuelle Toujours porter une protection oculaire L utilisation d équipements de protection comme un masque antipoussière des chaussures AVERTISSEMENTS GÉNÉRAUX SUR LA SÉCURITÉ DES OUTILS AVERTISSEMENT lisez tous les aver...

Page 21: ...pératures excessives L exposition aux flammes ou à une température au dessus de 129 C 265 F pourrait causer une explosion antidérapantes un casque de sécurité ou des protecteurs auditifs lorsque la situation le requiert réduira les risques de blessures corporelles c Empêcher les démarrages intempestifs S assurer que l interrupteur se trouve à la position d arrêt avant de relier l outil à une sourc...

Page 22: ...onnement Gardez les lames aiguisées Gardez vos mains et vos pieds à distance de la zone de coupe Les objets frappés par la lame de la tondeuse à gazon peuvent causer des blessures graves à des personnes Le gazon doit toujours être soigneusement examiné et libre de tout objet avant chaque tonte AVERTISSEMENTS DE SÉCURITÉ IMPORTANTS ET INSTRUCTIONS AVERTISSEMENT afin de réduire le risque de blessure...

Page 23: ...chine Réparer 1 Gardez la machine en bon état de fonctionnement Remplacez les pièces usées ou endommagées 2 Soyez prudent lorsque vous entretenez les lames Enveloppez la les lame s ou portez des gants Remplacez les lames endommagées Ne pas réparer ou altérer la les lame s Maintenez tous les écrous et boulons serrés Si la tondeuse à gazon frappe un objet étranger suivez ces étapes 1 Arrêtez la tond...

Page 24: ...éduire votre exposition à ces produits chimiques porter un équipement de sécurité approuvé comme un masque cache poussière spécialement conçu pour filtrer les particules microscopiques 3 Gardez la tondeuse libre d herbe feuilles ou autre accumulation de débris 4 Entretenez ou remplacez les étiquettes d instructions et de sécurité selon les besoins Les éléments suivants sont des explications des sy...

Page 25: ...s sont dans des bagages à main LISEZ TOUTES LES INSTRUCTIONS Consignes de sécurité importantes pour les blocs piles AVERTISSEMENT lisez toutes les consignes de sécurité les instructions et les symboles d avertissements du bloc piles du chargeur et du produit Ne pas suivre les avertissements et les instructions peut entraîner un choc électrique un incendie et ou des blessures graves Ne pas charger ...

Page 26: ...ans s y limiter les poussières de meulage les copeaux métalliques la laine d acier le papier d aluminium ou toute accumulation de particules métalliques devraient être éloignées des ouvertures du chargeur et des fentes de ventilation Consignes de sécurité importantes pour tous les chargeurs de piles AVERTISSEMENT lisez toutes les consignes de sécurité les instructions et les symboles d avertisseme...

Page 27: ...u ou de solution nettoyante Débranchez toujours le chargeur de l alimentation lorsqu il n y a aucun bloc piles à l intérieur Charger une pile Fig C 1 Branchez le chargeur dans une prise appropriée 2 Insérez et appuyez complètement le bloc piles Le voyant de chargement rouge clignotera constamment pendant le chargement 3 Le chargement est terminé lorsque le voyant rouge reste allumé en permanence L...

Page 28: ...vant et arrière de réglage de la hauteur de coupe 10 doivent être réglés sur la même hauteur indiqué par un numéro en regard de l encoche Ajuster la hauteur de la tondeuse Fig H DANGER ne tentez jamais de régler la hauteur de la tondeuse lorsque le moteur est en marche La hauteur de coupe est ajustée par les leviers avant et arrière de réglage de la hauteur de coupe 10 Déchiquetage Fig A F G DANGE...

Page 29: ... que trois secondes cessez d utiliser la tondeuse et faites la réviser Démarrer la tondeuse Fig J L DANGER lame tranchante en mouvement Ne jamais tenter de forcer le fonctionnement du boîtier de commande et le système de clé de sûreté au risque d entraîner une blessure grave REMARQUE La tondeuse est opérationnelle lorsque les blocs piles et la clé de sûreté sont installés Clé de sûreté Fig K DANGE...

Page 30: ...ntreposage de la tondeuse La tondeuse peut être transportée à l aide de la poignée de transport commode 14 NE tentez PAS de soulever la tondeuse en saisissant la poignée principale 4 Si un sac de collecte du gazon 12 est utilisé durant la saison de croissance rapide le gazon peut avoir tendance à obstruer l ouverture d éjection Relâchez l anse pour éteindre la tondeuse retirez la clé de sûreté et ...

Page 31: ...ez et installez la lame Assurez vous que la clé de sûreté et le bloc piles sont retirés Aiguiser la lame deux fois par saison de tonte est habituellement suffisant en circonstances normales Le sable cause l émoussement rapide de la lame Si le gazon a un sol sablonneux aiguiser plus souvent peut être nécessaire REMPLACEZ IMMÉDIATEMENT UNE LAME PLIÉE OU ENDOMMAGÉE Lorsque vous aiguisez la lame Assur...

Page 32: ... ou composez le 1 800 4 DeWALT 1 800 433 9258 Cette garantie ne s applique pas aux accessoires ou dommages causés par des réparations effectuées ou tentées par d autres CETTE GARANTIE REMPLACE TOUTES LES AUTRES INCLUANT LES GARANTIES IMPLICITES DE LA QUALITÉ MARCHANDE ET L APTITUDE POUR UN BUT PARTICULIER ET EXCLUT TOUS LES DOMMAGES ACCIDENTELS OU CONSÉCUTIFS Certaines provinces ne permettent pas ...

Page 33: ... efecto de drogas alcohol o medicamentos Un momento de descuido mientras se opera una herramienta eléctrica puede provocar lesiones personales graves b Utilice equipos de protección personal Siempre utilice protección para los ojos En las condiciones adecuadas el uso de equipos de protección ADVERTENCIAS GENERALES DE SEGURIDAD PARA HERRAMIENTAS ELÉCTRICAS ADVERTENCIA Lea todas las advertencias de ...

Page 34: ...r irritación o quemaduras e No use un paquete de batería o herramienta que estén dañados o modificados Las baterías dañadas o modificadas pueden presentar un comportamiento como máscaras para polvo calzado de seguridad antideslizante cascos o protección auditiva reducirá las lesiones personales c Evite el encendido por accidente Asegúrese de que el interruptor esté en la posición de apagado antes ...

Page 35: ...Mantenga las protecciones en su lugar y en buen estado de operación Mantenga las cuchillas afiladas Mantenga las manos y los pies lejos del área de corte Los objetos golpeados por la cuchilla de la podadora pueden causar lesiones graves a las personas El césped siempre debe revisarse cuidadosamente y despejarse de todos los objetos antes de cada corte Si la podadora golpea un objeto extraño siga e...

Page 36: ...es desgastadas o dañadas 2 Tenga cuidado al reparar las cuchillas Envuelva las cuchillas o use guantes Reemplace las cuchillas dañadas No repare ni altere las cuchillas Mantenga todas las tuercas y pernos apretados 3 Mantenga la podadora libre de hierba hojas u otros desechos acumulados 1 Detenga la podadora Libere la manija de travesaño 2 Retire los paquetes de baterías y la llave de seguridad 3 ...

Page 37: ...ucir su exposición a estos químicos use equipo de seguridad aprobado tal como máscaras de polvo que estén diseñadas específicamente para filtrar partículas microscópicas 4 Mantenga o reemplace las etiquetas de seguridad e instrucciones conforme sea necesario Las siguientes son explicaciones de ilustraciones de peligros de seguridad importantes en la podadora El usuario debe leer y comprender el ma...

Page 38: ...n proteger adecuadamente contra corto circuito si están en el equipaje registrado LEA TODAS LAS INSTRUCCIONES Instrucciones de Seguridad Importantes para Todos los Paquetes de Batería ADVERTENCIA Lea todas las advertencias de seguridad instrucciones y marcas de precaución para el paquete de la batería el cargador y el producto La falla en seguir las advertencias e instrucciones puede resultar en d...

Page 39: ...ehículos Los materiales extraños de naturaleza conductiva tales como pero sin limitarse a polvo de pulido rebabas de metal lana de acero papel aluminio o cualquier acumulación de partículas metálicas se Instrucciones de Seguridad Importantes para Todos los Cargadores de Batería ADVERTENCIA Lea todas las advertencias de seguridad instrucciones y marcas de precaución para el paquete de la batería el...

Page 40: ...solución de limpieza CONSERVE ESTAS INSTRUCCIONES PARA USO FUTURO deben mantener alejados de las cavidades y ranuras de ventilación del cargador Siempre desconecte el cargador del suministro de energía cuando no haya paquete de baterías en la cavidad Carga de la Batería Fig C 1 Conecte el cargador en un tomacorriente apropiado 2 Inserte y asiente completamente el paquete de batería La luz de carga...

Page 41: ...a lateral 16 y asegúrese que la aleta lateral 15 esté completamente abajo Cubierta de Mantillo Fig A F G PELIGRO Apague la unidad y retire la llave de seguridad y los paquetes de batería 1 Para operar la podadora en modo de cubierta de mantillo retire la bolsa de recolección de césped 12 2 Asegúrese que la cubierta de la puerta trasera 11 esté cerrada Descarga Lateral Fig A G PELIGRO Apague la uni...

Page 42: ...serias Paraevitarlesionesgraves apaguela unidadyretirelallavedeseguridadylospaquetesde bateríascuandoestédesatendida ocuandocargue limpie déservicio transporte levanteoguardelapodadora Llave de Seguridad Fig K PELIGRO Cuchilla móvil filosa Para evitar un arranque accidental o el uso no autorizado de su podadora sin cable se ha incorporado una llave de Instalación y Desinstalación de Paquete de Bat...

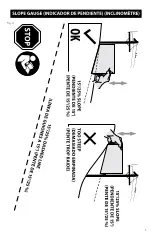
Page 43: ...LAS PIEDRAS PALOS ALAMBRES HUESOS Y OTROS ESCOMBROS QUE PUEDAN SER ARROJADOS POR LA CUCHILLA GIRATORIA ADVERTENCIA Pode a través de la pendiente nunca de arriba a abajo Tenga extrema precaución cuando cambie de dirección en pendientes No corte pendientes excesivamente empinadas Siempre mantenga un buen equilibrio Suelte la manija de travesaño para apagar la podadora cuando cruce cualquier área de ...

Page 44: ...odadora y apriete firmemente Afilado de Cuchillas MANTENGA LA HOJA AFILADA PARA OBTENER EL MEJOR RENDIMIENTO DE LA PODADORA UNA CUCHILLA SIN FILO NO CORTA LA HIERBA DE FORMA LIMPIA ADVERTENCIA Use guantes y protección adecuada para los ojos mientras saca afila e instala la cuchilla Asegúrese de quitar la llave de seguridad y el paquete de batería Afilar la cuchilla dos veces durante la temporada d...

Page 45: ...ones El Cargador y las unidades de batería no pueden ser reparados El cargador y la unidad de batería no contienen piezas reparables ADVERTENCIA Para asegurar la SEGURIDAD y la CONFIABILIDAD del producto las reparaciones el mantenimiento y los ajustes inclusive la inspección y el cambio de las escobillas cuando proceda deben ser realizados en un centro de mantenimiento en la fábrica DeWALT u en un...

Page 46: ...Esta garantía no cubre falla de partes debido al desgaste normal o abuso de la herramienta Para detalles adicionales de la cobertura de la garantía e información de reparación de garantía visite www dewalt com o llame al 1 800 4 DeWALT 1 800 433 9258 Esta garantía no se aplica a accesorios o daño causado cuando otros hayan realizado o intentado reparaciones ESTA GARANTÍA LIMITADA SE OTORGA EN LUGA...

Page 47: ......

Page 48: ...sion nominale est de 18 54 ou 108 120 V max se base sur l utilisation combinée de 2 blocs piles au lithium ion DeWALT de 60 V max El máximo voltaje inicial de la batería medido sin carga de trabajo es 20 o 60 voltios El voltaje nominal es de 18 54 o 108 V 120 V Máx se basan en el uso de 2 baterías de iones de litio DeWALT de 60 V Máx combinadas BT Bluetooth NOTE The Bluetooth word mark and logos a...

Reviews: