12
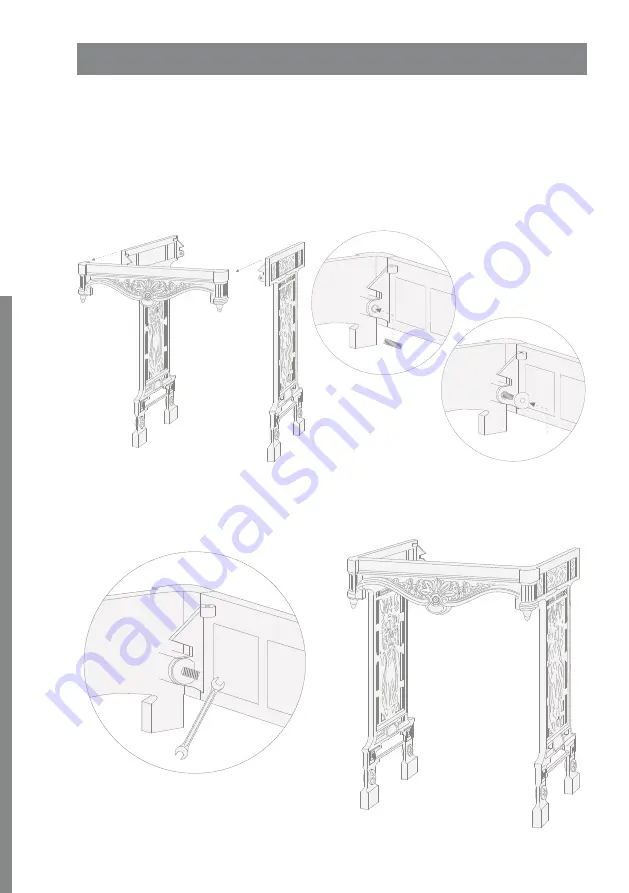
ASSEMBLY INSTRUCTIONS
1)
After removing the metal structure components from the from
the package, join together the Decorative front (A) and the Legs
(C), using the threaded rods, washers and nuts (E).
Repeat the operation for both legs to
complete the assembly of the metal
structure.
2)
Tighten the nuts with a 13
mm spanner (not supplied).
3)
Set the assembled structure
into position against the wall.
Summary of Contents for Angel Console
Page 42: ...41 P Y C A B C D E 13 Devon Devon Devon Devon Devon Devon D B A C E...
Page 43: ...42 A x1 B x1 C x2 D x4 E x2 A B D E C...
Page 44: ...43 P Y C F Cambridge 1 G S 2 F G...
Page 45: ...44 2 13 3 1...
Page 46: ...45 P Y C 6 D 4 B 5...
Page 47: ...46 7 Cambridge F 9 S G 10 8 2...
Page 48: ...47 P Y C 11 12 13...
Page 49: ...48 15 14...


