background image


2.3.

  Keypad Operation Instructions


2.3.1. 


Channel switching operation


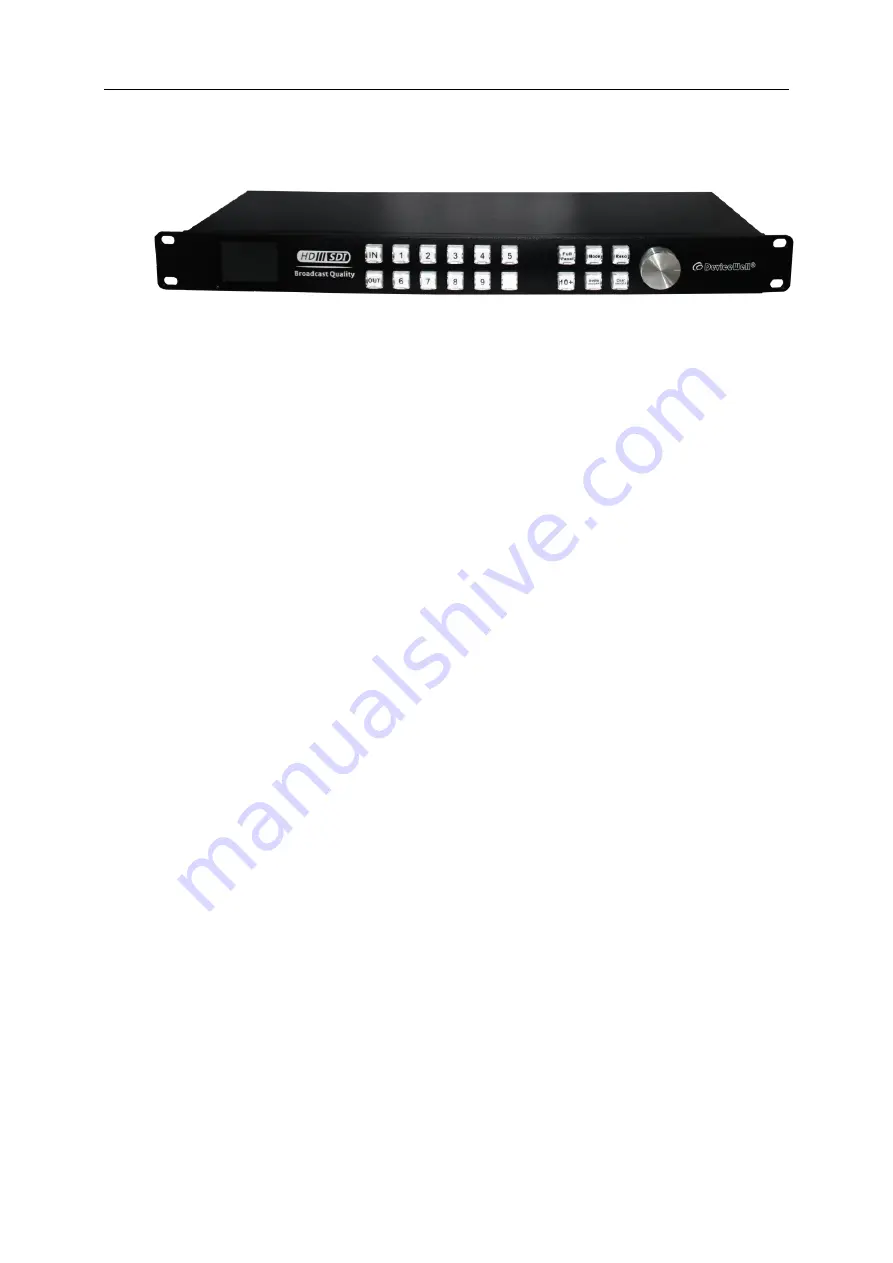
Switching  operation  can  be  performed  according  to  the  input  signal  and  the  multi-screen 

window number. IN x OUT y (such as switching the 2nd signal to the 5th display, IN + 2 + OUT 

+ 5), you can also switch all the way at the same time. To multi-channel display, IN 2 OUT 1, 2, 3, 

4.... If you want to switch 10 channels, press 10+ first, then press 0.


2.3.2. 

    Full Panel   


In the multi-screen switching,  you can select a certain way to display in full screen, press 

the full screen window  Full Panel (such as the full screen display of 5 screens in the 16 

screen: 5 + Full Panel), press the Full Panel button again to return In the multi-picture state, if the 

channel  switching  operation  has  just  been  performed,  the  OUT  is  in  the  light-on  state,  and  it  is 

necessary to first press OUT to turn off the light and then perform full-screen operation

.

。 

2.3.3. 

    Mode 

Multi-screen mode switching, there are six modes of 1, 4, 6, 8, 9, 10 to select, you can press 

the Mode button to cycle.


2.3.4. 

    Reso 

Output  resolution  setting,  press  the  Reso  button  to  switch  between  different  output 

resolutions, a total of 1080p60, 1080p50, 1080p30, 1080p25, 1080i50, 1080i60, 720p60, 720p50 

eight resolution options.


2.3.5. 

    Audio 

Switch the display or hide of the audio columns of all channels.


Summary of Contents for MVP9110

Page 1: ...SDI 10 Screen Multiview Model MVP9110 VAR 2 0 Users Manual...

Page 2: ...effect Do not place system equipment in a location that is too cold or too hot The power supply of the device will generate heat during operation so keep the working environment well ventilated to av...

Page 3: ...l switching operation 6 2 3 2 Full Panel 6 2 3 3 Mode 6 2 3 4 Reso 6 2 3 5 Audio 6 2 3 6 Char 7 2 4 LCD function 7 2 4 1 Open the software 7 2 4 2 CONTROL module 7 2 4 3 UMD module 8 2 4 4 COLOR modul...

Page 4: ...ut interface and control interface which can conveniently process SDI signals for picture segmentation signal delay frequency conversion processing and frame synchronization The device supports networ...

Page 5: ...5V Clock recovery Auto output optional Overshoot 5 Jitter 0 2Ul HDMI Output Output Signal Standard HDMI signal Rate 270Mbps 2 97Gbps Signal amplitude 800mV 10 100R Impedance 100 Control Parameter Loca...

Page 6: ...output of the signal source to the input of the unit 2 Configure the corresponding I O card according to the input and output of the site 3 Connect the signal output of this unit to the signal input...

Page 7: ...4 2 2 Multi screen Mode Description 2 2 1 1 screen mode 2 2 2 4 screen mode 2 2 3 6 screen mode...

Page 8: ...5 2 2 4 8 screen mode 2 2 5 9 screen mode 2 2 6 10 screen mode...

Page 9: ...el such as the full screen display of 5 screens in the 16 screen 5 Full Panel press the Full Panel button again to return In the multi picture state if the channel switching operation has just been pe...

Page 10: ...software Run the EXE file and click the search button to list the devices Select the corresponding device with the left mouse button to read the display mode characters and audio column status of the...

Page 11: ...ow After entering in the corresponding window bar press ENTER to save Note the input field supports a maximum of 10 characters 2 4 4 COLOR module Click the COLOR icon to enter the module Under this mo...

Page 12: ...switch turn on and off input resolution characters 5 Frame status open and close the frame of the screen 6 Lock status lock and unlock the equipment When locking the equipment the equipment keys and...

Page 13: ...2 5 1 Startup LCD status display After power on you can see the status of power supply internal temperature of chassis channel status and time on the LCD panel If the dual power supply fails a power...

Page 14: ...2 5 2 1 How to use the knob 1 Rotate clockwise to select downward 2 Counterclockwise is the up selection 3 When selected the font background is blue 4 Press to confirm 2 5 2 2 System settings Select...

Page 15: ...Screen brightness setting the brightness of the LCD panel can be adjusted through the knob The setting method is the same as above 3 Backlight time you can freely adjust the time of backlight constan...

Page 16: ...econd segment to set the PICTURE 168 press the knob after setting press the knob after setting the third segment set the last segment PICTURE 216 press the knob after setting and then set the subnet m...

Page 17: ...the knob rotate the knob to select the item and press the knob rotate the knob to select UMD or resolution and press the knob rotate the knob to text color or background color to adjust the backgroun...

Page 18: ...the channel 2 5 2 6 Equipment information Select the equipment information and press the knob to enter the equipment information screen Some system information of the equipment can be seen on the page...

Page 19: ...the equipment with a soft dry cloth Do not use alcohol paint thinner or gasoline for cleaning Ensure that the equipment is stored and operated in an environment away from liquids and stains There are...

Page 20: ...by devicewell 4 Carry out maintenance and repair for products modified or assembled with other products the time required for maintenance and repair or maintenance difficulty will be increased after p...

Reviews: