


ACT-5040W Quick Start Guide
ENG 2
Continuous shooting mode
Timelaps mode
6
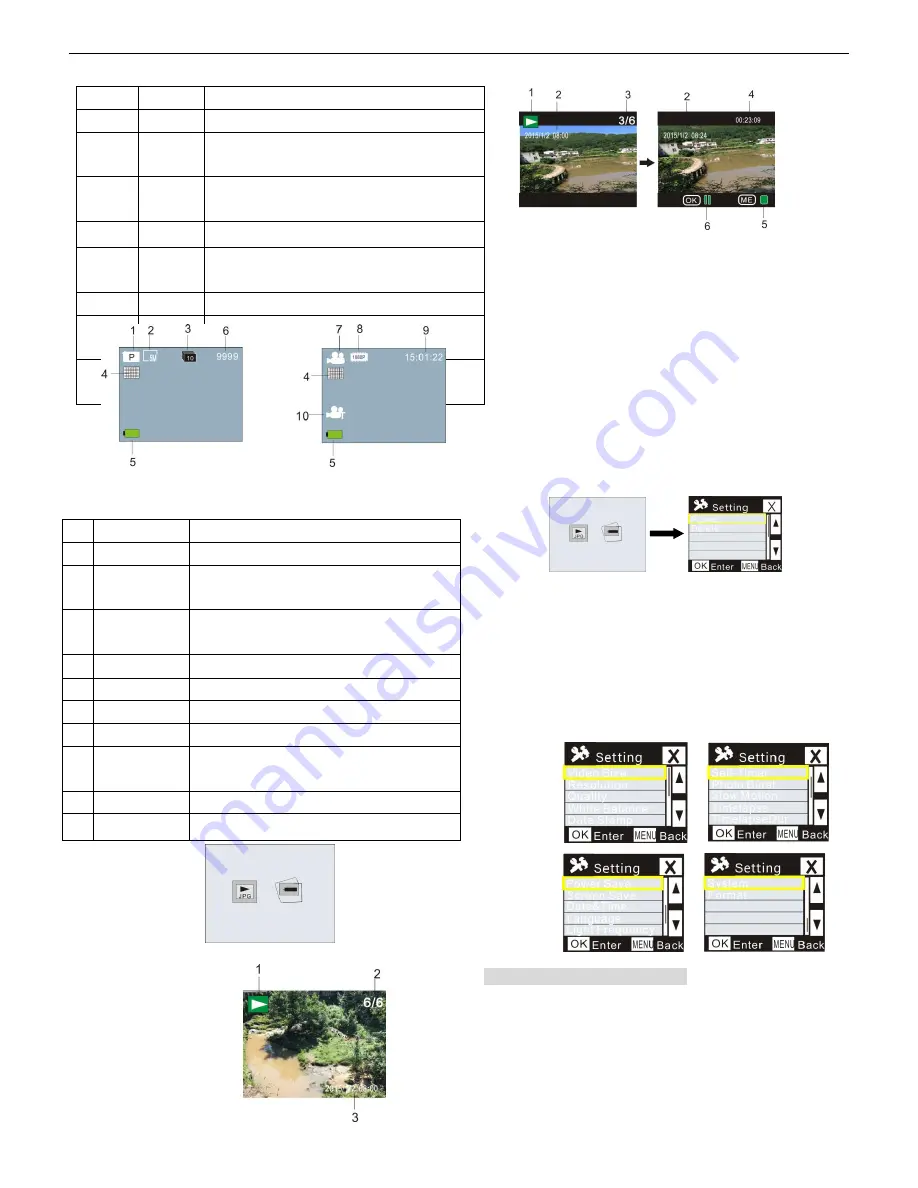
Playback mode
:
6.1
Start it up to enter Video Recording mode; then press Power button for mode
selection; press WIFI button to select playback mode, and press Shutter button to
enter; (as shown below):
Playback mode
6.2
Photo Example
1. Playback Mode Icon
2.Current File Number/Total Files
3. The date of photo
6.3 Frames under Playback Mode Introduction:
6.3.1 Frames of Video Recording File
1.
Playback mode icon
2. The date for video recording
3. Current File Number/Total Files
4. Playback Timer
5. Operation Indicator Icon (Press Power Button to stop)
6. Operation Indicator Icon (Press Shutter button for Pause)
Note: Under playback mode, press WIFI button to select other photos/video recording files to
realize loop selection.
6.4 Playback Mode Menu Setting
Quit from Playback mode, and press Power button to enable the mode interface; select Setting
mode, and press Shutter button to enter Menu; then press WIFI button to select Menu; press
Shutter button again to enter Sub-menu; the chosen Item in the Menu will be displayed with
background color; press WiFi button again to select the secondary sub-menu and press Shutter
button for confirmation; press Power button to quit from Menu setting.
7. Menu Setting
Under Video Recording/Photo and Timelaps mode, press Power button to enable the mode
interface; select a mode you need to set, and press Shutter button to enable the Menu; then, press
WiFi button to select Menu, and press Shutter button to enter Sub-menu; the chosen item in the
Menu will be displayed with background color; press WiFi button again to select secondary
sub-men, and press Shutter button for confirmation; press Power button to quit from Menu
Setting.
APP (support Android and iOS)
I. Installing the APP
1. For Android, search for “
DENVER ACTION CAM 2
” at Play Store and install the
APP according to the prompt.
2. For iOS, search for “
DENVER ACTION CAM 2
” at APP Store and install the APP
according to the prompt.
II. Android APP
No.
Icon Name
Description
1
Video mode
It is under Video mode
2
Video
resolution
Current Resolution: 1920x1080 30 frame; 1280x720 60
frame/30 frame are optional;
3
Recording
Time
It indicates the currently available recording time.
4
Quality
It indicates excellent current quality.
5
Battery
Icon
It indicates current battery is full.
6
Photo mode
It is under Photo mode
7
Photo size
Current photo size: 5M(2560x1920), 8M(3264X2448) and
3M(2048X1536) are optional.
8
Number of
Photo
It indicates current number of photo can be taken.
No. Icon Name
Description
1
Photo mode
It is under Photo mode
2
Photo size
Current photo size: p5M(2560x1920), 8M(3264X2448) and
3M(2048X1536) are optional.
3
Continuous
Shooting
10 photos can be shot continuously; 3/5 photos are optional.
4
Quality
It indicates excellent current quality.
5
Battery icon
It indicates current battery is full.
6
Number of Photo
It indicates current number of photo can be taken.
7
Video mode
It is under Video mode
8
Video resolution
Current resolution: 1920x1080 30 frame; 1280x720 60
frame/30frame are optional.
9
Recording time
It indicates the currently available recording time.
10
Timelaps
icon
It is under
Timelaps
mode for recording.