background image

REQUIRED:  Windows XP PC with ethernet port, DN-V755, Crossover Ethernet cable, 
Composite video cable (optional), Monitor (optional). 
 
PLEASE NOTE:  These instructions are for a new DN-V755 with all settings at default.  Any 
prior changes made to the machine may render these instructions ineffective. 
 
ALSO NOTE:  These instructions assume you are using one PC and one DN-V755 connected 
via crossover cable.  Any other setup may not work properly. 
 
 
1.  Power off both the PC and the DN-V755 
 
2.  Connect the crossover Ethernet cable to both the PC and the DN-V755 
 
3.  Power them both on 
 
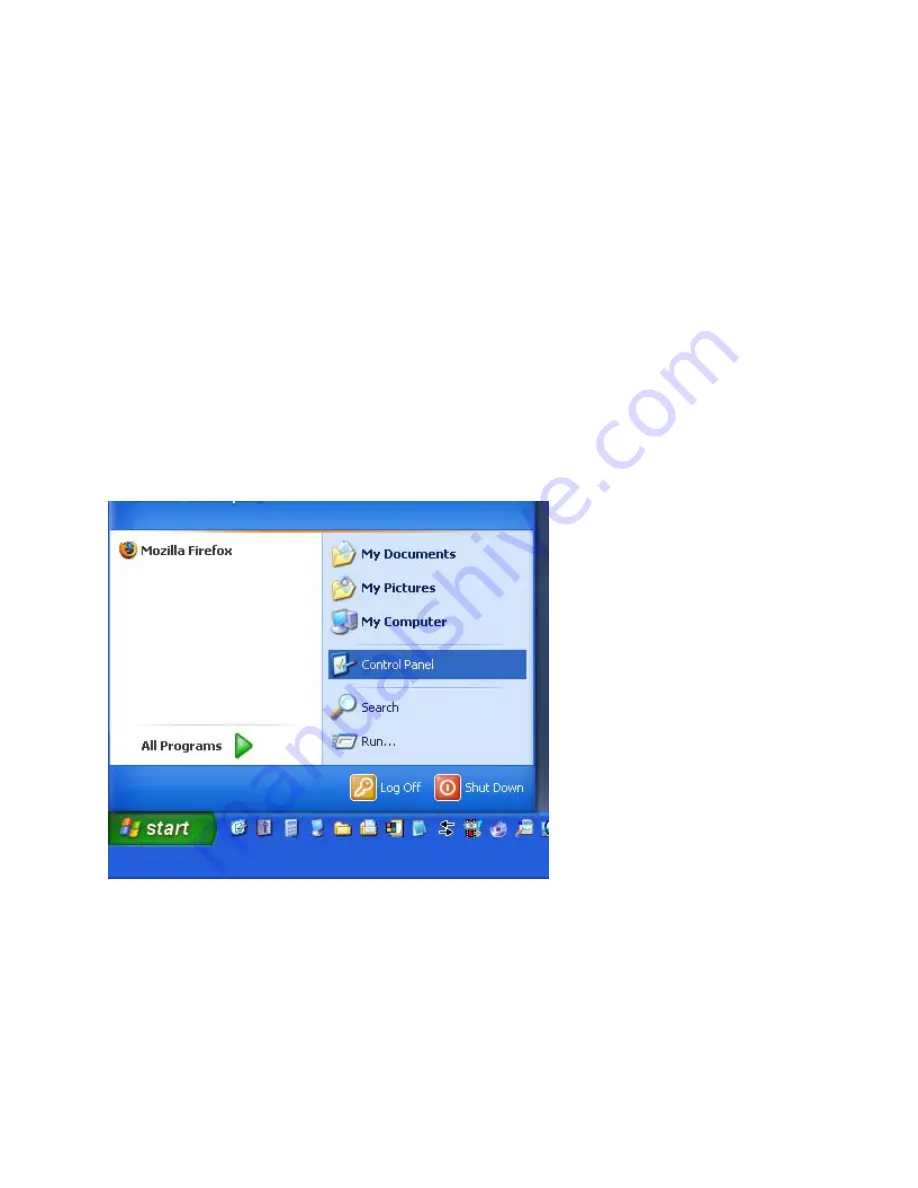
4.  When the PC has finished booting up click on “Start” and then “Control Panel”(see fig.1) 
 
(fig.1) 


2

Summary of Contents for DN-V755

Page 1: ...1...

Page 2: ...de to the machine may render these instructions ineffective ALSO NOTE These instructions assume you are using one PC and one DN V755 connected via crossover cable Any other setup may not work properly...

Page 3: ...ll come up If you see Pick A Category in the window click Network and Internet Connections then Network Connections If you just see icons representing control panel items double click Network Connecti...

Page 4: ...6 In the network connections window right click on Local Area Connection and choose properties see fig 4 fig 4 4...

Page 5: ...7 In the Local Area Connection Properties window that pops up click on Internet Protocol TCP IP to highlight it see fig 5 fig 5 5...

Page 6: ...button next to Use the following IP Address if it is already selected you may want to write the numbers on the screen down for future reference as they will need to be removed Please erase any setting...

Page 7: ...dress type 169 254 1 1 see fig 7 fig 7 11 Click in the empty box next to Subnet Mask 255 255 0 0 should appear If it does not please type it in see fig 7 above 12 Click OK 13 Click Close 14 Close all...

Page 8: ...15 Open Internet Explorer 16 Delete whatever is in the address bar and type http 169 254 1 2 index htm see fig 8 fig 8 8...

Page 9: ...17 Wait for the page to load completely you should see done in the lower left and click on Settings at the top of the page see fig 9 10 fig 9 fig 10 9...

Page 10: ...18 When this page loads completely click Network on the left side of the page see fig 11 fig 11 10...

Page 11: ...19 Under Advanced Options you will see unit name Delete anything in this box and type in DNV755 without the quotes see fig 12 fig 12 11...

Page 12: ...Click Save and Restart and when the window pops up telling you close the browser do so see fig 13 14 fig 13 fig 14 21 You should be back to the desktop If there are any extraneous windows close them...

Page 13: ...22 When the DN V755 is done rebooting right click on an empty space on the desktop and choose New then shortcut see fig 15 fig 15 13...

Page 14: ...that pops up you will see type the location of the item and a flashing cursor Type DNV755 without the quotes and make sure you use two backslashes not forward slashes see fig 16 fig 16 24 Click Next...

Page 15: ...26 You will now see a set of folders The web page for control and playlist creation is in the Application folder Place all of your content in the Content folder see fig 19 fig 19 27 Set your machine u...

Reviews: