Denford reserves the right to alter machines and software specifications without prior notice. All Denford products are
subject to copyright. All brands and products are trademarks or registered trademarks of their respective companies.
Denford Limited, Armytage Road, Brighouse, West Yorkshire HD6 1QF, England
Total Commitment to Manufacturing Technology in Education
and Training Worldwide. ISO9001 compliant.
F: +44(0)1484 728100 Email: [email protected]
CALL NOW
T: +44(0)1484 728000
To get you up and running, Denford also offer a range
of CNC Routers, Lasers, Milling Machines and Lathes,
together with tooling packages, workholding kits and
courseware.
SETUP
SETUP
1. Unpack and Check Equipment
Before setting up your Denford lathe, please check your separate
order documentation, making sure that all items have been
delivered. Any missing or damaged items should be reported to
Denford Customer Services as soon as possible.
Plan view showing ideal
machine layout and
operating positions.
Ensure that any inlet / exhaust vents are not covered or blocked.
Machine Operator
2. Position Lathe with Computer
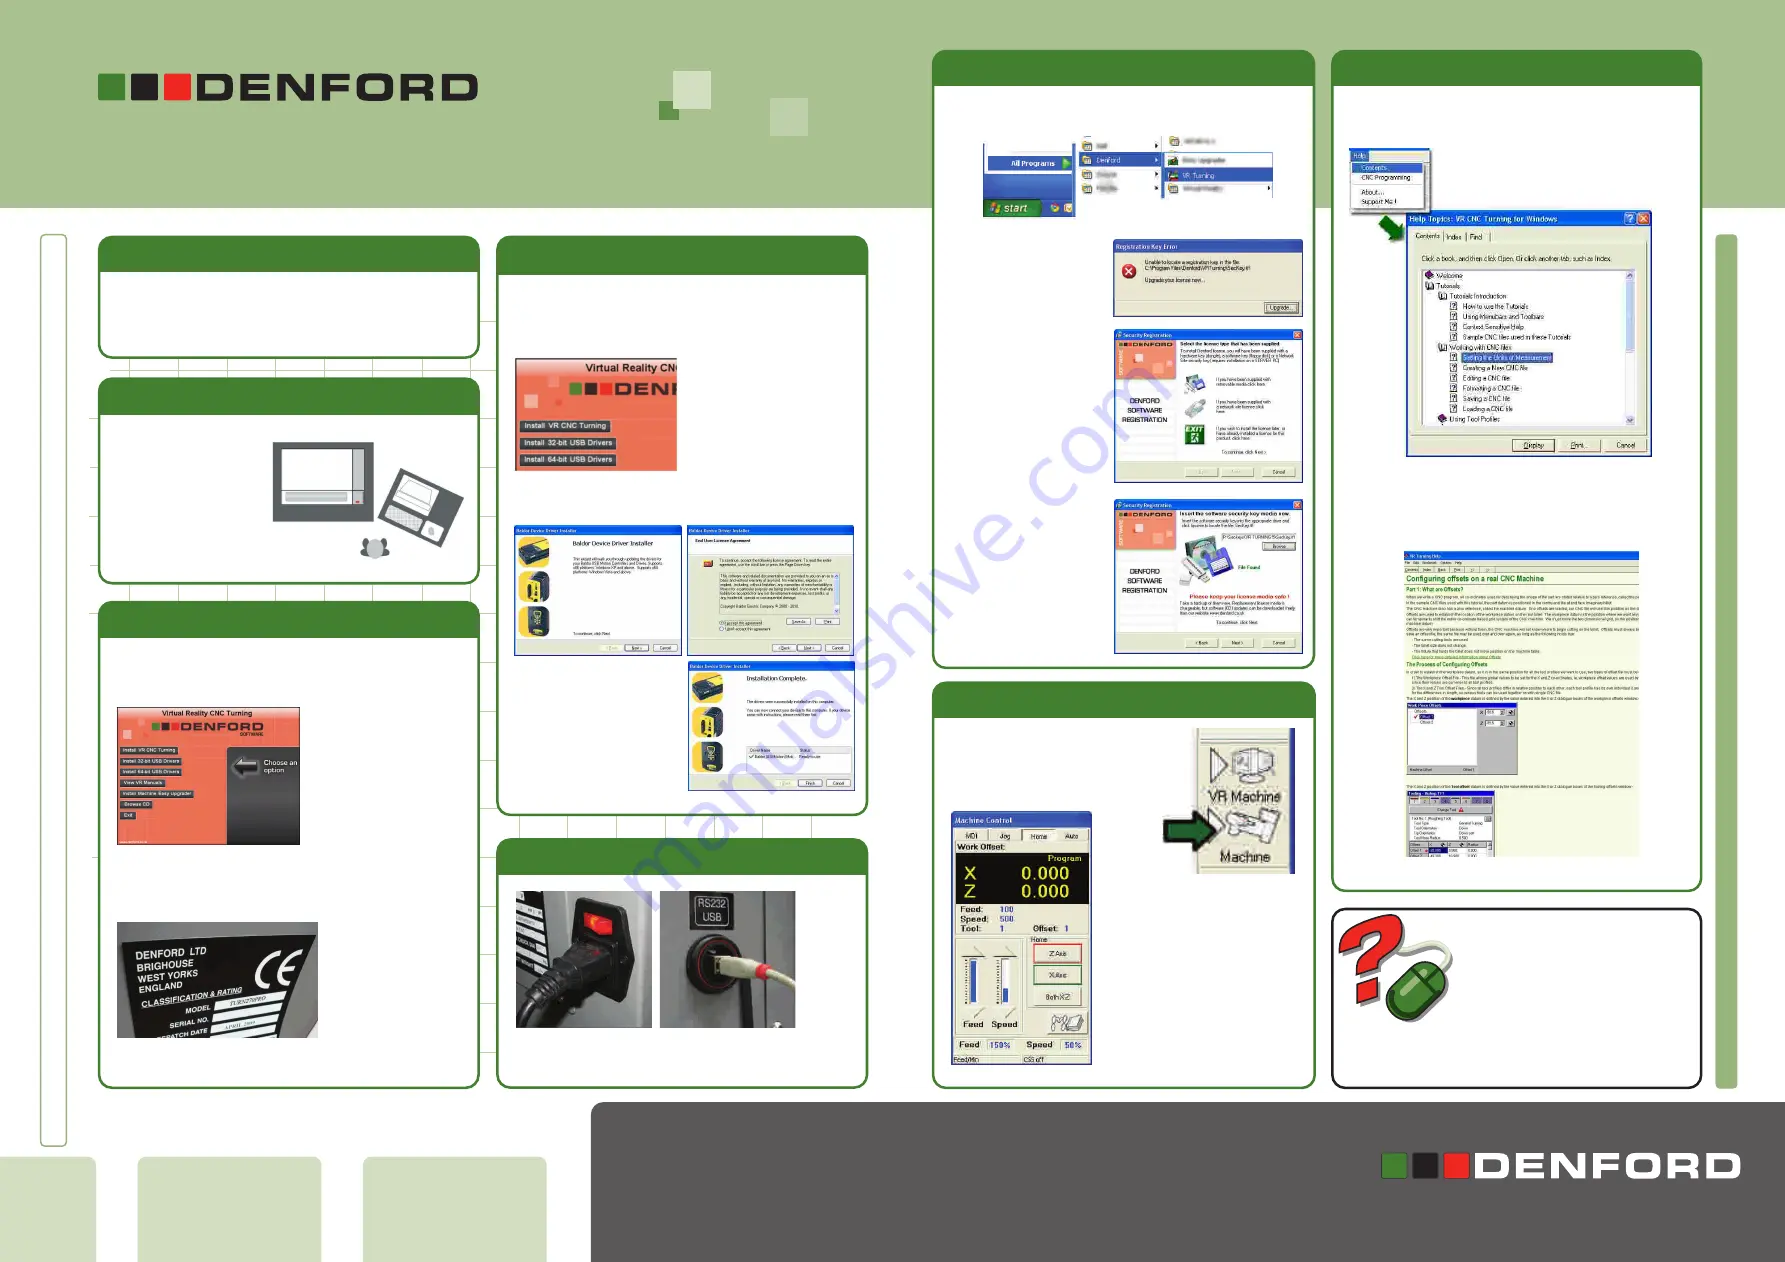
Insert the VR CNC Turning CD into the computer.
Click on
“Install VR CNC Turning”
and follow the on-screen
instructions.
Be sure to choose the correct machine by checking the model
name on the Machine Serial plate.
You may have to scroll down the list of machines using the
scrollbar in order to find your particular model.
Now is a good time to print or copy the machine manual (PDF)
from the VR Turning CD.
3. Install VR CNC Turning
You will now need to install
a Denford Software license
file (seckey.tff).
Click
Upgrade…
Choose the removable media
option and click
Next >.
Locate and select the shortcut created by the installation from
Start > All Programs.
If all is OK, then the machine control
panel will appear as shown.
The red border around an axis home
button indicates that the axis must
be homed before selecting any other
mode. A green border means that
the axis has homed properly.
If you are unfamiliar with the VR Turning software, refer to the
built-in help and tutorials, accessed from the top menu.
7. Test Machine Communication
6. Running the VR Turning Software
8. Run the Machine
Get help, advice and share designs online
www.denfordata.com/bb
Need
more Help?
Installation & Commissioning Guide
TURN 270 PRO
Connect the power cable.
Connect the computer to the lathe using the USB cable.
5. Connect USB and Power Cables
4. Install USB Drivers
Once the software has installed, return to the Installation
menu:
Follow the Driver instructions
clicking
Next >
until installation
has completed successfully.
Choose
32-bit USB drivers
if
your Operating System is a
32-bit version (in most cases
XP and Vista are 32-bit).
Choose
64-bit USB drivers
if
your Operating System is a
64-bit version.
Ignore any requests for a
software license installation
during installation - this is
carried out later, when you
run the software for the first
time.
If you have one, insert the
license disk/CD. If the
seckey.tff file is located
elsewhere, then click
Browse
Click
Next >
when the file is
found.
Check that the registered
products list includes
VR TURNING 5
The software should now
start as normal.
To test the connection to the machine,
press the “select real machine” button in
the VR Turning software window.
The help system has all the essential information you need to
control the machine, set offsets and run a CNC program.
CAD/CAM Software : VR CNC Software : CNC Routers : Mills : Lathes : PCB/Engraving
M a c h i n e s : B e n c h e s & A c c e s s o r i e s : L a s e r C u t t e r s / E n g r a v e r s
Rapid Prototyping : Concept Modelling : 3D Scanning Solutions : Cutter / Plotters


