Keyboard
43
9
Keyboard
WARNING:
Before working inside your computer, read the safety information
that shipped with your computer. For additional safety best practices information,
see the Regulatory Compliance Homepage at
www.dell.com/regulatory_compliance.
CAUTION:
Only a certified service technician should perform repairs on your
computer. Damage due to servicing that is not authorized by Dell™ is not covered
by your warranty.
CAUTION:
To avoid electrostatic discharge, ground yourself by using a wrist
grounding strap or by periodically touching an unpainted metal surface (such as a
connector on your computer).
CAUTION:
To help prevent damage to the system board, remove the main battery
(see "Removing the Battery" on page 13) before working inside the computer.
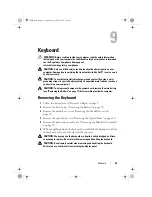
Removing the Keyboard
1
Follow the instructions in "Before You Begin" on page 9.
2
Remove the battery (see "Removing the Battery" on page 13).
3
Remove the module cover (see "Removing the Module Cover" on
4
Remove the optical drive (see "Removing the Optical Drive" on page 33).
5
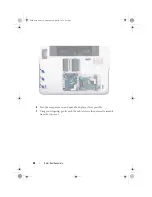
Remove the palm-rest assembly (see "Removing the Palm-Rest Assembly"
6
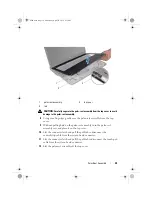
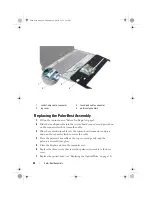
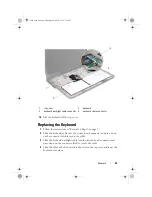
Without pulling hard on the keyboard, carefully lift the keyboard and slide
the keyboard tabs out of the slots on the top cover.
CAUTION:
The keycaps on the keyboard are fragile, easily dislodged, and time-
consuming to replace. Be careful when removing and handling the keyboard.
CAUTION:
Be extremely careful when removing and handling the keyboard.
Failure to do so could result in scratching the display panel.
book.book Page 43 Wednesday, April 25, 2012 2:11 PM
Summary of Contents for XPS L702X
Page 12: ...12 Before You Begin book book Page 12 Wednesday April 25 2012 2 11 PM ...
Page 25: ...Wireless Mini Card s 25 book book Page 25 Wednesday April 25 2012 2 11 PM ...
Page 26: ...26 Wireless Mini Card s book book Page 26 Wednesday April 25 2012 2 11 PM ...
Page 32: ...32 Hard Drive s book book Page 32 Wednesday April 25 2012 2 11 PM ...
Page 35: ...Optical Drive 35 book book Page 35 Wednesday April 25 2012 2 11 PM ...
Page 36: ...36 Optical Drive book book Page 36 Wednesday April 25 2012 2 11 PM ...
Page 42: ...42 Palm Rest Assembly book book Page 42 Wednesday April 25 2012 2 11 PM ...
Page 50: ...50 Power Button Board book book Page 50 Wednesday April 25 2012 2 11 PM ...
Page 53: ...Coin Cell Battery 53 book book Page 53 Wednesday April 25 2012 2 11 PM ...
Page 54: ...54 Coin Cell Battery book book Page 54 Wednesday April 25 2012 2 11 PM ...
Page 74: ...74 IR Emitter Board book book Page 74 Wednesday April 25 2012 2 11 PM ...
Page 75: ...IR Emitter Board 75 book book Page 75 Wednesday April 25 2012 2 11 PM ...
Page 76: ...76 IR Emitter Board book book Page 76 Wednesday April 25 2012 2 11 PM ...
Page 82: ...82 Camera Module book book Page 82 Wednesday April 25 2012 2 11 PM ...
Page 89: ...Top Cover 89 book book Page 89 Wednesday April 25 2012 2 11 PM ...
Page 90: ...90 Top Cover book book Page 90 Wednesday April 25 2012 2 11 PM ...
Page 94: ...94 Subwoofer book book Page 94 Wednesday April 25 2012 2 11 PM ...
Page 98: ...98 AC Adapter Connector book book Page 98 Wednesday April 25 2012 2 11 PM ...
Page 102: ...102 Fan book book Page 102 Wednesday April 25 2012 2 11 PM ...
Page 103: ...Fan 103 book book Page 103 Wednesday April 25 2012 2 11 PM ...
Page 104: ...104 Fan book book Page 104 Wednesday April 25 2012 2 11 PM ...
Page 108: ...108 Heat Sink book book Page 108 Wednesday April 25 2012 2 11 PM ...
Page 109: ...Heat Sink 109 book book Page 109 Wednesday April 25 2012 2 11 PM ...
Page 110: ...110 Heat Sink book book Page 110 Wednesday April 25 2012 2 11 PM ...
Page 122: ...122 TV Antenna Connector book book Page 122 Wednesday April 25 2012 2 11 PM ...
Page 126: ...126 USB Board book book Page 126 Wednesday April 25 2012 2 11 PM ...
Page 132: ...132 System Board book book Page 132 Wednesday April 25 2012 2 11 PM ...


