Steps
1. Peel the fingerprint reader cable from the keyboard.
2. Remove the speaker cable from the routing guides on the left keyboard bracket.
3. Loosen the captive screw that secures the left keyboard bracket to the palm-rest assembly.
4. Using a plastic scribe, pry the left keyboard bracket off the palm-rest assembly.
5. Loosen the captive screw that secures the right keyboard bracket to the palm-rest assembly.
6. Using a plastic scribe, pry the right keyboard bracket off the palm-rest assembly.
7. Disconnect the keyboard cable and keyboard backlight cable from the keyboard controller board.
8. Peel the keyboard controller board cable from the keyboard.
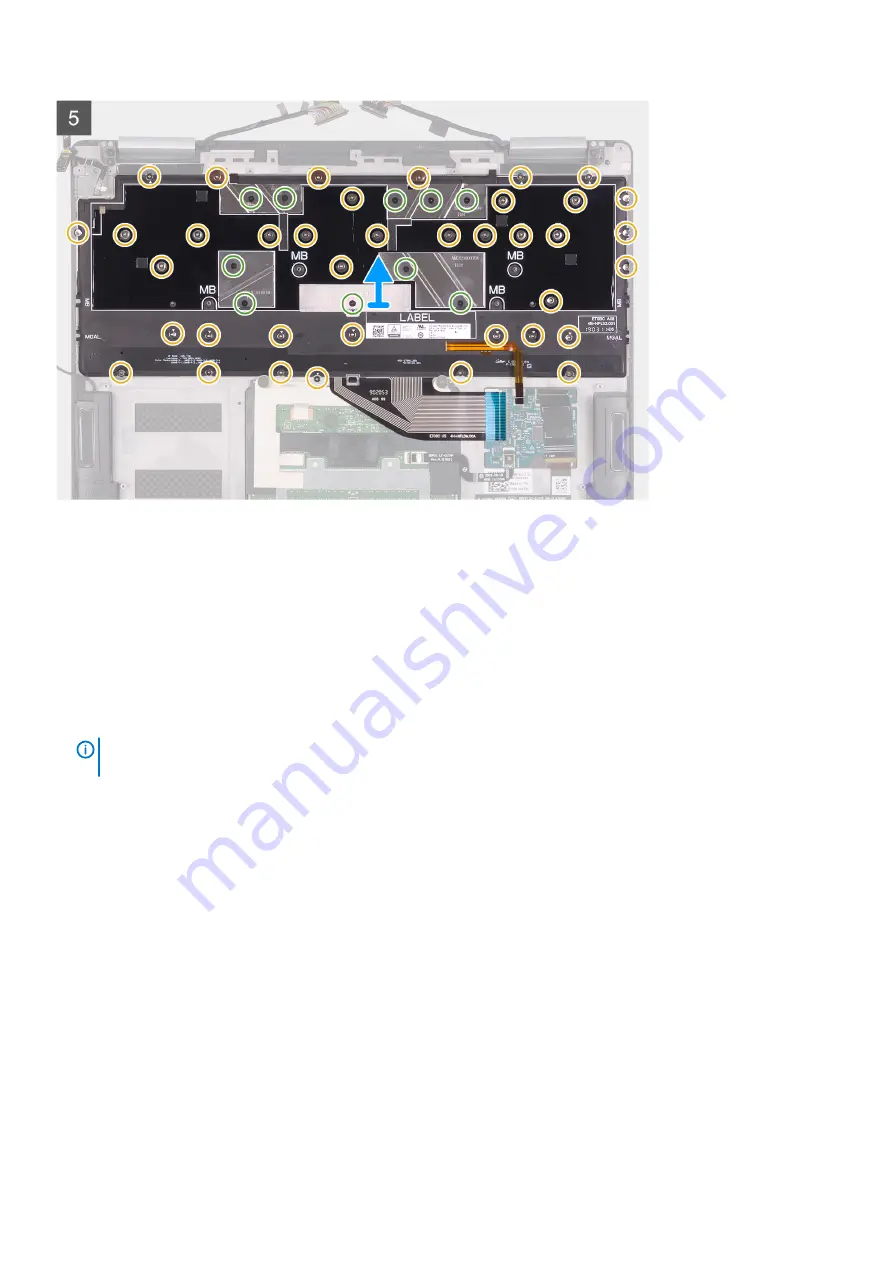
9. Remove the 38 screws (M1.2x1.4) and ten screws (M1.2x1.6) that secure the keyboard to the palm-rest assembly.
NOTE:
Peel off the three copper foil from the palm-rest assembly, and then peel off the two conductive tapes on the
keyboard assembly to separate the keyboard assembly and the palm-rest assembly.
10. Lift the keyboard off the palm-rest assembly.
Installing the Keyboard
Prerequisites
If you are replacing a component, remove the existing component before performing the installation procedure.
About this task
The following images indicate the location of keyboard assembly and provide a visual representation of the installation procedure.
28
Removing and installing components
Summary of Contents for XPS 13 7390 2-in-1
Page 1: ...XPS 13 7390 2 in 1 Service Manual Regulatory Model P103G Regulatory Type P103G001 ...
Page 10: ...10 Removing and installing components ...
Page 11: ...Removing and installing components 11 ...
Page 25: ...Removing and installing components 25 ...


