Setting up the monitor
│
31
Connecting your monitor
WARNING: Before you begin any of the procedures in this section,
follow the
NOTE: Dell monitors are designed to work optimally with Dell supplied
inbox cables. Dell does not guarantee the video quality and performance
when using non-Dell cables.
NOTE: Route the cables through the cable-management slot before
connecting them.
NOTE: Do not connect all cables to the computer at the same time.
NOTE: The graphics are used for the purpose of illustration only.
Appearance of the computer may vary.
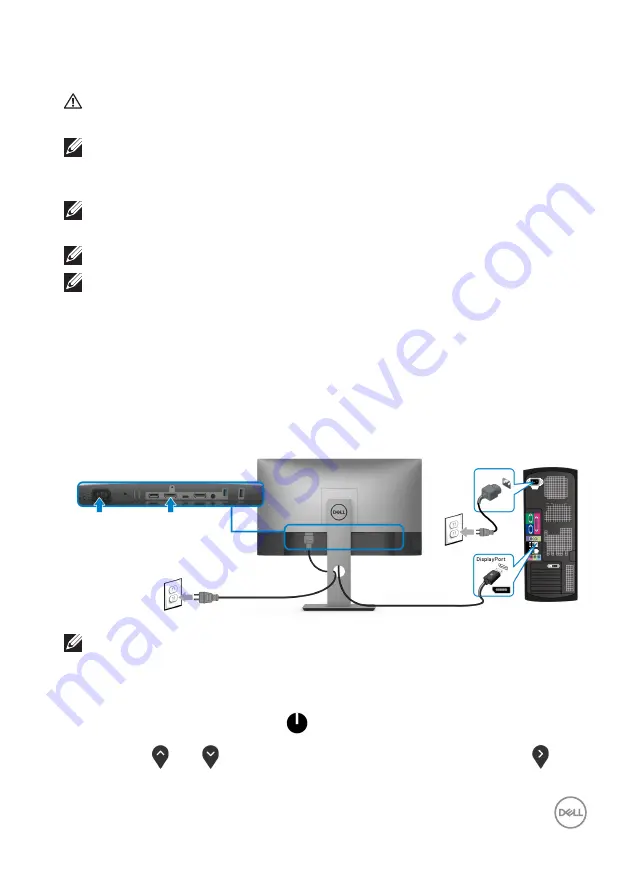
To connect your monitor to the computer:
1.
Turn Off your computer and disconnect the power cable.
2.
Connect the DisplayPort, HDMI, or USB Type-C cable from your monitor to
the computer.
Connecting the DisplayPort (DisplayPort to DisplayPort) cable (for
U2520D)
NOTE: The default out of factory setting is DP1.4 (DP1.2 is supported).
If the monitor fails to show any content after the DisplayPort cable is
connected, follow the procedures below to change the settings to
DP1.1:
• Press any button (except the
button) to activate the OSD menu.
• Use the
and
buttons to highlight
Input Source
, then use the
button enter the submenu.


