Dell U2421M Troubleshooting Steps Download Page 1

Troubleshooting steps 


Using the Monitor Self-Test 

The monitor provides a self-test feature that allows you to check whether your monitor is 
functioning properly. If your monitor and computer are properly connected but the monitor 
screen remains dark, run the monitor self-test by performing the following steps: 

1.


Turn off both the computer and the monitor. 

2.


Unplug the video cable from the back of the monitor. To ensure proper Self-Test 
operation, remove all digital (white DVI connector) and analog (blue VGA connector) 
cables from the back of the computer. 

3.


Turn on the monitor.  

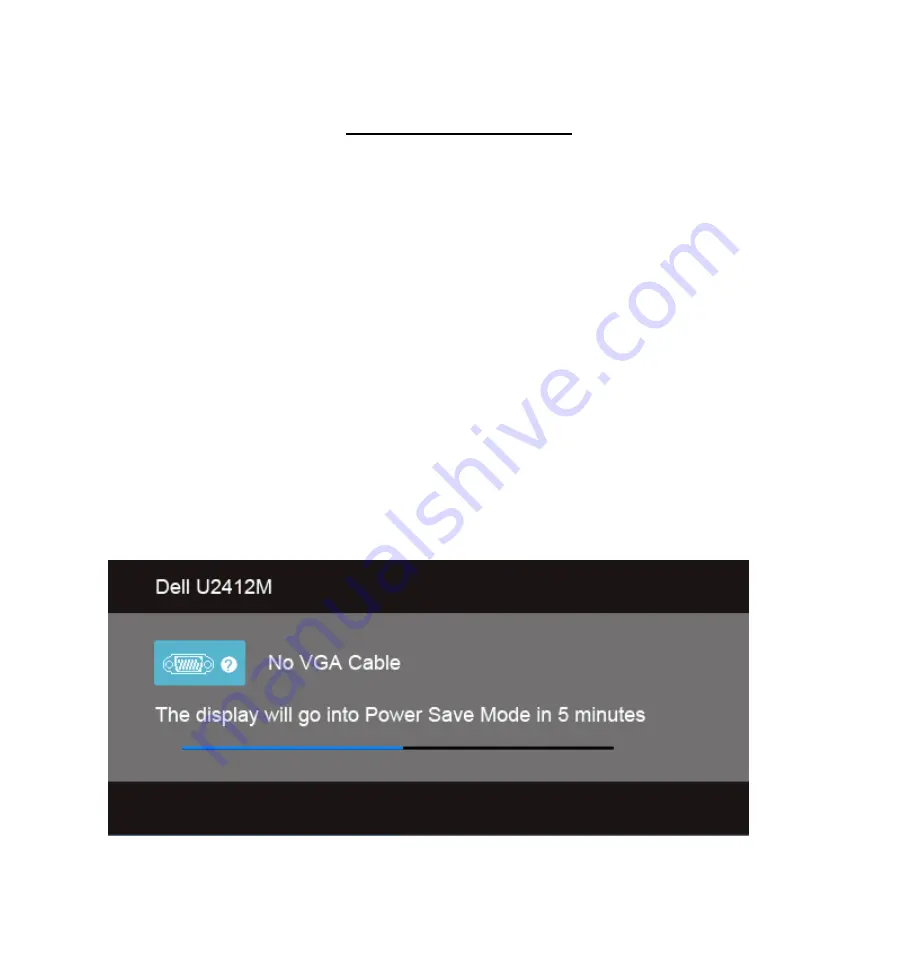
The floating dialog box should appear on-screen (against a black background) if the flat panel 
display cannot sense a video signal and is working correctly. While in self-test mode, the power 
LED remains blue. Also, depending upon the selected input, one of the dialogs shown below will 
continuously scroll through the screen. 


Summary of Contents for U2421M

Page 1: ... monitor 2 Unplug the video cable from the back of the monitor To ensure proper Self Test operation remove all digital white DVI connector and analog blue VGA connector cables from the back of the computer 3 Turn on the monitor The floating dialog box should appear on screen against a black background if the flat panel display cannot sense a video signal and is working correctly While in self test...

Page 2: ... panel display screen remains blank after using the previous procedure check the video controller and computer because the flat panel display is functioning properly Using the Built In Diagnostics The monitor has a built in diagnostic tool that helps you determine if a problem you are having with the display is a problem with the monitor your computer or your video card You can only run the built ...

Page 3: ...e of the screen 2 Unplug the video cable s from the back of the computer or monitor The monitor then goes into the self test mode 3 Press and hold Button 1 and Button 4 simultaneously for 2 seconds A gray screen should appear 4 Carefully inspect the screen for abnormalities 5 Press Button 4 on the front panel again The color of the screen should change to red 6 Inspect the screen for abnormalities...

Page 4: ...ly using any other electrical equipment Ensure that the power button is depressed fully No Video Power LED On No picture or no brightness Increase the brightness and contrast controls via OSD Run the monitor self test feature check Check for bent or broken pins in the video cable connector Run the built in diagnostics Ensure that the correct input source is selected via the Input Source Select but...

Page 5: ...ell Monitor Quality and Pixel Policy see Dell Support site at www dell com support monitors Stuck on Pixels LCD screen has bright spots Cycle power on off Pixel that is permanently off is a natural defect that can occur in LCD technology For more information on Dell Monitor Quality and Pixel Policy see Dell Support site at www dell com support monitors Brightness Problems Picture too dim or too br...

Page 6: ...he monitor to the Factory settings Perform monitor self test feature check to determine if the scrambled screen appears in self test mode Check for bent or broken pins in the video cable connector Restart the computer in the safe mode If you re using DVI connection ensure that a Dual Link DVI cable is used Supplied together with the monitor Check for loose connection Unplug reconnect if required S...

Page 7: ...ngs OSD to Graphics or Video depending on the application Try different Color Preset Settings in Color Settings OSD Adjust R G B value in Color Settings OSD if the Color Management is turned Off Change the Input Color Format to PC RGB or YPbPr in the Advance Settings OSD Run the built in diagnostics Image retention from a static image left on the monitor for a long period of time Faint shadow from...

Page 8: ...are pressed No picture the LED light is white Check the signal source Ensure the computer is not in the power saving mode by moving the mouse or pressing any key on the keyboard Check whether the signal cable is plugged in properly Re plug the signal cable if necessary Reset the computer or video player The picture does not fill the entire screen The picture cannot fill the height or width of the ...

Page 9: ... your computer Reconnect the USB peripherals downstream connector Switch off and then turn on the monitor again Reboot the computer Some USB devices like external portable HDD require higher electric current connect the device directly to the computer system High Speed USB 3 0 interface is slow High Speed USB 3 0 peripherals working slowly or not working at all Check that your computer is USB 3 0 ...

Page 10: ...e in cable into the computer s audio out jack Set all Windows volume controls to their maximum Play some audio content on the computer i e audio CD or MP3 Turn the Power Volume knob on the Soundbar clockwise to a higher volume setting Clean and reseat the audio line in plug Test the Soundbar using another audio source i e portable CD player Distorted Sound Computer s sound card is used as the audi...

Page 11: ...e setting Clean and reseat the audio line in plug Unbalanced Sound Output Sound from only one side of Soundbar Clear any obstructions between the Soundbar and the user Confirm that the audio line in plug is completely inserted into the jack of the sound card or audio source Set all Windows audio balance controls L R to their midpoints Clean and reseat the audio line in plug Troubleshoot the comput...

Page 12: ...click Desk Management B In the list of drives in the right panel right click Removable Device and then click Change Drive Letter and Paths C Click Change and in the drop down box specify a drive letter for the Removable Device choosing one that is not assigned to the mapped network drives D Click OK then click OK again Drive letter is assigned but the media is not accessible The media needs reform...

Page 13: ...media while the LED is still blinking then you cannot complete your action on the media Format the media for writing or erasing the same folder or file name Cannot format or write on the media Write protect switch is enabled Verify that the write protect switch of the media is unlocked Card reader is not working USB interface is not working Check that your monitor is powered On Reconnect the upstr...

Page 14: ... Dell and should be used with appropriate caution Dell shall not be liable for any loss including but not limited to loss of data loss of profit or loss of revenue which customers may incur by following any procedure or advice set out in the Quick Tips Article ID SLN297700 ...

Reviews: