


■
ST2220:
54.61cm (21.5 inches) viewable area display.
■
1920 x 1080 resolution, plus full-screen support for lower resolutions.
■
Tilt adjustment capability.
■
Plug and play capability if supported by your system.
■
On-Screen Display (OSD) adjustments for ease of set-up and screen optimization.
■
Software and documentation CD which includes an information file (INF), Image Color Matching File (ICM), and product documentation.
■
Energy Saver feature for Energy Star compliance.
■
Security lock slot.
Identifying Parts and Features
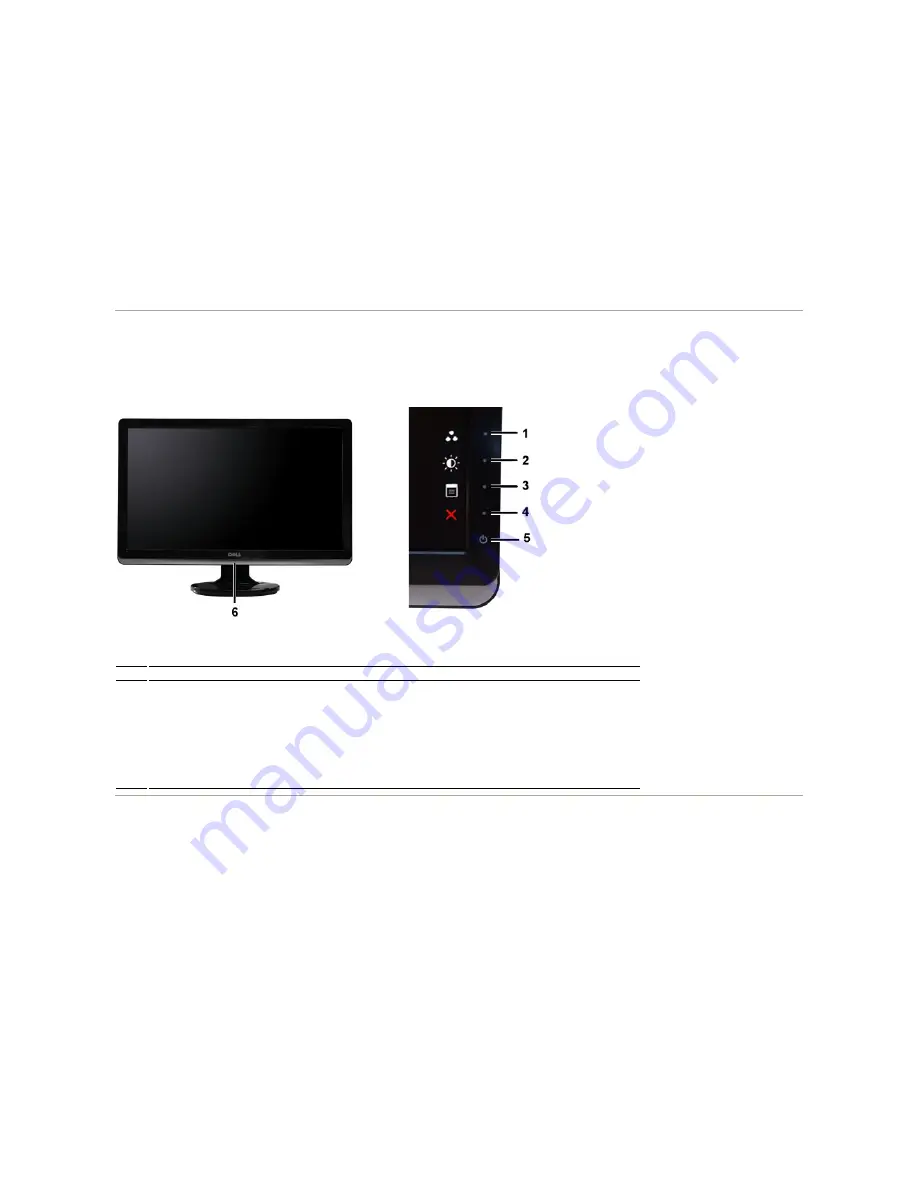
Front View
Back View
Front View
Front Panel Controls
Label
Description
1-2
Shortcut keys
*The default settings are Preset Modes and Brightness/Contrast.
1
Shortcut key: Preset Modes (Default)
2
Shortcut key: Brightness/Contrast (Default)
3
OSD menu select
4
EXIT
5
Power On/Off
6
Power light indicator (below Dell logo)


