

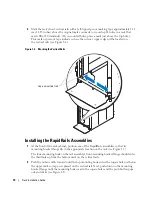


14
Rack Installation Guide
2
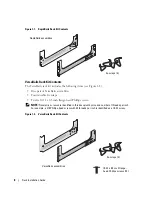
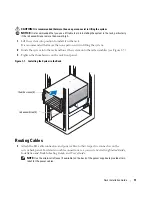
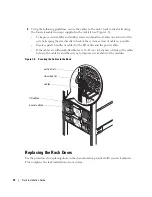
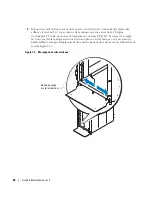
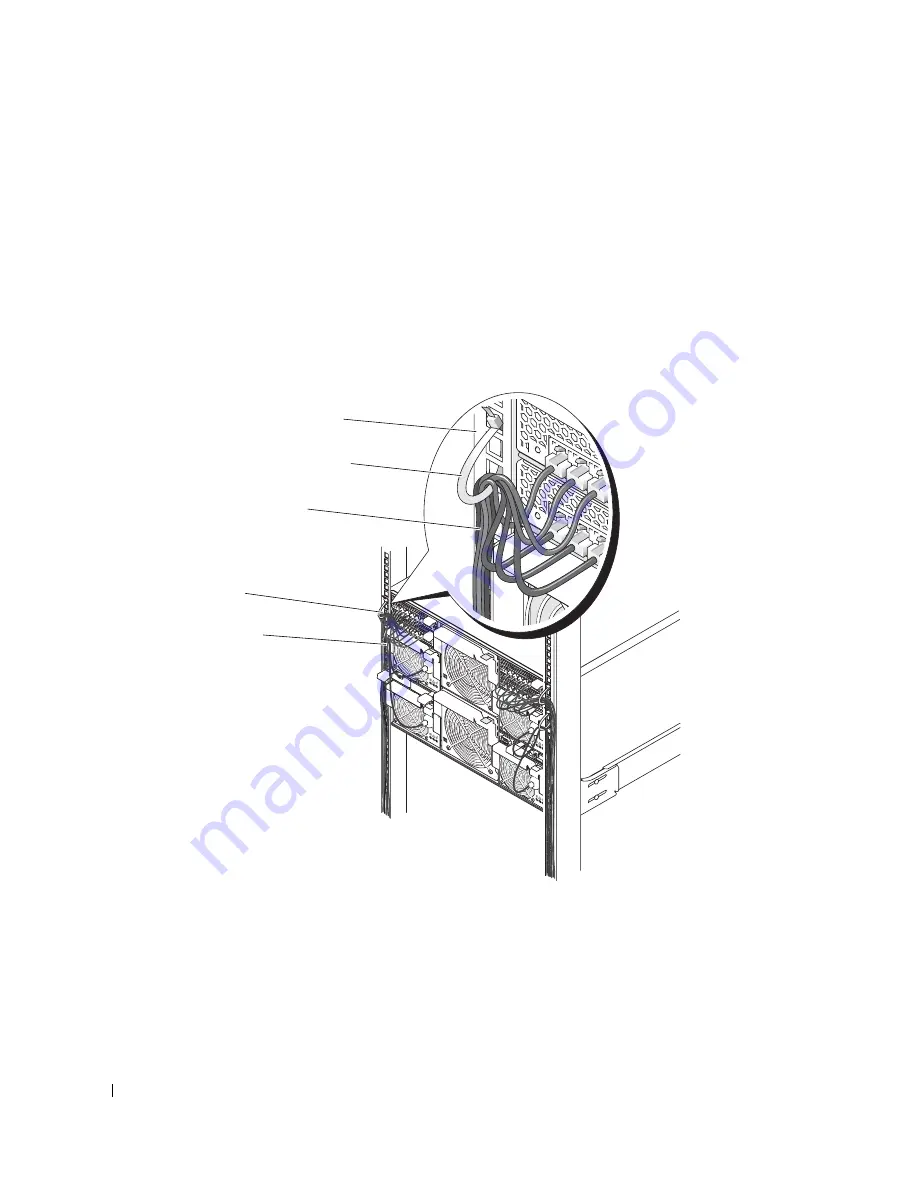
Using the following guidelines, secure the cables to the rack’s back vertical rails using
the four releasable tie-wraps supplied in the rack kit (see Figure 1-8).
–
To improve serviceability and airflow, create two bundles of cables on each side of the
system, keeping the area directly in back of the system as clear of cables as possible.
–
Create separate bundles of cables for the I/O cables and the power cables.
–
If the cables are sufficiently flexible, leave 10–15 cm (4–6 inches) of slack in the cables
between the cable tie and the system, to improve serviceability of the modules.
Figure 1-8.
Securing the Cables to the Rack
Replacing the Rack Doors
See the procedures for replacing doors in the documentation provided with your rack cabinets.
This completes the rack installation of your system.
tie-wraps (4)
cables
vertical rail
I/O cables
power cables
Summary of Contents for PowerEdge 1955
Page 2: ......
Page 3: ...Rack Installation Guide ...
Page 6: ...4 Contents ...
Page 18: ...16 Index 16 Index ...
Page 19: ...Guide d installation du rack ...
Page 22: ...20 Sommaire ...
Page 34: ...32 Guide d installation du rack ...
Page 36: ...34 Index 34 Index ...
Page 37: ...Rack Installationsanleitung ...
Page 40: ...38 Inhalt ...
Page 52: ...50 Rack Installationsanleitung ...
Page 54: ...52 Index 52 Index ...
Page 55: ...ラック取り付けガイド ...
Page 58: ...56 目次 ...
Page 70: ...68 索引 68 索引 ...
Page 71: ...Guía de instalación del rack ...
Page 74: ...72 Contenido ...
Page 86: ...84 Guía de instalación del rack ...
Page 88: ...86 Índice 86 Índice ...


