Connecting and Configuring a J-EX Series Switch (J-Web Procedure)
There are two ways to connect and configure a J-EX Series switch: one method is through
the console using the CLI and the other is using the J-Web interface. This topic describes
the J-Web procedure.
NOTE:
Before you begin the configuration, enable a DHCP client on the
management PC you will connect to the switch so that the switch can obtain
an IP address dynamically.
NOTE:
Read the following steps before you begin the configuration. You
must complete the initial configuration using EZSetup within 10 minutes. The
switch exits EZSetup after 10 minutes and reverts to the factory default
configuration, and the PC loses connectivity to the switch. The LCD displays
a count-down timer when the switch is in initial setup mode.
To connect and configure the switch using the J-Web interface:
1.
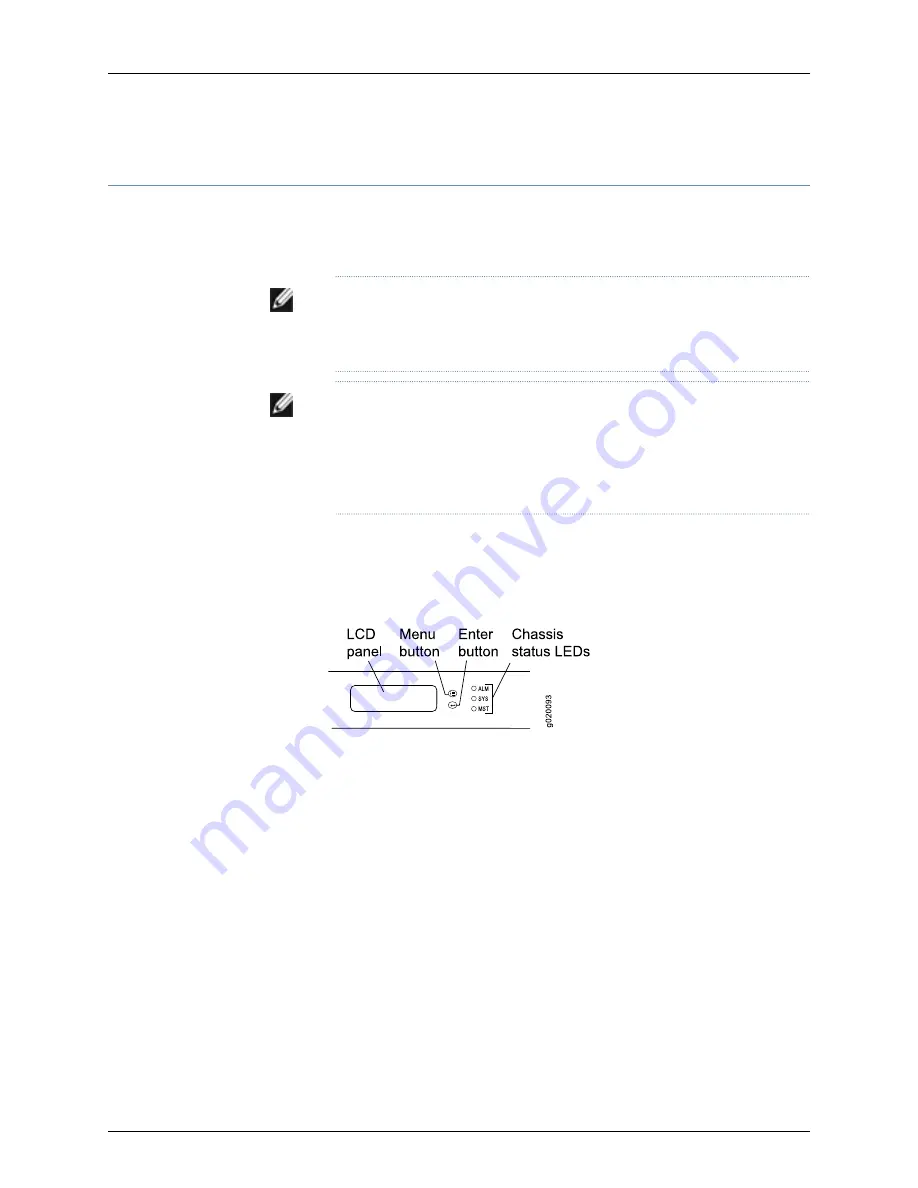
To transition the switch into initial setup mode, use the
Menu
and
Enter
buttons located
to the right of the LCD panel (see Figure 55 on page 133):
Figure 55: LCD Panel in a J-EX4200 Switch
a. Press the
Menu
button until you see
MAINTENANCE MENU
. Then press the
Enter
button.
b. Press
Menu
until you see
ENTER EZSetup
. Then press
Enter
.
If EZSetup does not appear as an option in the menu, select Factory Default to
return the switch to the factory default configuration. EZSetup is displayed in the
menu only when the switch is set to the factory default configuration.
c. Press
Enter
to confirm setup and continue with EZSetup.
2.
Connect the Ethernet cable from the Ethernet port on the PC to port 0 (
ge-0/0/0
)
on the front panel of the switch.
The port is configured as the DHCP server with the default IP address,
192.168.1.1
. The
switch can assign an IP address to the management PC in the IP address range
192.168.1.2
through
192.168.1.253
.
3.
From the PC, open a Web browser, type
http://192.168.1.1
in the address field, and
press Enter.
133
Chapter 12: Performing Initial Configuration
Summary of Contents for PowerConnect J-EX4200
Page 6: ...vi ...
Page 12: ...xii Dell PowerConnect J Series J EX4200 Ethernet Switch Hardware Guide ...
Page 18: ...2 Dell PowerConnect J Series J EX4200 Ethernet Switch Hardware Guide ...
Page 70: ...54 Dell PowerConnect J Series J EX4200 Ethernet Switch Hardware Guide ...
Page 72: ...56 Dell PowerConnect J Series J EX4200 Ethernet Switch Hardware Guide ...
Page 78: ...62 Dell PowerConnect J Series J EX4200 Ethernet Switch Hardware Guide ...
Page 84: ...68 Dell PowerConnect J Series J EX4200 Ethernet Switch Hardware Guide ...
Page 86: ...70 Dell PowerConnect J Series J EX4200 Ethernet Switch Hardware Guide ...
Page 90: ...74 Dell PowerConnect J Series J EX4200 Ethernet Switch Hardware Guide ...
Page 100: ...84 Dell PowerConnect J Series J EX4200 Ethernet Switch Hardware Guide ...
Page 102: ...86 Dell PowerConnect J Series J EX4200 Ethernet Switch Hardware Guide ...
Page 120: ...104 Dell PowerConnect J Series J EX4200 Ethernet Switch Hardware Guide ...
Page 130: ...114 Dell PowerConnect J Series J EX4200 Ethernet Switch Hardware Guide ...
Page 152: ...136 Dell PowerConnect J Series J EX4200 Ethernet Switch Hardware Guide ...
Page 153: ...PART 4 Removing Switch Components Removing Switch Components on page 139 137 ...
Page 154: ...138 Dell PowerConnect J Series J EX4200 Ethernet Switch Hardware Guide ...
Page 167: ...PART 5 Switch and Component Maintenance Routine Maintenance on page 153 151 ...
Page 168: ...152 Dell PowerConnect J Series J EX4200 Ethernet Switch Hardware Guide ...
Page 171: ...PART 6 Troubleshooting Switch Components Troubleshooting Switch Components on page 157 155 ...
Page 172: ...156 Dell PowerConnect J Series J EX4200 Ethernet Switch Hardware Guide ...
Page 175: ...PART 7 Returning Hardware Getting Help on page 161 159 ...
Page 176: ...160 Dell PowerConnect J Series J EX4200 Ethernet Switch Hardware Guide ...
Page 186: ...170 Dell PowerConnect J Series J EX4200 Ethernet Switch Hardware Guide ...
Page 198: ...182 Dell PowerConnect J Series J EX4200 Ethernet Switch Hardware Guide ...
Page 220: ...204 Dell PowerConnect J Series J EX4200 Ethernet Switch Hardware Guide ...
Page 221: ...PART 9 Compliance Information Compliance Information on page 207 205 ...
Page 222: ...206 Dell PowerConnect J Series J EX4200 Ethernet Switch Hardware Guide ...
Page 227: ...Declarations of Conformity for J EX4200 Switches 211 Chapter 21 Compliance Information ...
Page 229: ...PART 10 Index Index on page 215 213 ...
Page 230: ...214 Dell PowerConnect J Series J EX4200 Ethernet Switch Hardware Guide ...
Page 238: ...222 Dell PowerConnect J Series J EX4200 Ethernet Switch Hardware Guide ...


