4
DELL P2419HCB
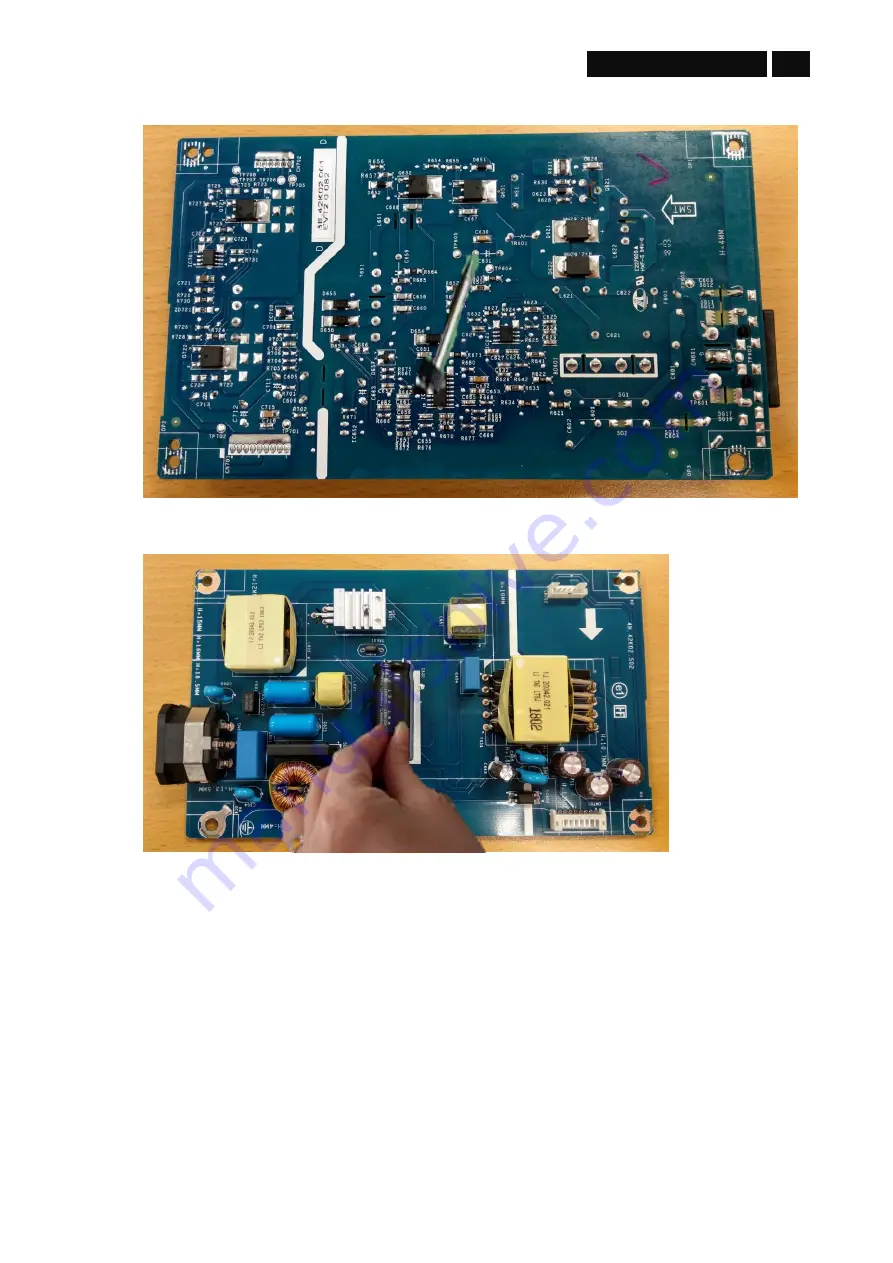
S11-3 Take out bulk cap. pin solder with soldering iron and absorber
S11-4 Lift the bulk cap. up and away from the PCB
Page 1: ...rews Disassemble Rear Cover and Middle Frame according to the sequence as the picture showed Screw Torque 9 1Kgf S4 Tear off the AL foil Pull out Control board cable wire and USB board cable Take down main shielding from middle frame Tear off adhesive tape from LVDS cable Pull out LVDS cable and take off main shielding from panel S5 Unlock 9 screws on middle frame Screw Torque 3 5 4 0Kgf S6 Unlock...
Page 2: ...e middle frame and bezel from panel S8 Disassemble Mylar from Main Shielding S9 Unlock 8 PCB screws Screw Torque 8 9kgf S10 Take out I F Board SPS Board LED Driver Board from Main Shielding Pull out I F board cable and LED Driver board cable from SPS Board ...
Page 3: ... P2419HCB S11 Remove electrolyte capacitors red mark from printed circuit boards S11 1 Cut the glue between bulk cap and PCB with a knife S11 2 Ensure cutting path within the glue don t touch bulk cap or PCB ...
Page 4: ...4 DELL P2419HCB S11 3 Take out bulk cap pin solder with soldering iron and absorber S11 4 Lift the bulk cap up and away from the PCB ...
Page 5: ...containing BFR No used Component and waste contain asbestos No used CRT No used Component contain CFC HCFC HFC and HC No used Gas discharge lamps No used LCD display 100 cm2 Product has an LCD greater than 100 cm2 External electric cable Product has external cables Component contain refractory ceramic fibers No used Component contain radio active substances No used Electrolyte capacitors height 25...