before working inside your computer
.
2. Remove the
.
3. Remove the
.
About this task
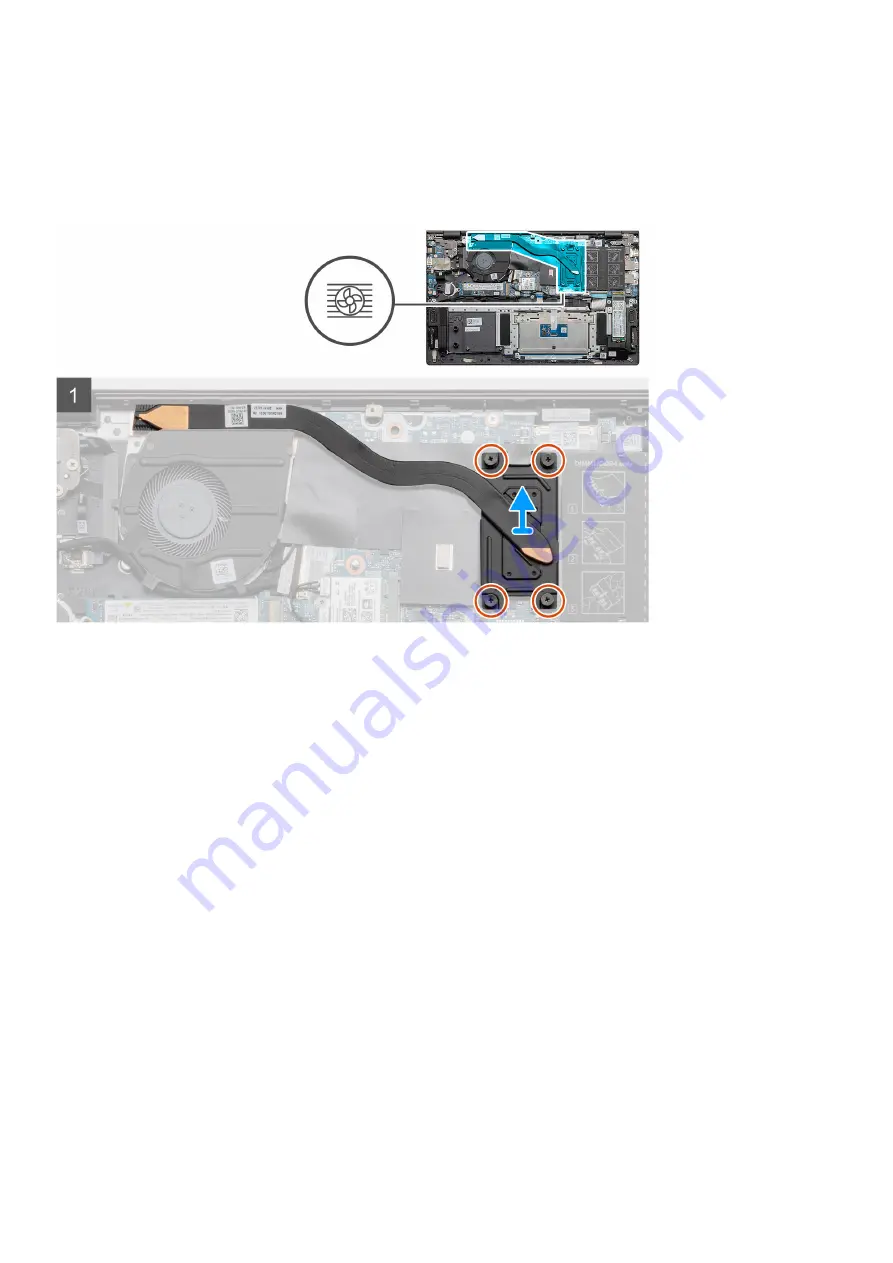
The figure indicates the location of the heat sink and provides a visual representation of the removal procedure.
Steps
1. In sequential order (as indicated on the heat sink), loosen the four captive screws that secure the heat sink to the system
board.
2. Lift and remove the heat sink off the palm-rest and keyboard assembly.
Installing the heat sink - UMA
Prerequisites
If you are replacing a component, remove the existing component before performing the installation procedure.
About this task
The figure indicates the location of the heat sink and provides a visual representation of the installation procedure.
38
Disassembly and reassembly
Summary of Contents for P102F
Page 16: ...16 Disassembly and reassembly ...
Page 45: ...Disassembly and reassembly 45 ...
Page 47: ...Disassembly and reassembly 47 ...
Page 56: ...56 Disassembly and reassembly ...
Page 57: ...Disassembly and reassembly 57 ...
Page 59: ...Disassembly and reassembly 59 ...
Page 79: ...The Flash BIOS opens 4 Click Flash from file System setup 79 ...
Page 81: ...7 Click Update BIOS for the system to reboot and flash the BIOS System setup 81 ...


