4-12
Dell OptiPlex GXa and OptiPlex NX Systems Service Manual
S
ystem Power Supply
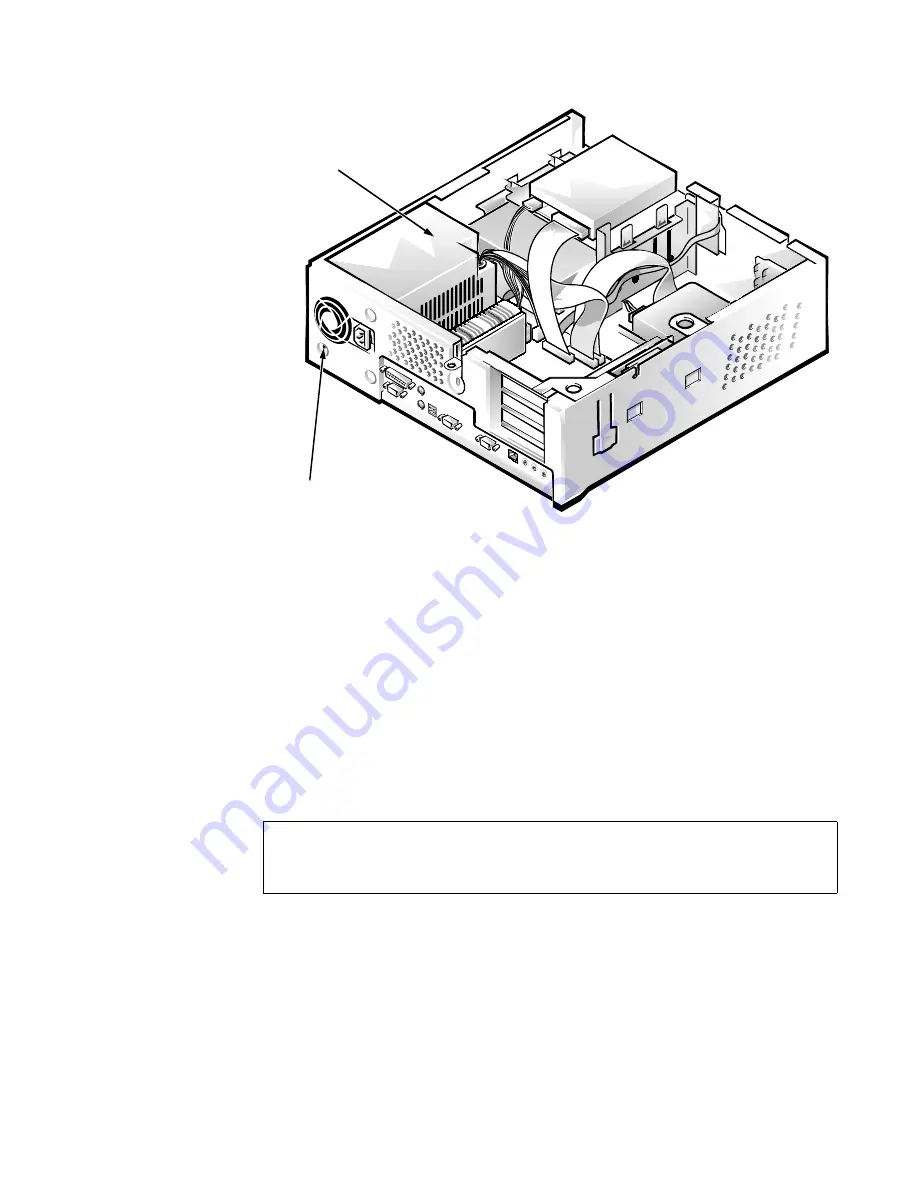
Figure 4-10. System Power-Supply Removal
To remove the system power supply, follow these steps:
1. Disconnect the AC power cable from the back of the power supply.
2. Disconnect the DC power cables from the system board and the drives.
3. Remove the power-supply mounting screw at the back of the chassis.
4. Slide the system power supply forward until it stops; then lift it from
the chassis.
When you replace the system power supply, place it down inside the chassis and
against the right side of the chassis. Then slide the system power supply toward
the back of the chassis, and hook the tabs into the right side of the power supply.
NOTE: When replacing the power supply on an enhanced manageability
system, ensure that the replacement power supply is an EM power supply.
WARNING: The voltage select switch, located on the back of the power
supply assembly, must be set to the correct operating voltage (115 V or
230 V) before the power cable is plugged into an AC outlet.
power supply
power-supply
mounting screw
Summary of Contents for OptiPlex GXa
Page 1: ... HOO 2SWL3OH D DQG 2SWL3OH 1 6 VWHPV 6 59 0 18 ...
Page 31: ...System Overview 1 19 System Board Jumpers Figure 1 16 System Board Jumpers ...
Page 39: ...System Overview 1 27 Figure 1 21 DC Power Cables for the Low Profile Computer P5 P4 P3 P2 P1 ...
Page 66: ...2 12 Dell OptiPlex GXa and OptiPlex NX Systems Service Manual ...
Page 148: ...6 28 Dell OptiPlex GXa and OptiPlex NX Systems Service Manual ...
Page 166: ...7 18 Dell OptiPlex GXa and OptiPlex NX Systems Service Manual ...
Page 172: ...A 6 Dell OptiPlex GXa and OptiPlex NX Systems Service Manual ...
Page 180: ......
Page 181: ... www dell com Printed in the U S A P N 51555 Rev A01 ...


