Steps
1. Align the rubber feet with the slots on the bottom cover and push it firmly in place.
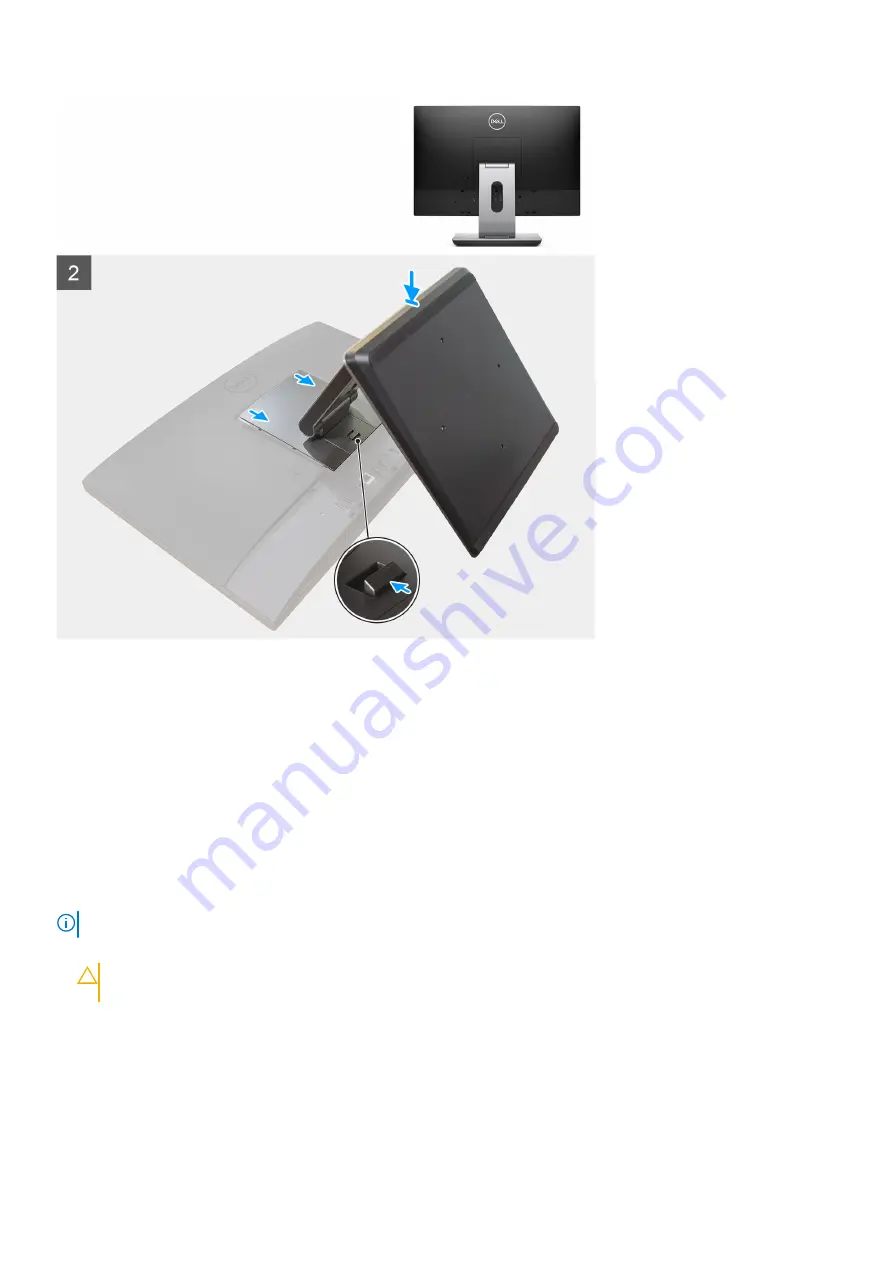
2. Align the tabs on the stand with the slots on the back cover.
3. Snap the stand until it clicks into place.
Next steps
After working inside your computer
.
Removing the height adjustable stand
Prerequisites
NOTE:
Follow the same procedure to remove the Height Adjustable Stand with Optical Disk Drive.
Before working inside your computer
.
CAUTION:
When servicing the system, place it on an elevated, clean, and flat surface. Dell recommends
removing the stand to avoid accidental damage to the system display during servicing.
About this task
The following image provides a visual representation of the height adjustable stand removal procedure.
Removing and installing components
17


