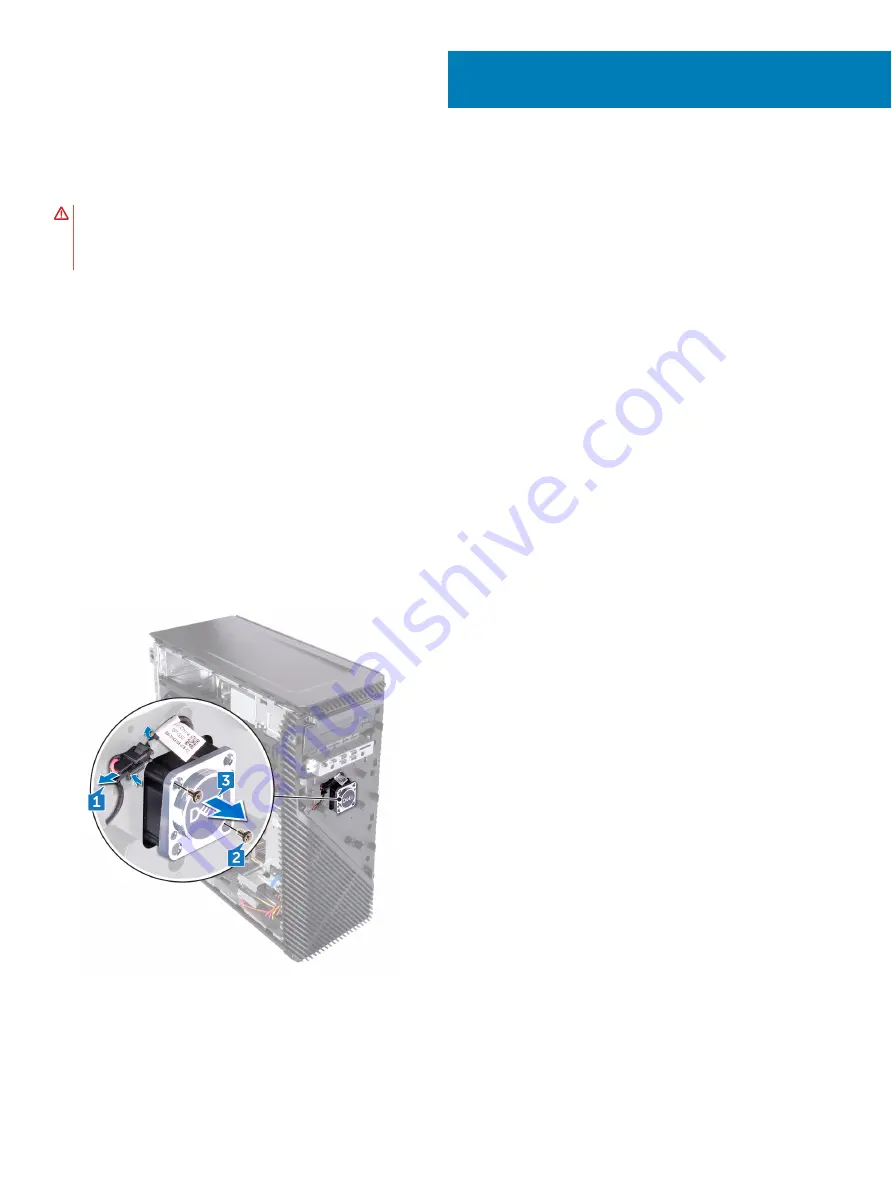
Removing the logo board
WARNING:
Before working inside your computer, read the safety information that shipped with your computer and follow the
steps in
Before working inside your computer
. After working inside your computer, follow the instructions in
. For more safety best practices, see the Regulatory Compliance home page at
Topics:
•
•
Prerequisites
1
Remove the
2
Remove the
Procedure
1
Disconnect the logo-board cable from the logo board.
2
Disconnect the two screws (M3x5) that secures the logo board to the chassis.
3
Remove the logo board from the chassis.
51
Removing the logo board
87
Summary of Contents for Inspiron 5676
Page 23: ...Removing the memory module 23 ...
Page 26: ...26 Removing the solid state drive ...
Page 30: ...30 Removing the 3 5 inch hard drive ...
Page 32: ...Post requisites Replace the right side cover 32 Replacing the 3 5 inch hard drive ...
Page 34: ...34 Removing the 2 5 inch hard drive ...
Page 36: ...Post requisites Replace the right side cover 36 Replacing the 2 5 inch hard drive ...
Page 46: ...46 Removing the wireless card ...
Page 54: ...Post requisites Replace the right side cover 54 Replacing the power supply unit ...
Page 58: ...58 Removing the left side cover ...
Page 64: ...64 Removing the processor cooling assembly ...
Page 72: ...72 Removing the processor ...
Page 80: ...80 Removing the front I O panel ...
Page 84: ...84 Removing the front panel light board ...
Page 94: ...94 Removing the power button board ...
Page 98: ...98 Removing the front bezel ...
Page 100: ...8 Replace the right side cover 100 Replacing the front bezel ...
Page 104: ...4 Replace the power supply unit 5 Replace the right side cover 104 Replacing the rear cover ...


