background image

883964-01 Rev. A
March 2014
©2014 Dell Inc. All Rights Reserved.

3.

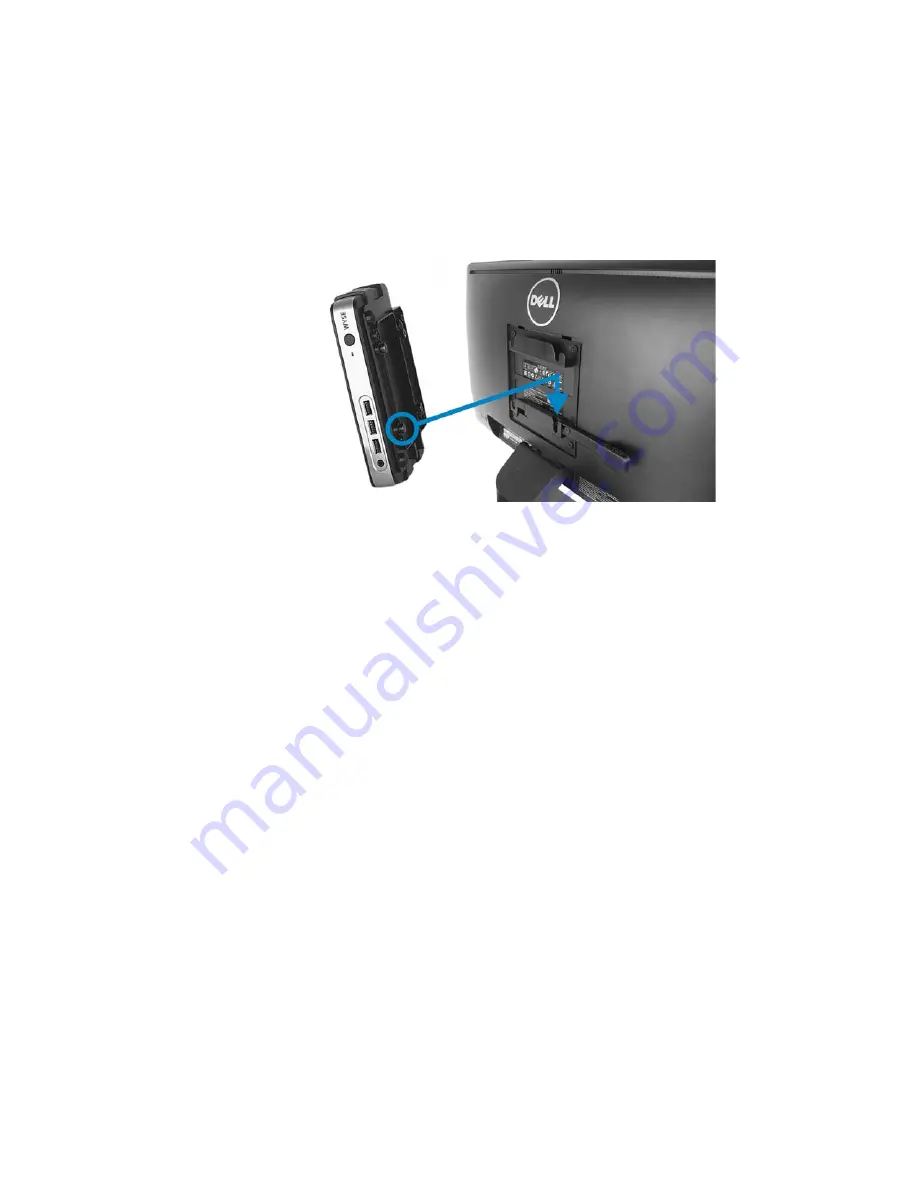
Place the monitor in the upright standing position. Then, slightly tip the cloud client 
to align and insert the protruding shoulder screws into the four cutout areas of the 
bracket. The security latch will move automatically when the shoulder screws are 
inserted. 

Tip

: If you need to remove the cloud client, gently pull the security latch slightly to 

the right to release the shoulder screws and to lift the cloud client from the bracket 
cutouts.

4.

Make all desired connections, and then connect the power adapter’s AC power 
cable to an electrical outlet.

Summary of Contents for E Series

Page 1: ...onitor base extension must be used Note If using an E2414 Monitor the P series mounting bracket must be used Wyse Cloud Clients Using this Bracket Wyse models D class P25 and T class may use the Dell E Series Monitor VESA Mounting Bracket Shown below are D and T class on monitors having the attached base extension Note Mount the cloud client only as shown improper orientation where the back panel ...

Page 2: ...s either a plastic base as shown or a metal base If your stand has the metal base use the longer screws from the Base Extension kit If your stand has the plastic base use the shorter screws Mounting the D Class to the E Series Monitor Use the following instructions to mount the D class cloud client to the Dell E Series Monitor VESA Mounting Bracket 1 Remove the cloud client from its horizontal or ...

Page 3: ... edge 3 Place the monitor in the upright standing position Then slightly tip the cloud client to align and insert the four protruding shoulder screws into the four cutout areas of the bracket The security latch will move automatically when the shoulder screws are inserted Tip If you need to remove the cloud client gently pull the security latch slightly to the right to release the shoulder screws ...

Page 4: ...hillips head screwdriver attach one of the four 4 shoulder screws through the outside screw hole and into the nut do not over tighten Repeat for remaining three nuts and shoulder screws c Finally insert the cloud client into the stand bracket as shown with the power button at the top and the extended plastic ledge on the opposite side 2 Remove the four 4 VESA screws from the back of the monitor an...

Page 5: ... the four cutout areas of the bracket The security latch will move automatically when the shoulder screws are inserted Tip If you need to remove the cloud client gently pull the security latch slightly to the right to release the shoulder screws and to lift the cloud client from the bracket cutouts 4 Make all desired connections and then connect the power adapter s AC power cable to an electrical ...

Reviews: