background image

Dell 1909W Flat Panel Monitor User's Guide

file:///T|/htdocs/monitors/1909W/en/ug/about.htm[11/8/2012 2:53:29 PM]

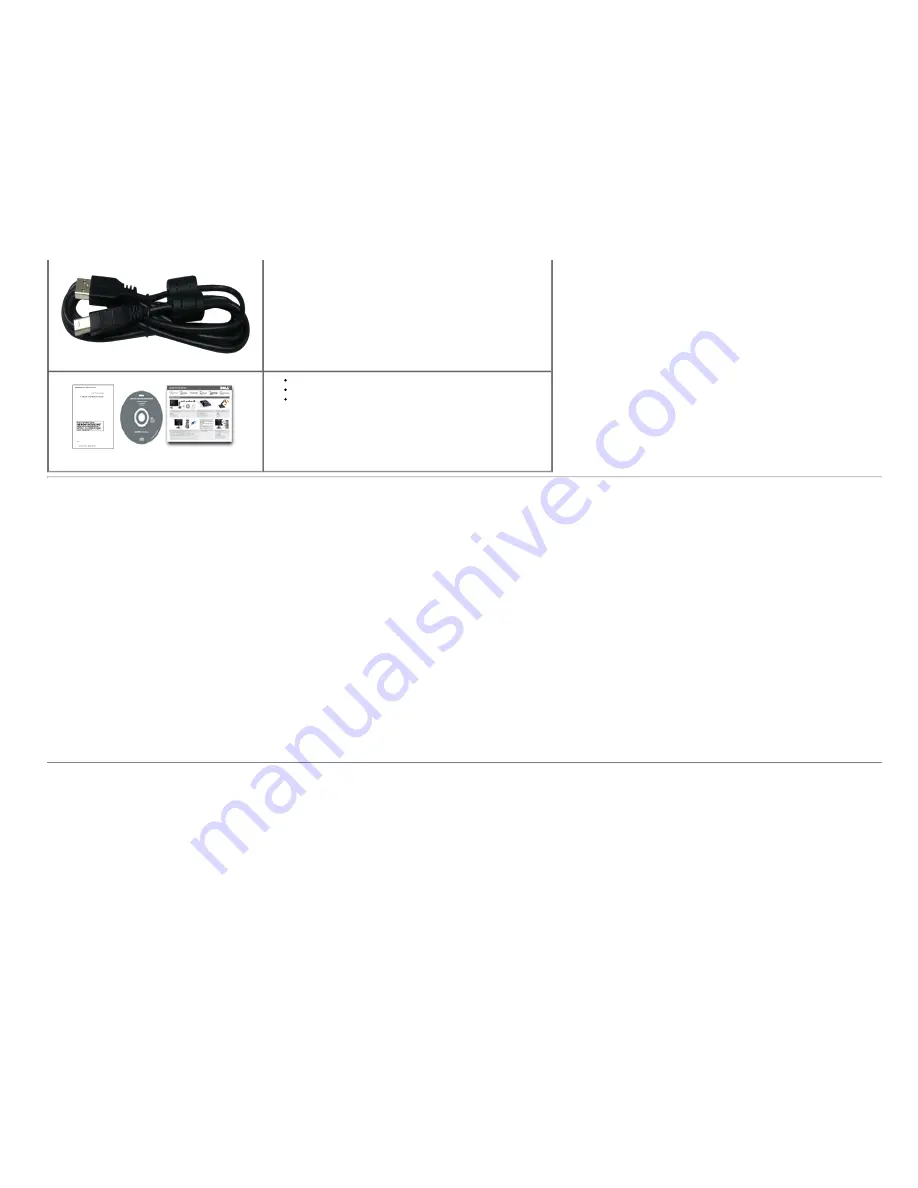
Drivers and Documentation

 media

Quick Setup Guide

Safety Information

Product Features

The 

1909W 

flat panel display has an active matrix, thin-film transistor (TFT), liquid crystal display (LCD). The monitor features include:

 19-inch (482.6 mm) viewable area display (Measured diagonally) .

 1440x900 resolution, plus full-screen support for lower resolutions.

 Wide viewing angle to allow viewing from a sitting or standing position, or while moving from side-to-side.

 Tilt, Swivel, Vertical Extension and rotate adjustment capabilities.

 Removable pedestal and Video Electronics Standards Association (VESA) 100 mm mounting holes for flexible mounting solutions.

 Plug and play capability if supported by your system.

 On-Screen Display (OSD) adjustments for ease of set-up and screen optimization.

 Software and documentation media which includes an information file (INF), Image color Matching File (ICM), and product documentation.

 Energy Saver feature for Energy Star compliance.

 Security lock slot.

 Asset Management Capable.

 EPEAT™ GOLD compliant.

Identifying Parts and Controls

Front View

Summary of Contents for 1909W - UltraSharp - 19" LCD Monitor

Page 1: ...s in any manner whatsoever without the written permission of Dell Inc is strictly forbidden Trademarks used in this text Dell and the DELL logo are trademarks of Dell Inc Microsoft and Windows are either trademarks or registered trademarks of Microsoft Corporation in the United States and or other countries Adobe is a trademark of Adobe Systems Incorporated which may be registered in certain juris...

Page 2: ...tenance Guidelines Package Contents Your monitor ships with the components shown below Ensure that you have received all the components and contact Dell if something is missing NOTE Some items may be optional and may not ship with your Monitor Some features or media may not be available in certain countries NOTE Stand and cables are not included when purchased with OptiPlexTM USFF 780 OptiPlexTM S...

Page 3: ... Flat Panel Monitor User s Guide file T htdocs monitors 1909W en ug about htm 11 8 2012 2 53 29 PM Power Cable VGA Cable attached to the monitor DVI Cable USB up stream cable enables the USB ports on the monitor ...

Page 4: ...w viewing from a sitting or standing position or while moving from side to side Tilt Swivel Vertical Extension and rotate adjustment capabilities Removable pedestal and Video Electronics Standards Association VESA 100 mm mounting holes for flexible mounting solutions Plug and play capability if supported by your system On Screen Display OSD adjustments for ease of set up and screen optimization So...

Page 5: ... Guide file T htdocs monitors 1909W en ug about htm 11 8 2012 2 53 29 PM Front View Front panel controls Label Description 1 Brightness Contrast 2 Automatic adjust 3 Input source Select 4 Menu 5 Power with power light indicator Back View ...

Page 6: ...re your monitor 3 Dell Soundbar mounting brackets To attach the optional Dell Soundbar 4 Stand Release Button To press to release the stand 5 Cable management slot To organize cables by placing them through the slot 6 label compartment To pull out to view labels Note The regulatory rating label and barcode serial number label is revealed when plate is pulled out from USB compartment Label View Mon...

Page 7: ...egulatory marks Monitor rear view with pull out card inserted back to provide a clean back view Label Description Use 1 Barcode serial number label To contact Dell for technical support 2 Regulatory label Lists the regulatory approvals Note The regulatory rating label and barcode serial number label is revealed when plate is pulled out from USB compartment Side View ...

Page 8: ...Dell 1909W Flat Panel Monitor User s Guide file T htdocs monitors 1909W en ug about htm 11 8 2012 2 53 29 PM Left view Right view Label Description 1 USB downstream ports Bottom View ...

Page 9: ...ndbar power connector 3 DVI connector 4 VGA connector 5 USB upstream port 6 USB downstream ports Monitor Specifications Flat Panel Specifications Screen type Active matrix TFT LCD Panel type TN Screen dimensions 19 inches 19 inch viewable image size Preset display area 408 24 H X255 15 V Horizontal 408 24 mm 16 08 inches Vertical 255 15 mm 10 05 inches Pixel pitch 0 2835 mm ...

Page 10: ...ngle 160 vertical typical 160 horizontal typical Luminance output 300 CD m typical Contrast ratio 1000 to 1 typical Faceplate coating Antiglare with hard coating 3H Backlight CCFL 2 edgelight system Response Time 5 ms typical Color Gamut 83 1909W color gamut typical is based on CIE1976 83 and CIE1931 72 test standards ...

Page 11: ...Dell 1909W Flat Panel Monitor User s Guide file T htdocs monitors 1909W en ug about htm 11 8 2012 2 53 29 PM ...

Page 12: ...Dell 1909W Flat Panel Monitor User s Guide file T htdocs monitors 1909W en ug about htm 11 8 2012 2 53 29 PM ...

Page 13: ...Dell 1909W Flat Panel Monitor User s Guide file T htdocs monitors 1909W en ug about htm 11 8 2012 2 53 29 PM ...

Page 14: ...Dell 1909W Flat Panel Monitor User s Guide file T htdocs monitors 1909W en ug about htm 11 8 2012 2 53 29 PM ...

Page 15: ...ion Specifications Horizontal scan range 30 kHz to 83 kHz automatic Vertical scan range 56 Hz to 75 Hz automatic Optimal preset resolution 1440 X 900 at 60 Hz Highest preset resolution 1440 x 900 at 60 Hz Supported Video Modes Video display capabilities DVI playback 480i 480p 576i 576p 720p 1080i 1080P Supports HDCP ...

Page 16: ...Dell 1909W Flat Panel Monitor User s Guide file T htdocs monitors 1909W en ug about htm 11 8 2012 2 53 29 PM ...

Page 17: ...Dell 1909W Flat Panel Monitor User s Guide file T htdocs monitors 1909W en ug about htm 11 8 2012 2 53 29 PM ...

Page 18: ...Dell 1909W Flat Panel Monitor User s Guide file T htdocs monitors 1909W en ug about htm 11 8 2012 2 53 29 PM ...

Page 19: ...Dell 1909W Flat Panel Monitor User s Guide file T htdocs monitors 1909W en ug about htm 11 8 2012 2 53 29 PM ...

Page 20: ...Hz Sync Polarity Horizontal Vertical VESA 720 x 400 31 5 70 0 28 3 VESA 640 x 480 31 5 60 0 25 2 VESA 640 x 480 37 5 75 0 31 5 VESA 800 x 600 37 9 60 3 40 VESA 800 x 600 46 9 75 0 40 VESA 1024 x 768 48 4 60 0 65 0 VESA 1024 x 768 60 0 75 0 78 8 VESA 1152 x 864 67 5 75 0 108 0 VESA 1280 x 800 61 6 60 0 83 5 VESA 1280 x 1024 64 0 60 0 108 0 VESA 1280 x 1024 80 0 75 0 135 0 VESA 1440 x 900 56 0 60 0 ...

Page 21: ...Dell 1909W Flat Panel Monitor User s Guide file T htdocs monitors 1909W en ug about htm 11 8 2012 2 53 29 PM ...

Page 22: ...ve polarity at 75 ohm input impedance Digital DVI D TMDS 600mV for each differential line positive polarity at 50 ohm input impedance Synchronization input signals Separate horizontal and vertical synchronizations polarity free TTL level SOG Composite SYNC on green AC input voltage frequency current 100 to 240 VAC 50 or 60 Hz 3 Hz 1 5A Max Inrush current 120 V 30 A Max 240 V 60 A Max ...

Page 23: ...Dell 1909W Flat Panel Monitor User s Guide file T htdocs monitors 1909W en ug about htm 11 8 2012 2 53 29 PM ...

Page 24: ... T htdocs monitors 1909W en ug about htm 11 8 2012 2 53 29 PM Physical Characteristics Connector type 15 pin D subminiature blue connector DVI D white connector Signal cable type Digital Detachable DVI D Solid pins shipped detached from the monitor ...

Page 25: ...s 175 64 mm Dimensions without stand Height 11 42 inches 289 77 mm Width 17 45 inches 442 87 mm Depth 2 32 inches 59 00 mm Stand dimensions Height Compressed 9 48 inches 240 80 mm Height Extended 14 22 inches 360 80 mm Width 9 85 inches 249 92 mm Depth 6 92 inches 175 64 mm Weight Weight with packaging 14 09 lbs 6 40 kg Weight with stand assembly and cables 12 34 lbs 5 60 kg Weight without stand a...

Page 26: ...Dell 1909W Flat Panel Monitor User s Guide file T htdocs monitors 1909W en ug about htm 11 8 2012 2 53 29 PM ...

Page 27: ...Dell 1909W Flat Panel Monitor User s Guide file T htdocs monitors 1909W en ug about htm 11 8 2012 2 53 29 PM ...

Page 28: ...Dell 1909W Flat Panel Monitor User s Guide file T htdocs monitors 1909W en ug about htm 11 8 2012 2 53 29 PM ...

Page 29: ...Dell 1909W Flat Panel Monitor User s Guide file T htdocs monitors 1909W en ug about htm 11 8 2012 2 53 29 PM ...

Page 30: ...Dell 1909W Flat Panel Monitor User s Guide file T htdocs monitors 1909W en ug about htm 11 8 2012 2 53 29 PM ...

Page 31: ...Dell 1909W Flat Panel Monitor User s Guide file T htdocs monitors 1909W en ug about htm 11 8 2012 2 53 29 PM ...

Page 32: ... Operating 5 to 35 C 41 to 95 F Non operating Storage 20 to 60 C 4 to 140 F Shipping 20 to 60 C 4 to 140 F Humidity Operating 10 to 80 non condensing Non operating Storage 5 to 90 non condensing Shipping 5 to 90 non condensing Altitude Operating 3 657 60 m 12 000 ft max Non operating 12 192 m 40 000 ft max Thermal dissipation 256 08 BTU hour maximum ...

Page 33: ...Dell 1909W Flat Panel Monitor User s Guide file T htdocs monitors 1909W en ug about htm 11 8 2012 2 53 29 PM 119 50 BTU hour typical ...

Page 34: ...Dell 1909W Flat Panel Monitor User s Guide file T htdocs monitors 1909W en ug about htm 11 8 2012 2 53 29 PM ...

Page 35: ...Dell 1909W Flat Panel Monitor User s Guide file T htdocs monitors 1909W en ug about htm 11 8 2012 2 53 29 PM ...

Page 36: ...er Indicator Power Consumption Normal operation Active Active Active Blue 25 W typical Active off mode Inactive Inactive Blanked Amber Less than 1 W Switch off Off Less than 1 W The OSD will only function in the normal operation mode When the menu or plus buttons are pressed in Active off mode one of the following messages will be displayed Analog Input In Power Save Mode Press Computer Power Butt...

Page 37: ...Dell 1909W Flat Panel Monitor User s Guide file T htdocs monitors 1909W en ug about htm 11 8 2012 2 53 29 PM ...

Page 38: ...Dell 1909W Flat Panel Monitor User s Guide file T htdocs monitors 1909W en ug about htm 11 8 2012 2 53 29 PM ...

Page 39: ...Dell 1909W Flat Panel Monitor User s Guide file T htdocs monitors 1909W en ug about htm 11 8 2012 2 53 29 PM ...

Page 40: ...Dell 1909W Flat Panel Monitor User s Guide file T htdocs monitors 1909W en ug about htm 11 8 2012 2 53 29 PM Pin Assignments VGA Connector ...

Page 41: ...Number 15 pin Side of the Connected Signal Cable 1 Video Red 2 Video Green 3 Video Blue 4 GND 5 Self test 6 GND R 7 GND G 8 GND B 9 Computer 5V 3 3V 10 GND sync 11 GND 12 DDC data 13 H sync 14 V sync 15 DDC clock DVI Connector Pin Number 24 pin Side of the Connected Signal Cable 1 TMDS RX2 2 TMDS RX2 3 TMDS Ground ...

Page 42: ... 8 2012 2 53 29 PM 4 Floating 5 Floating 6 DDC Clock 7 DDC Data 8 Floating 9 TMDS RX1 10 TMDS RX1 11 TMDS Ground 12 Floating 13 Floating 14 5V 3 3V power 15 Self test 16 Hot Plug Detect 17 TMDS RX0 18 TMDS RX0 19 TMDS Ground 20 Floating 21 Floating 22 TMDS Ground 23 TMDS Clock 24 TMDS Clock ...

Page 43: ...Dell 1909W Flat Panel Monitor User s Guide file T htdocs monitors 1909W en ug about htm 11 8 2012 2 53 29 PM ...

Page 44: ...Dell 1909W Flat Panel Monitor User s Guide file T htdocs monitors 1909W en ug about htm 11 8 2012 2 53 29 PM ...

Page 45: ...Dell 1909W Flat Panel Monitor User s Guide file T htdocs monitors 1909W en ug about htm 11 8 2012 2 53 29 PM ...

Page 46: ...Dell 1909W Flat Panel Monitor User s Guide file T htdocs monitors 1909W en ug about htm 11 8 2012 2 53 29 PM ...

Page 47: ...Dell 1909W Flat Panel Monitor User s Guide file T htdocs monitors 1909W en ug about htm 11 8 2012 2 53 29 PM ...

Page 48: ...Dell 1909W Flat Panel Monitor User s Guide file T htdocs monitors 1909W en ug about htm 11 8 2012 2 53 29 PM ...

Page 49: ...Dell 1909W Flat Panel Monitor User s Guide file T htdocs monitors 1909W en ug about htm 11 8 2012 2 53 29 PM ...

Page 50: ...Dell 1909W Flat Panel Monitor User s Guide file T htdocs monitors 1909W en ug about htm 11 8 2012 2 53 29 PM ...

Page 51: ...Dell 1909W Flat Panel Monitor User s Guide file T htdocs monitors 1909W en ug about htm 11 8 2012 2 53 29 PM ...

Page 52: ...Dell 1909W Flat Panel Monitor User s Guide file T htdocs monitors 1909W en ug about htm 11 8 2012 2 53 29 PM ...

Page 53: ...Dell 1909W Flat Panel Monitor User s Guide file T htdocs monitors 1909W en ug about htm 11 8 2012 2 53 29 PM ...

Page 54: ...Dell 1909W Flat Panel Monitor User s Guide file T htdocs monitors 1909W en ug about htm 11 8 2012 2 53 29 PM ...

Page 55: ...Dell 1909W Flat Panel Monitor User s Guide file T htdocs monitors 1909W en ug about htm 11 8 2012 2 53 29 PM ...

Page 56: ...Dell 1909W Flat Panel Monitor User s Guide file T htdocs monitors 1909W en ug about htm 11 8 2012 2 53 29 PM ...

Page 57: ...e system The monitor automatically provides the computer system with its Extended Display Identification Data EDID using Display Data Channel DDC protocols so the system can configure itself and optimize the monitor settings Most monitor installations are automatic you can select different settings if desired For more information about changing the monitor settings see Operating the Monitor ...

Page 58: ...Dell 1909W Flat Panel Monitor User s Guide file T htdocs monitors 1909W en ug about htm 11 8 2012 2 53 29 PM ...

Page 59: ...side of your monitor NOTE This monitor supports High Speed Certified USB 2 0 interface Transfer speed Data Rate Power Consumption High speed 480 Mbps 2 5W Max each port Full speed 12 Mbps 2 5W Max each port Low speed 1 5 Mbps 2 5W Max each port USB Upstream Connector Pin Number 4 pin Side of the Connector 1 DMU 2 VCC 3 DPU 4 GND USB Downstream Connector Pin Number 4 Pin Side of the Signal Cable 1 ...

Page 60: ... see Dell Support site at support dell com Maintenance Guidelines Cleaning Your Monitor WARNING Read and follow the safety instructions before cleaning the monitor WARNING Before cleaning the monitor unplug the monitor power cable from the electrical outlet For best practices follow the instructions in the list below while unpacking cleaning or handling your monitor To clean your antistatic screen...

Page 61: ...OTE The stand is detached when the monitor is shipped from the factory NOTE This is applicable for a monitor with a stand When the OptiPlexTM USFF 780 OptiPlexTM SFF 980 AIO stand is bought please refer to the respective AIO stand setup guide for set up instructions To attach the monitor stand 1 Place the stand on a flat surface 2 Fit the groove on the back of the monitor to the two tabs on the up...

Page 62: ... the computer 1 Turn off your computer and disconnect the power cable 2 Connect either the white digital DVI D or the blue analog VGA display connector cable to the corresponding video port on the back of your computer Do not use both cables on the same computer Use both the cables only when they are connected to two different computers with appropriate video systems Connecting the white DVI cable...

Page 63: ...Connect the upstream USB cable cable supplied to the monitor upstream port and then to the appropriate USB port on your computer see bottom view for details 2 Connect USB peripherals to the downstream USB ports side or bottom on the monitor See side or bottom view for details 3 Plug the power cables for your computer and monitor into a nearby outlet 4 Turn on the monitor and the computer If your m...

Page 64: ...ot use with any device other than Dell Soundbar NOTE Soundbar Power Connector 12V DC output is for optional Dell Soundbar only 1 Working from the rear of the monitor attach the Soundbar aligning the two slots with the two tabs along the bottom rear of the monitor 2 Slide the Soundbar to the left until it snaps into place 3 Connect the soundbar to the Audio Power DC out socket see bottom view for d...

Page 65: ...ed on a clean surface NOTE This is applicable for a monitor with a stand When the OptiPlexTM USFF 780 OptiPlexTM SFF 980 AIO stand is bought please refer to the respective AIO stand setup guide for set up instructions To remove the stand 1 Rotate the stand to allow access to the stand release button 2 Press and hold the Stand release button 3 Lift the stand up and away from the monitor Back to Con...

Page 66: ...m Using the Front Panel Use the control buttons on the front of the monitor to adjust the characteristics of the image being displayed As you use these buttons to adjust the controls an OSD shows the numeric values of the characteristics as they change Front panel Button Description A Brightness Contrast Use this button to directly access the Brightness Contrast menu or to increase the values of t...

Page 67: ... Adjust Down Use this button to select the input source or to decrease the values of the selected menu option Use the Input source button to select one of the two different video signals that may be connected to your monitor VGA input DVI D input or or If either VGA or DVI D input is selected and both VGA and DVI D cables are not connected a floating dialog box as shown below appears or D Menu Use...

Page 68: ...stem NOTE If you change the settings and then either proceed to another menu or exit the OSD menu the monitor automatically saves those changes The changes are also saved if you change the settings and then wait for the OSD menu to disappear 1 Push the MENU button to launch the OSD menu and display the main menu Main Menu for Analog VGA Input or Main Menu for DVI Input ...

Page 69: ...ide bar and then use the and buttons according to the indicators on the menu to make your changes 6 Select the Menu Exit option to return to the main menu or exit the OSD menu Icon Menu and Submenus Description BRIGHTNESS CONTRAST Use this menu to activate Brightness Contrast adjustment Brightness Brightness adjusts the luminance of the backlight Push the button to increase brightness and push the...

Page 70: ...he analog VGA connector INPUT SOURCE Use the INPUT SOURCE menu to select between different video signals that may be connected to your monitor AUTO Select Push to select the Auto Select the monitor will auto detect either VGA input or DVI D input VGA Select VGA input when you are using the analog VGA connector Push to select the VGA input source DVI D Select DVI D input when you are using the Digi...

Page 71: ...w media application like photo clip etc via PC choose Multimedia preset If you play a game in PC choose Gaming preset If you prefer a lower color temperature 5700K choose Warm preset If you prefer a higher color temperature choose Cool preset Custom R G B Preset offers a range of 6500K colors Choose Standard to utilize the panel native color format Select Warm preset for a reddish tint This color ...

Page 72: ...een or purple This is used to adjust the desired flesh tone color Use or to adjust the hue from 0 to 100 Push to increase the green shade of the video image Push to decrease the purple shade of the video image NOTE Hue adjustment is available only for video input Saturation This feature can adjust the color saturation of the video image Use or to adjust the saturation from 0 to 100 Push to increas...

Page 73: ...ock The Phase and Pixel Clock adjustments allow you to adjust your monitor to your preference These settings are accessed through the main OSD menu by selecting Image Settings Use the or buttons to adjust for best image quality Phase If satisfactory results are not obtained using the Phase adjustment use the Pixel Clock coarse adjustment and then use Phase fine again NOTE Pixel Clock and Phase Adj...

Page 74: ...s to adjustments When Lock is selected no user adjustments are allowed All buttons are locked except the menu button NOTE When the OSD is locked pressing the menu button takes the user directly to the OSD settings menu with OSD Lock selected Select Unlock to unlock and allow user access to all applicable settings Menu Rotation Rotates the OSD by 90 degrees counter clockwise Your can adjust the men...

Page 75: ... image retention the program may take some time to run You can enable this feature by selecting Enable Factory Reset Reset all OSD settings to the factory preset values Note This monitor has a build in feature to automatically calibrate the brightness to compensate for CCFL aging OSD Warning Messages When the monitor does not support a particular resolution mode you will see the following message ...

Page 76: ... is receiving from the computer See Monitor Specifications for the Horizontal and Vertical frequency ranges addressable by this monitor Recommended mode is 1440 x 900 You will see the following message before the DDC CI function is disabled When monitor enters Power Save mode the following message appears Activate the computer and wake up the monitor to gain access to the OSD If you press any butt...

Page 77: ... Click OK If you do not see 1440 x 900 as an option you may need to update your graphics driver Depending on your computer complete one of the following procedures If you have a Dell desktop or portable computer Go to support dell com enter your service tag and download the latest driver for your graphics card If you are using a non Dell computer portable or desktop Go to the support site for your...

Page 78: ...M SFF 980 AIO stand is bought please refer to the respective AIO stand setup guide for set up instructions Tilt With the built in pedestal you can tilt the monitor for the most comfortable viewing angle NOTE The stand is detached when the monitor is shipped from the factory Rotating the Monitor Before you rotate the monitor your monitor should be fully vertically extended Vertical Extension and fu...

Page 79: ...us Portrait view with your Dell computer you require an updated graphics driver that is not included with this monitor To download the graphics driver go to support dell com and see the Download section for Video Drivers for latest driver updates NOTE When in Portrait View Mode you may experience performance degradation in graphic intensive applications 3D Gaming etc ...

Page 80: ...em To adjust the Rotation Display Settings 1 Right click on the desktop and click Properties 2 Select the Settings tab and click Advanced 3 If you have an ATI graphics card select the Rotation tab and set the preferred rotation If you have an nVidia graphics card click the nVidia tab in the left hand column select NVRotate and then select the preferred rotation If you have an Intel graphics card s...

Page 81: ...5 Turn off your monitor and reconnect the video cable then turn on both your computer and the monitor If your monitor screen remains blank after you use the previous procedure check your video controller and computer because your monitor is functioning properly NOTE Self test feature check is not available for S Video Composite and Component video modes Built in Diagnostics Your monitor has a buil...

Page 82: ... 2 DVI D the positioning adjustments are not available Horizontal Vertical Lines Screen has one or more lines Reset the monitor to Factory Settings Perform Auto Adjust via OSD Adjust Phase and Pixel Clock controls via OSD Perform monitor self test feature check and determine if these lines are also in self test mode Check for bent or broken pins in the video cable connector Run the built in diagno...

Page 83: ...tly to the computer system High Speed USB 2 0 interface is slow High Speed USB 2 0 peripherals working slowly or not working at all Check that your computer is USB 2 0 capable Some computers have both USB 2 0 and USB 1 1 ports Ensure that the correct USB port is used Reconnect the upstream cable to your computer Reconnect the USB peripherals downstream connector Reboot the computer Dell Soundbar P...

Page 84: ...dio balance controls L R to their midpoints Clean and reseat the audio line in plug Troubleshoot the computer s sound card Test the Soundbar using another audio source i e portable CD player Low Volume Volume is too low Clear any obstructions between the Soundbar and the user Turn the Power Volume knob on the Soundbar clockwise to the maximum volume setting Set all Windows volume controls to their...

Page 85: ...ompliance website located at www dell com regulatory_compliance Contacting Dell For customers in the United States call 800 WWW DELL 800 999 3355 NOTE If you do not have an active Internet connection you can find contact information on your purchase invoice packing slip bill or Dell product catalog Dell provides several online and telephone based support and service options Availability varies by ...

Page 86: ...file T htdocs monitors 1909W en ug GRAPHICS front gif 11 8 2012 2 54 23 PM ...

Reviews: