


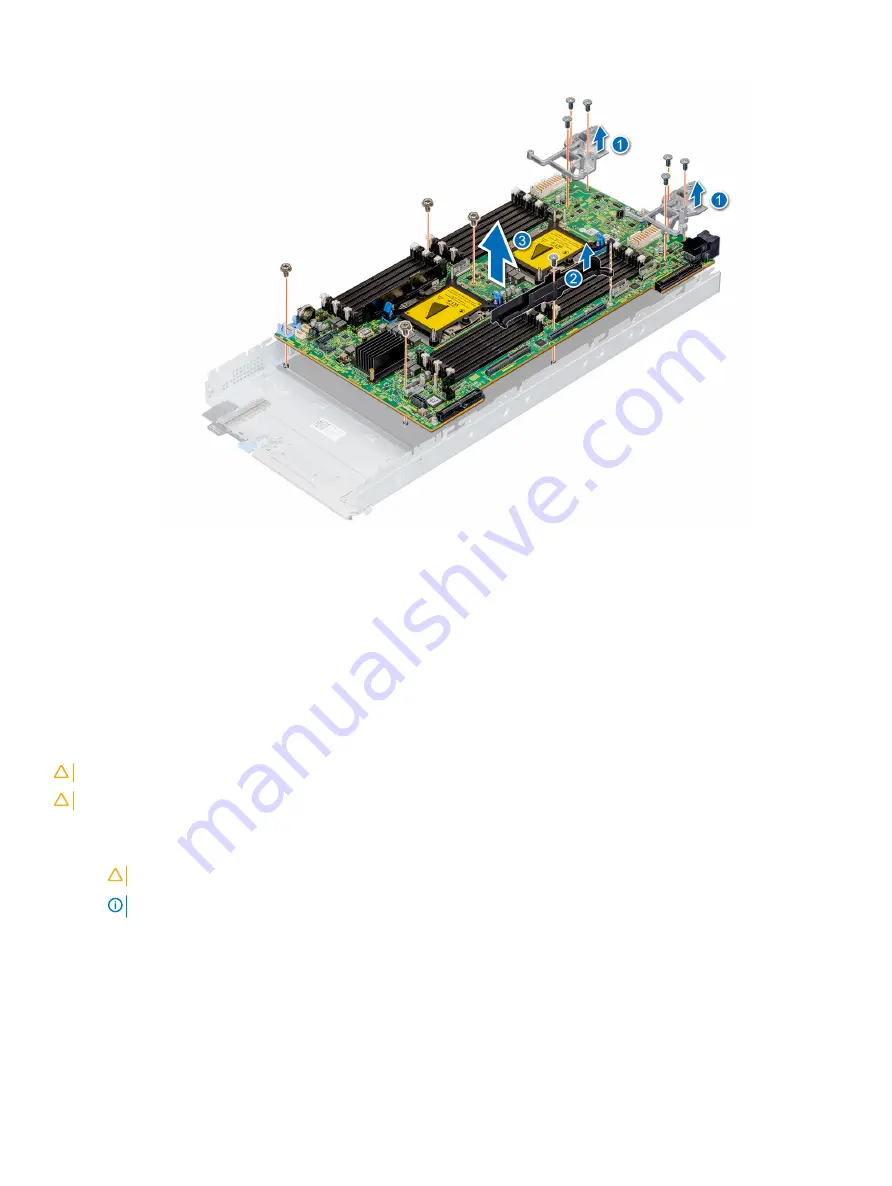
Figure 84. Removing the system board
Next step
1
.
Installing the system board
Prerequisites
Follow the safety guidelines listed in
CAUTION:
Do not lift the system board by holding a memory module, processor, or other components.
CAUTION:
Take care not to damage the system identification button while placing the system board into the system.
Steps
1
Unpack the replacement system board assembly.
CAUTION:
Take care not to damage the system identification button while placing the system board into the chassis.
NOTE:
It is required to reactivate the licenses after the system board replacement.
2
Holding the system board by the edges, place the system board into the system.
3
Using the Phillips #2 screwdriver, secure the system board to the chassis with the screws.
112
Installing and removing system components