


Montageanleitung /
Mounting Instruction
Deko-Light Elektronik-Vertriebs GmbH
11.09.2018
www.deko-light.com / [email protected]
Technische Daten können ohne Vorankündigung geändert werden. Irrtümer vorbehalten. /
Technical Data can be changed without advance notice. Errors excepted.
1 / 1
Achtung! Für diese Arbeiten müssen Sie die Spannungsversorgung trennen.
Attention! For this work you must turn off the power supply.
Betrieb nur mit 24V
Netzteil betreiben /
Operation only with
24V power supply unit
Kanäle /
Channel
Lichtfarbe /
Light color
Kabelfarbe /
Cable color
Kennzeichnung /
Cable mark
1
Einzelfarbe /
Single color
rot /
red
(+)
schwarz /
black
(-)
DC 24V +
DC 24V -
Anschlusswerte entnehmen Sie bitte dem beiliegendem Datenblatt. /
For the technical details please refer the enclosed data sheet.
Unterwasserleuchte, Snapper I /
Underwater lamp Snapper I
24V DC, 3,00 W
Artikel Nr. /
Article No.
: 131001 / 131002
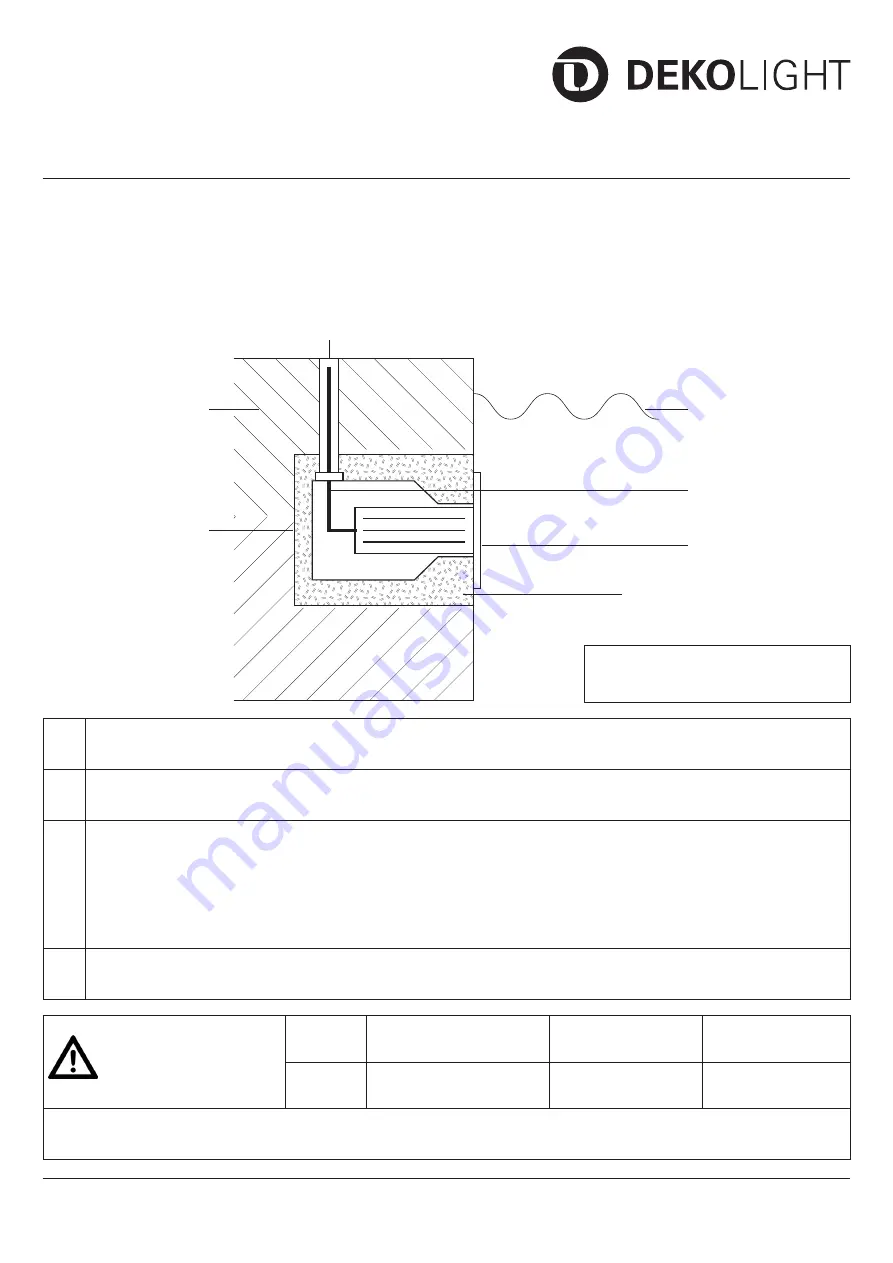
Beton /
Concrete
Leerraum für
Einbaugehäuse
(Größe siehe
Datenblatt) /
Space for housing
(dimensions please
refer data sheet)
Leerrohr /
empty conduit
Wasser /
Water
Leuchte /
Lamp
Anschlußkabel /
Connection cable
wasserundurchlässige Schicht /
water proofed layer
1
Leerraum für Einbaugehäuse herstellen.
Preparing space for housing.
2
Den Örtlichkeiten entsprechend Leerrohre und Leitungen verlegen.
Install conduits and cables corresponding to the locations.
3
Bitte beachten Sie beim Einsetzen des Einbaugehäuses das dieses wasserdurchlässig ist.
Dies gewährleistet die permanente Kühlung der Leuchte. Darum ist es erforderlich eine
wasserundurchlässige Schicht zwischen Beton und Einbaugehäuse einzubringen.
Please note when inserting the installation housing that this is water permeable. This ensures the
permanent cooling of the lamp. Therefore, it is necessary to introduce a water-impermeable layer
between the concrete and the installation housing.
4
Leuchte anschließen und in das Einbaugehäuse einbauen.
Connect the Lamp and install into the housing.
Montage bei max. 2,00 m Tiefe
Installation at max. 2,00 m depth