WIRELESS SURVEILLANCE SYSTEM
USER’S MANUAL
PLEASE READ THIS MANUAL CAREFULLY BEFORE OPERATING EQUIPMENT.
RETAIN IT FOR FUTURE REFERENCE.
Page 1: ...WIRELESS SURVEILLANCE SYSTEM USER S MANUAL PLEASE READ THIS MANUAL CAREFULLY BEFORE OPERATING EQUIPMENT RETAIN IT FOR FUTURE REFERENCE...
Page 2: ...OPERATION 5 1 Camera setting 11 13 5 2 REC setting 13 16 5 3 System setting 16 19 5 4 System Info 19 20 5 5 Playback 20 21 6 USAGE OF SOFTWARE IN iOS OPERATING SYSTEM 6 1 Install client end software 2...
Page 3: ...gerous voltage within the products enclosure that may be of sufficient magnitude to constitute risk of electric shock to person The exclamation point within an equilateral triangle is intended to aler...
Page 4: ...er next step 8 Move to next options or next channel 9 Move to previous options or previous channel 10 Move to right options or volume up 11 Enter or Exit the menu 12 Start or Stop manual recording 13...
Page 5: ...Start Stop manual recording Move to previous options or adjust the digital Move to next options or adjust the digital ENTER Confirm the settings or enter next step Move to left options or switch to p...
Page 6: ...ve to previous options or adjust the digital Move to next options or adjust the digital ENTER Confirm the settings or enter next step Move to left options or switch to previous option Move to right op...
Page 7: ...NTER Confirm the settings or enter next step Move to left options or Switch to previous option Move to right options or Switch to next option MENU Enter the main menu or Exit the menu operation REC St...
Page 8: ...Camera 3 SPECIFICATIONS 3 1 LCD DVR ITEMS DESCRIPTION 9 inch TFT LCD 16 9 LED back light Display Screen 7 inch TFT LCD 16 9 LED back light Resolution 800 H RGB 480 V 9 inch 198mm H 111 7mm V Display...
Page 9: ...x Operating Temperature 0 40 Operating Humidity 65 Storage temperature 10 50 3 2 DVR ITEMS DESCRIPTION Frequency Range 2 4G FHSS Cameras Supported 4 channels Transmission distance 200 300 meters Line...
Page 10: ...perature 10 40 Operating Humidity 85 Storage temperature 20 50 Power Supply 100 240V 50 60Hz 12V 500mA Power consumption 5W max INDOOR BOX CAMERA ITEMS DESCRIPTION Image Sensor 1 4 inch color CMOS Sen...
Page 11: ...ge 2 4G FHSS Transmission distance 200 300 meters Line of sight User ID Random ID Usage Environment Indoor Operating Temperature 0 40 Operating Humidity 65 Storage temperature 10 50 Power Supply 100 2...
Page 12: ...ly installed at the desktop floor wall 4 3 INSTALL THE CAMERA Install the antenna to camera Install and lock the bracket of camera Fix camera after pairing Plug in the power adapter of camera Notes Ca...
Page 13: ...the camera with a selected DVR channel 5 1 1 1 Plug and turn on the power adapters of DVR and cameras 5 1 1 2 Press Menu to enter the main menu and press to select Camera setting then press Enter to e...
Page 14: ...Cam 1 2 3 4 and press to select ON OFF then press Enter to confirm and press Menu to exit Note Dual screen display if only set 2 cameras as ON 5 1 3 Resolution To choose the recording resolution as V...
Page 15: ...n press to select Anti flicker and press Enter to enter next step Press to select 60Hz 50Hz then press Enter to confirm and press Menu to exit 5 2 REC SETTING 5 2 1 REC Mode To choose the trigger ways...
Page 16: ...to select Cam 1 2 3 4 and press Enter to confirm Press to enter time setting and press to adjust the digit Then press to select the date at Mon Tue Wed Thu Fri Sat Sun Press to select Set and press E...
Page 17: ...ress Enter at the Motion Detection screen to enter next step Press to select Cam 1 2 3 4 and press to select Low Mid High then press Enter to confirm and press Menu to exit 5 2 4 Section To set the re...
Page 18: ...omatically overwrite the old video recording in SD card when the SD card is full NO the DVR will show Card Error Retry Please when the SD card is full 5 3 SYSTEM SETTING 5 3 1 Date Time To set the dat...
Page 19: ...deo will output to TV Monitor with PAL video system Panel video will display at the monitor which is only for LCD DVR 5 3 3 Format To delete all video and image stored in the SD card At the Setting sc...
Page 20: ...nu to exit ON DVR will sound beep alarm when motion detected 5 3 6 Firmware Update To update latest firmware if any At the Setting screen press to select Firmware Update and press Enter to enter next...
Page 21: ...elect Static IP and press to select Address Mask Gateway and press Enter to confirm Press to adjust the digit of 0 9 then press Enter to confirm and press Menu to exit System defaults Dynamic IP ON an...
Page 22: ...en press to select Version and press Enter to check the machine software version then press Menu to exit 5 4 3 Network Info To check the network information At the System Info screen press to select N...
Page 23: ...files are packed in same folder Files are named by the recording time and channel For example 153147 3 means channel 3 begins recording at 15 31 47 which is little later than the starting time 6 USAGE...
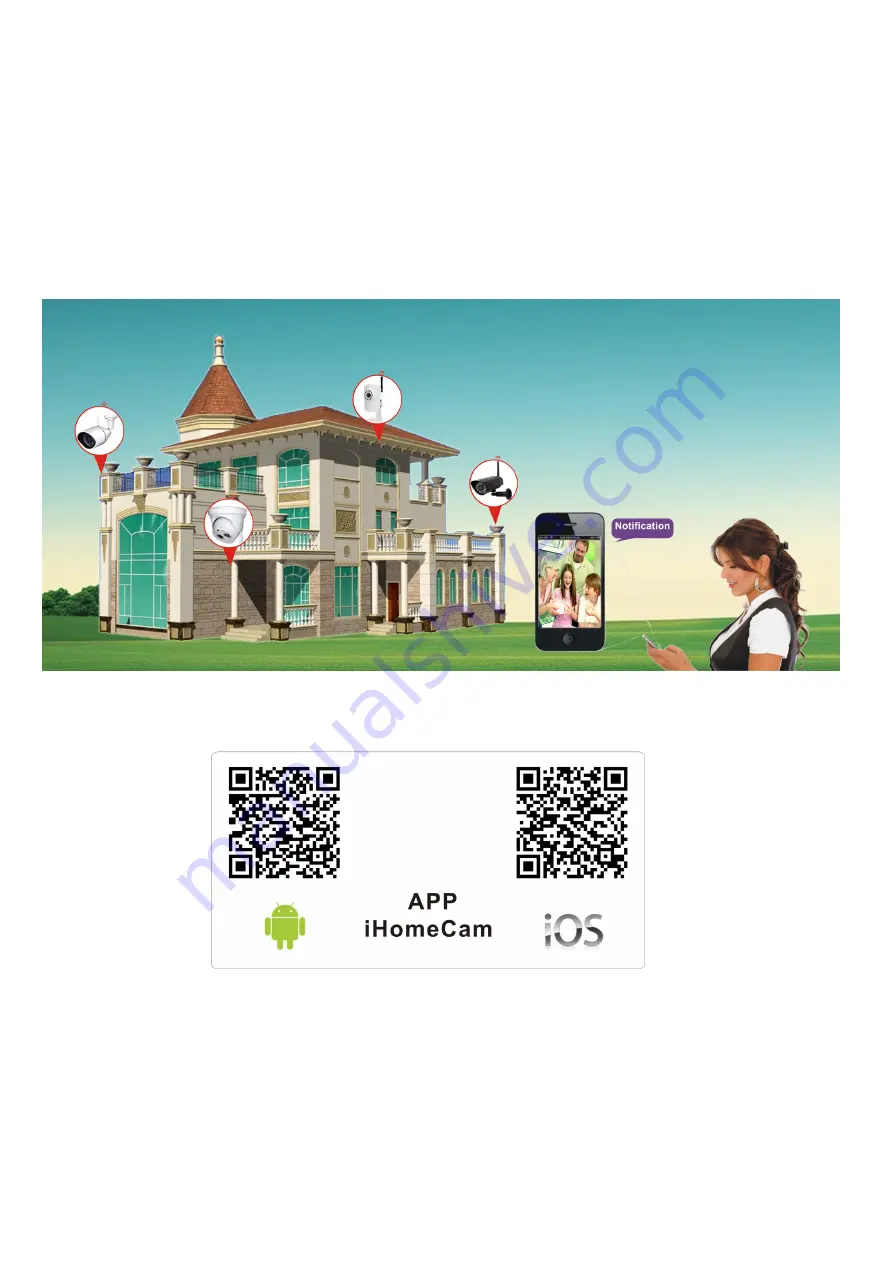
Page 24: ...ure in the Apple App Store and install the software 6 2 HOW TO ADD DVR 6 2 1 After software installation is completed please search icon iHomeCam as below picture at your Apple phone desktop 6 2 2 Cli...
Page 25: ...DVR to the list 6 2 2 2 Add DVR by scanning QR Code Click to scan QR code to obtain UID automatically then enter password and click the Save to finish adding DVR 6 2 2 3 Add DVR by manually operation...
Page 26: ...DVR can be viewed 6 3 2 Click the icon CH1 CH2 CH3 CH4 then images can be viewed on Apple phone 6 3 3 Full screen display function Start Apple phone to horizontal screen and put it horizontally to ge...
Page 27: ...H2 CH3 CH4 6 4 SYSTEM SETTINGS 6 4 1Enter into system settings Press for 2 seconds the below windows appear Name The initial device name Password Default password 000000 Advanced Setting Access to the...
Page 28: ...to the customer s internet conditions e g Internet signal speed to adjust the parameter Max High Medium Low Min of the real time play back results mean selected High Click to go back the previous ste...
Page 29: ...n or 3G data services and ensure the Android phone can connect to the Internet properly 7 1 INSTALL CLIENT END SOFTWARE APP iHomeCam Use Android phone to search iHomeCam APP as below picture in the Go...
Page 30: ...al network DVR Click to begin to search Local area network DVR Select the DVR and enter the password then click the OK to finish adding new DVR 7 2 2 2 Add DVR by scanning QR Code Click to scan QR cod...
Page 31: ...aded without prior notice some features maybe be different from this manual 9 Trouble Shooting 9 1 Devices are not pairing 1 Check the camera and DVR are correctly connected with power adapters and th...
Page 32: ...limited transmission distance 4 Make sure the network is ok the network speed is not less than 128kbps 5 Confirm the intelligent terminal CPU speed is not less than 1GHz the early Android devices can...