background image

27

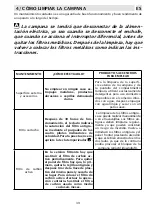
mAInTEnAnCE

HoW To pRoCEED?

ACCESSoRY/pRoDuCTS To uSE

External sur-

faces and 

accessories

Do not use metallic scrub-

bers, abrasive products, or 

hard brushes.

To clean the external surfaces of the 

hood and the light housing screen 

use only commercially available 

household detergents diluted in wa-

ter. Then rinse with clean water and 

dry with a soft cloth.

Filter cartridge

After 30 hours’ operation, the 

button pad will signal that 

the grease filter is saturated 

by flashing the 4 speed LEDs.

press the timer button to 

reset   .

The grease filters can be washed by 

hand or in the dishwasher. These fil-

ters need to be cleaned on a regular 

basis because otherwise they may 

present a fire risk. Refit the grease 

filters and front panel, making sure 

that the panel is properly fitted at 

the sides so that it does not cause 

the downdraft to stop operating.

Carbon filter

In the recirculation mode, you 

must substitute the active 

carbon filter periodically.

To remove the fibre panel you 

must first remove the anti-

grease grill and pull the plas-

tic knob on the panel itself, 

removing it from its housing. 

To replace the active carbon 

filter, do the reverse. Replace 

the used carbon filter on an 

average of every six months.

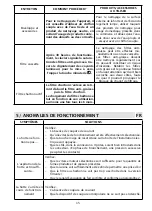
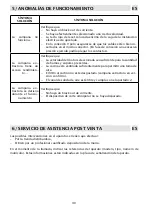
5/ opERATIonAL AnomALIES

En

SYmpTom

SoLuTIon

The hood does 

not work...

Check that:

-  There is not a power outage.

-  A specific speed has actually been selected.

-  The red reset key positioned above the electrical installation box 

is pressed.

-  Check that the leads are well inserted into the nine-pole connec-

tor (too much pressure when making the connections could bend 

the contacts).

The hood has low 

output...

Check that:

-  The motor speed selected is sufficient for the quantity of fumes 

steam present.

-  The kitchen is ventilated well enough to allow for air intake.

-  The charcoal filter has not been used (filtering mode version).

-  The air outlet conduit is unobstructed and conforms to paragraph 2.

The cooker hood 

does not close 

again.

Check that:

-  There is not a power outage.

-  The single-pole contactor breaker switch has not tripped.

Summary of Contents for DHD1100X

Page 1: ... DE BETRIEBSANLEITUNG Hotte plan de travail Worktop hood DHD1100X DHD1101X DHD1102X DHD1500DG ES MANUAL DE UTILIZACIÓN FR GUIDE D UTILISATION Exaustor para plano de trabalho Dunstabzugshaube für arbeitsplatten Campana aspirante para mesa de trabajo ...

Page 2: ...s Produkts schützen Sie die Umwelt und die Ge sundheit Ihrer Mitmenschen Umwelt und Gesundheit werden durch falsches Entsorgen gefähr det Weitere Informationen über das Recycling dieses Produkts erhalten Sie von Ihrem Rathaus Ihrer Müllabfuhr oder dem Geschäft in dem Sie das Produkt gekauft haben Dieses Elektro haushaltsgerät ist entsprechend der EU Richtlinie 2002 96 CE Über Elektro und Elektroni...

Page 3: ...3 Livret 1 Livret 2 Livret 3 French Polish Italian English Czech Danish Spanish Slovack Sweedish Portuguese Russian Greek German Netherlands ...

Page 4: ...4 ...

Page 5: ...ez coordon ner à votre nouvelle hotte DE DIETRICH Bien entendu dans un souci permanent de satisfaire le mieux possible vos exigences vis à vis de nos produits notre service consommateurs est à votre disposition et à votre écoute pour répondre à toutes vos questions ou sug gestions coordonnées à la fin de ce livret Et connectez vous aussi sur notre site www dedietrich electromenager com où vous tro...

Page 6: ...2 COMMENT INSTALLER VOTRE HOTTE 10 Montage du moteur séparé 11 Montage et démontage des filtres anti graisse 11 Montage et démontage des filtres charbon 11 Raccordement de votre hotte 12 3 COMMENT FONCTIONNE VOTRE HOTTE 13 4 COMMENT NETTOYER VOTRE HOTTE 14 5 ANOMALIES DE FONCTIONNEMENT 15 6 SERVICE APRÈS VENTE 16 Relations consommateurs 16 Interventions 16 Pièces d origine 16 SOMMAIRE FR ...

Page 7: ...les ou pour d autres buts que celui pour lequel il a été conçu A la réception de l appareil déballez le ou faites le déballer immé diatement Vérifiez son aspect général Faites les éventuelles réserves par écrit sur le bon de livraison dont vous gardez un exemplaire Cet appareil peut être utilisé par des enfants d au moins 8 ans et par des personnes ayant des capacités physiques sensorielles ou men...

Page 8: ... réglementations concernant l évacuation de l air doivent être respectées L air ne doit pas être envoyé dans un conduit utilisé pour évacuer les fumées d appareils utilisant du gaz ou un autre combustible ne s applique pas aux appareils qui renvoient uni quement l air dans la pièce Une ventilation convenable de la pièce doit être prévue lorsqu une hotte de cuisine est utilisée simultanément avec d...

Page 9: ...ur évacuer les fumées d appareils utilisant du gaz ou autre combustible L utilisation de conduits désaffectés ne peut se faire qu après accord d un spécialiste compétent Lorsque la hotte de cuisine est placée au dessus d un appareil à gaz la distance minimale entre le dessus de la table et le des sous de la hotte doit être d au moins 70 cm Si les instructions de la table de cuisson installée sous ...

Page 10: ...te à l intérieur du meuble en utilisant les deux brides fournies en dotation fig 3 8 procéder au montage du moteur sur le corps de la hotte en orientant l évacuation de l air sur la position choisie vers le haut ou vers le bas dessin 4 Le moteur peut être fixé soit aussi bien sur la partie avant que sur la partie arrière du produit Pour l installation sur la partie arrière procédez comme suit dévi...

Page 11: ... est renvoyé dans la cuisine à l aide d une gaine qui dirige l aire sur un côté du meuble Fig 5 MONTAGE DU MOTEUR SÉPARÉ Il est possible d installer le moteur séparément de la hotte pour cela commander le kit DHK900 989580001 MONTAGE ET DÉMONTAGE DES FILTRES ANTI GRAISSE MONTAGE ET DÉMONTAGE DES FILTRES CHARBON La hotte doit être en position ouverte pour faire le montage et le démontage des filtre...

Page 12: ...e de votre installation doit être de 10 ou 16 A Si le câble d alimenta tion est endommagé faites appel au service après vente afin d éviter un danger RACCORDEMENT ÉLECTRIQUE Votre appareil est conforme aux directives Européennes 2006 95 CE Directives Basse Tension et 2004 108 CE compatibilité Électromagnétique Lors de l installation et des opérations d entretien l appareil doit être débranché du r...

Page 13: ...vitesse du moteur d aspiration Elle a la fonction d arrêt automatique du dispositif d aspiration et de fermeture automatique du panneau d aspiration dix minutes après sa programmation La fonction programmée est signalée par le clignotement de la LED correspondant à la vitesse programmée L annulation de la minuterie se fait en appuyant de nouveau sur la touche BOOST Il permet au moteur de fonctionn...

Page 14: ...frapper la touche minuterie Après 4 heures de fonctionnement continu depuis la dernière programmation l appareil s éteint et se ferme automatiquement Durant l enlèvement du panneau avant pour les opérations de nettoyage et d entretien toutes les fonctions électroniques d aspiration et de déplacement sont bloquées Sécurité contre le risque d écrasement dans le cas où un obstacle empêcherait la ferm...

Page 15: ...x côtés faute de quoi il pourrait provoquer le blocage du chariot de filtrage Filtre charbon actif Le filtre charbon s enlève en reti rant d abord le filtre anti graisse puis le filtre charbon Le chargement du filtre charbon se fait en fonction de son utilisation au moins une fois tous les 6 mois SYMPTÔMES SOLUTIONS La hotte ne fonc tionne pas Vérifiez L absence de coupure de courant Qu une vitess...

Page 16: ...la marque Lors de votre appel afin de faciliter la prise en charge de votre demande munissez vous des références complètes de votre appareil référence commerciale référence service numéro de série Ces renseignements figurent sur la plaque signalétique Pour obtenir un rendez vous avec un technicien vous pouvez nous contacter du lundi au samedi de 7h00 à 20h00 au 09 69 39 34 34 N Cristal appel non s...

Page 17: ...itted refrigerators that can be freely coordinated with your new DE DIETRICH range ventilation hood Naturally since our objective is the satisfaction of our clients towards our products our customer service is at your total disposition to respond to any request and receive any useful suggestion reference details at the end of the booklet Visit our web site www dedietrich elecromanager com where yo...

Page 18: ...ire 20 Mounting the hood 21 Description of the appliance 21 2 HOOD INSTALLATION 22 Remote motor installation 23 Removal of the filter cartridge 24 Mounting the carbon filter 24 Electrical hook up of the hood 24 3 HOW THE HOOD WORKS 25 4 CLEANING THE HOOD 26 5 OPERATIONAL ANOMALIES 27 6 AFTER SALES SERVICE 28 CONTENTS EN ...

Page 19: ...es or for any other purpose for which it is not intended This appliance is designed for use by consumers in the home Do not use it for commercial or industrial purposes or for any other purpose for which it is not intended This appliance can be used by children aged under 8 and by persons with diminished physical sensory or mental capacities or persons without any experience or knowledge provided ...

Page 20: ... used to evacuate fumes from appliances that use gas or other fuels this does not apply to ap pliances that only emit air into the room The room must be suitably ventilated when the range hood is used at the same time as appliances that use gas or other fuels this does not apply to appliances that only emit air into the room Risk of fire It is forbidden to flambé food or to turn on gas rings that ...

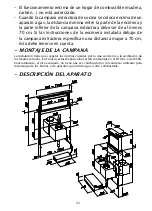
Page 21: ...gulations are container in the DTU 61 1 of the CSTB In particular discharged air must not be channelled into a conduit used for exhaust discharge or discharge from devices that operate with gas or other combustible materials The use of unused conduits is not permissible without the approval of a qualified technician DESCRIPTION OF THE APPLIANCE ...

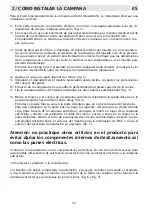
Page 22: ...kitchen furniture 7 Fix the hood inside the furniture utilising the two supplied brackets fig 3 8 Proceed with the assembly of the motor onto the body of the hood orientating the air outlet to the desired higher or lower position Design 4 The motor can be fitted in the front or rear part of the hood To install the motor in the rear part proceed as follows unscrew the plate situated in the rear par...

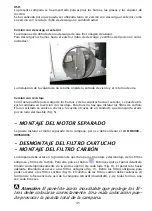
Page 23: ...e are not supplied In filtering application that the stop valve doesn t permit the entrance of wind and exhausted air Filtering version In the case an exhausting hole is not possible the hood can be used in filtering version For this mode charcol filters are to be fitted inside the hood Filtered air will be evacuated in the kitchen trough a duct that conveys the air on a side of the cabinet Fig 5 ...

Page 24: ... VVF 3 conductor 0 75 mm2 neutral phase and ground power cable This can be hooked up to a 220 240 V mono phase electrical network by way of a CEI 60083 regulation power socket that must remain accessible after installation in conform ity to installation regulations We decline all responsibility in case of accident caused by a lack of ground connection or incorrect ground connec tion The fuse used ...

Page 25: ...n minutes it has been set The set function is shown by the flashing LED for the set speed To cancel the timer function press the key again BOOST It enables the motor to work at the maximum speed for 6 minutes and after that it drops back at the 3rd speed automatically On the DHD1101X model being the 4th speed lower than what expressed in the Regulations this function is not present ECO DESIGN Adju...

Page 26: ... UE65 and EU66 regulations the product will have the 4th speed timed for 6 minutes When the 4th speed is set after 6 minutes the unit drops back at the 3rd speed Then it will be possible to increase the speed again by pressing the suitable button The speed of the motor can be decreased automatically during the normal use even if the Timer function is set If the 4th speed is set and the customer ac...

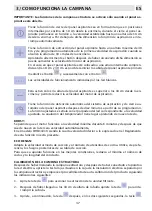
Page 27: ...he active carbon filter periodically To remove the fibre panel you must first remove the anti grease grill and pull the plas tic knob on the panel itself removing it from its housing To replace the active carbon filter do the reverse Replace the used carbon filter on an average of every six months 5 OPERATIONAL ANOMALIES EN SYMPTOM SOLUTION The hood does not work Check that There is not a power ou...

Page 28: ...nother qualified mechanic who is an authorized agent for the brand appliances When making an appointment state the full reference of your equipment model type and serial number This information appears on the manufacturer s nameplate attached to your equipment 6 AFTER SALES SERVICE EN ...

Page 29: ...DE DIETRICH Como nuestro objetivo naturalmente coincide con la satisfacción de nues tros clientes por nuestros productos nuestro servicio de consumidores está a su completa disposición para responder a cualquier necesidad y para aceptar cualquier útil sugerencia las referencias al final de este manual Visite además nuestro sitio internet www dedietrich elecromanager com donde podrá encontrar nuest...

Page 30: ...Montaje de la campana 33 Descripción del aparato 33 2 CÓMO INSTALAR LA CAMPANA 34 Montaje del motor separado 35 Desmontaje del filtro de cartucho 35 Montaje del filtro de carbón 35 Conexión eléctrica de la campana 36 3 CÓMO FUNCIONA LA CAMPANA 37 4 CÓMO LIMPIAR LA CAMPANA 39 5 DEFECTOS DE FUNCIONAMIENTO 40 6 SERVICIO POSTVENTA 40 ÍNDICE ES ...

Page 31: ... fines comerciales o industriales o para otros objetivos distintos a aquel los para los que ha sido diseñado En el momento de la recepción del aparato desembálelo o hágalo desembalar inmediatamente Verifique su aspecto general Realice las eventuales reservas por escrito en la orden de entrega de la que conserva un ejemplar Este aparato puede ser utilizado por niños de al menos 8 años y por persona...

Page 32: ... de vapor o de alta presión para limpiar su aparato exigencias relativas a la seguridad eléctrica Riesgo de asfixia Deben respetarse las reglamentaciones concernientes a la eva cuación del aire El aire no debe enviarse por un conducto utili zado para evacuar los humos de aparatos que utilicen gas u otro combustible no se aplica a los aparatos que expulsan única mente aire en la estancia Debe preve...

Page 33: ...lizado para la descarga de los humos o de aparatos que utilicen gas u otro combustible El funcionamiento encima de un hogar de combustible madera carbón no está autorizado Cuando la campana extractora de cocina se coloca encima de un aparato a gas la distancia mínima entre la parte de la encimera y la parte inferior de la campana extractora debe ser de al menos 70 cm Si las instrucciones de la enc...

Page 34: ...o superior de la cocina 7 Fije la campana dentro del mueble utilizando los dos soportes suministrados fig 3 8 Monte el motor en el cuerpo de la campana extractora orientando la salida del aire en la posición elegida hacia arriba o hacia abajo fig 4 El motor se puede fijar ya sea en la parte delantera que en la parte trasera del producto Para una instalación en la parte trasera haga lo siguiente de...

Page 35: ...enviar a la cocina a través de un conducto que transporta el aire por un lado del mueble Fig 5 MONTAJE DEL MOTOR SEPARADO Se puede instalar el motor separado de la campana pero se debe ordenar el kit DHK900 989580001 DESMONTAJE DEL FILTRO CARTUCHO MONTAJE DEL FILTRO CARBÓN La campana debe estar en la posición de apertura para el montaje y desmontaje de los filtros antigrasa y filtros de carbón Par...

Page 36: ... fusible adoptado tendrá que ser de 10 o 16A Si el cable de alimentación estuviera dañado llamar a la asistencia posventa para evitar cualquier riesgo CONEXIÓN ELÉCTRICA El presente aparato es conforme con las Directivas Europeas 2006 95 CE Directivas Baja Tensión y 2004 108 CE Compatibilidad Electromagnética En el momento de la instalación y de las operaciones de mantenimiento el aparato se tiene...

Page 37: ...l sistema de aspiración y de cierre au tomático del panel aspirante después de diez minutos a partir de su programación La función ajustada se señala con el parpadeo del led correspondiente a la velocidad ajustada La anulación del temporizador tiene lugar apretando de nuevo la tecla BOOST Se permite que el motor funcione a la velocidad máxima durante 6 minutos y después de que cae de nuevo en la t...

Page 38: ...mpieza y mantenimiento todas las funciones electrónicas de aspiración y movimiento se bloquean Protección anti aplastamiento si un obstáculo impidiera el cierre del Downdraft el cierre se interrumpirá y el Downdraft volverá a subir Debido a las nuevas regulaciones UE65 y EU66 el producto tendrá la cuarta velocidad crono metrada durante 6 minutos Cuando se establece la cuarta velocidad después de 6...

Page 39: ...suave Filtro cartucho Después de 30 horas de fun cionamiento el teclado indicará la saturación del filtro antigra sa mediante el parpadeo de los cuatro pilotos indicadores de velocidad Para la puesta en cero apriete la tecla temporizador La limpieza de los filtros antigra sa se puede realizar manualmente o en el lavavajillas Los filtros an tigrasa deben limpiarse regular mente ya que pueden consti...

Page 40: ... la conexión 9 polo asegurarse de que los cables estén bien in sertados en el mismo conector En fase de conexión una excesiva presión ejercida podría plegar los contactos La campana ex tractora tiene un escaso rendimien to Verifique que La velocidad del motor seleccionada sea suficiente para la cantidad de humos y vapores presentes La cocina esté ventilada suficientemente para permitir una toma de...

Page 41: ...enáveis com o novo exaustor DE DIETRICH Obviamente sempre com o objectivo de satisfazer plenamente a nossa clientela a nossa Assistência aos Clientes estará à sua total disposição para fornecer qualquer informação e aceitar as suas sugestões Visite também o nosso site em www dedietrich elecromanager com onde poderá encontrar as nossas últimas inovações e muitas outras informações úteis DE DIETRICH...

Page 42: ... incêndio 44 Montagem 45 Descrição do aparelho 45 2 INSTALAÇÃO DO EXAUSTOR 46 Montagem do motor separado 47 Desmontagem do filtro de cartucho 47 Montagem do filtro de carvão 47 Ligação eléctrica 48 3 FUNCIONAMENTO DO EXAUSTOR 49 4 LIMPEZA DO EXAUSTOR 51 5 ANOMALIAS DE FUNCIONAMENTO 52 6 SERVIÇOS AUTORIZADOS 52 ÍNDICE PT ...

Page 43: ...a ser utilizado por particulares no seu lugar de habitação Não o utilizar para fins comerciais ou indus triais ou para outros objetivos diferentes daqueles para os quais foi concebido À recepção do aparelho desembale o ou faça o desembalar ime diatamente Verifique o seu aspeto geral Faça as eventuais reservas por escrito no formulário de entrega do qual deverá guardar um exemplar Este aparelho pod...

Page 44: ...pressão para limpar o seu aparelho exigências relativas à segurança eléctrica Risco de asfixia As regulamentações referentes à evacuação do ar devem ser respei tadas O ar não deve ser enviado a um conduto utilizado para eva cuar fumos de aparelhos que utilizem gás ou um outro combustível não se aplica aos aparelhos qui difundem unicamente ar no local Uma ventilação conveniente do local deve ser pr...

Page 45: ...cu ação de fumos de aparelhos que utilizam gás ou outro combustível É proibida a utilização de tubos de evacuação fora de uso salvo parecer favorável de um técnico qualificado Quando o exaustor de cozinha é colocado acima de um apare lho a gás a distância mínima entre o topo da placa de cozinha e a parte inferior do exaustor deve ser de ao menos 70 cm Se as instruções da placa de cozinha instalada...

Page 46: ...tamente na bancada 7 Fixe a estrutura do exaustor no móvel utilizando os suportes de série fig 3 8 Proceder à montagem do motor no corpo do exaustor dirigindo a saida do ar na posição desejada pelo baixo ou pelo alto Fig 4 O motor pode ser fixado quer na parte dianteira quer na parte traseira do aparelho Para uma instalação na parte traseira proceda da seguinte maneira Desaparafuse a placa situada...

Page 47: ...e carvão O ar reciclado é lançado novamente na cozinha por meio de um tubo que encaminha o ar por um lado do móvel Fig 5 MONTAGEM DO MOTOR SEPARADO É possível instalar o motor separadamente do exaustor mas è preciso encomendar o kit DHK900 989580001 DESMONTAGEM DO FILTRO DE CARTUCHO MONTAGEM DO FILTRO DE CARVÃO O exaustor tem que estar em posição aberta pela montagem e desmontagem dos filtros anti...

Page 48: ...ível utilizado deve ser de 10 ou 16A Se o cabo de alimentação estiver danificado chame a assistência técnica para evitar qualquer risco LIGAÇÃO ELÉCTRICA O presente aparelho está em conformidade com as Directivas Europeias 2006 95 CE Baixa Tensão e 2004 108 CE Compatibilidade Electromagnética Para efectuar a instalação e as operações de manutenção o aparelho deve estar desligado da rede eléctrica ...

Page 49: ...o de paragem automática do sistema de aspiração e de fechamento auto mático do painel aspirante passados dez minutos da sua configuração A função selecionada é sinalizada pela intermitência do respetivo led na velocidade de sejada A anulação do temporizador é feita pressionando novamente a respetiva tecla BOOST Ele permite que o motor a trabalhar na velocidade máxima durante 6 minutos e depois que...

Page 50: ...todas as funções electrónicas de aspiração e movimento são bloqueadas Proteção de esmagamento no caso de um obstáculo impedir a descida do suporte o sis tema de segurança interrompe a descida e o suporte do exaustor sobe Devido às novas regulamentações UE65 e EU66 o produto terá a quarta velocidade cronome trada por 6 minutos Quando a quarta velocidade é definida aos 6 minutos o aparelho cai de vo...

Page 51: ...um pano macio Filtro de cartucho Após 30 horas de funcionamen to a botoeira indicará a saturação do filtro de gordura com o piscar dos 4 leds indicadores de veloci dade para fazer o reset prima a tecla do temporizador Timer A limpeza dos filtros de gordu ra pode ser feita à mão ou na máquina Os filtros de gordura devem ser limpos regularmente porque podem constituir risco de incêndio Reponha os fi...

Page 52: ...cima da caixa do sistema eléctrico está pressionada Na conexão de 9 polos verifique se os fios estão bem encaixados na fase de ligação a excessiva pressão exercida pode dobrar os contactos O rendimento é escasso Verifique se A velocidade do motor seleccionada é suficiente para a quantidade de fumos e de vapores presentes A cozinha está bem arejada para permitir a tomada de ar O filtro a carvão não...

Page 53: ... mit Ihrer Dunstab zugshaube kombinieren lassen Da unser Ziel natürlich die Kundenzufriedenheit mit unseren Produkten ist steht Ihnen unser Kundenservice zur vollen Verfügung um Anfrage jeder Art zu beantworten und nützliche Hinweise entgegen zu nehmen Kontakt hinweise finden Sie am Ende dieser Anleitung Besuchen Sie uns auch im Internet unter www dedietrich elecromanager com hier finden Sie neben...

Page 54: ...stabzugshaube 57 Gerätebeschreibung 57 2 INSTALLATION DER DUNSTABZUGSHAUBE 58 Einbau des separaten motors 59 Ausbau des patronenfilters 59 Einsetzen der Kohlefilter 59 Stromanschluss der Dunstabzugshaube 60 3 FUNKTIONSWEISE DER DUNSTABZUGSHAUBE 61 4 REINIGUNG DER DUNSTABZUGSHAUBE 63 5 UNREGELMÄSSIGKEITEN IN DER FUNKTIONSWEISE 64 6 KUNDENDIENST 64 INHALT DE ...

Page 55: ...sungen in dieser Anlei tung folgen nicht akzeptieren Wichtige VorsichtsmaSSnahmen Dieses Gerät wurde für die private Nutzung im Haushalt entwickelt Verwenden Sie es deshalb nicht zu gewerblichen oder industriellen oder zu anderen als den bestimmungsgemäßen Zwecken Wir raten Ihnen das Gerät bei Erhalt sofort auszupacken oder aus packen zu lassen Überprüfen Sie sein allgemeines Erscheinungs bild mac...

Page 56: ...verbunden Reparaturen dürfen ausschließlich von zugelassenen Fachleuten vorge nommen werden Unterbrechen Sie vor der Reinigung oder Wartung der Abzugshaube immer die Stromversorgung Verwenden Sie aufgrund der Anforderungen zur Gewährleistung der elektrischen Sicherheit zur Reinigung Ihres Geräts nie Dampf oder Hochdruckgeräte Erstickungsgefahr Die für den Luftabzug geltenden Regelungen müssen eing...

Page 57: ...nderen Gas und Brennstoff geräten benutzt werden Das Reinigen und Wechseln der Filter muss im empfohlenen Rythmus er folgen Ein Ansammeln von Fett ist mit einem Brandrisiko verbunden Der Betrieb des Geräts über einem Brennstoffherd Holz Kohle usw ist nicht zulässig Wird die Abzugshaube über ein Gasgerät angebracht ist ein Mindest abstand zwischen der Kochfläche und der Unterseite der Abzugshaube v...

Page 58: ... Abzugshaube muss perfekt an der Oberfläche des Herds anliegen 7 Die Abzugshaube im Inneren des Möbelstücks mit den beiden mitgelieferten Bügeln Abb 3 befestigen 8 Mit dem Einbau des Motors an der Dunstabzugshaube beginnen und die Luftklappe in gewünschter Lage nach oben oder nach unten hinrichten Abb 4 Der Motor kann sowohl im vorderen als auch im hinteren Bereich der Abzugshaube befes tigt werde...

Page 59: ...umgewälzte Luft wird der Küche über eine Leitung wieder zugeführt die Luft auf eine Schrankseite lenkt Abb 5 EINBAU DES SEPARATEN MOTORS Der Motor lässt sich separat einbauen aber dazu muss der Bausatz Art DHK900 989580001 bestellt werden AUSBAU DES PATRONENFILTERS EINSETZEN DER KOHLEFILTER Während der Einsetzung und der Beseitigung der Fettfilter und der Kohlenfilter muss sich die Dunstabzugshaub...

Page 60: ...n 10 und 16A sein Sollte das Stromversorgungskabel beschädigt sein wenden Sie sich an die Kundenbetreuung nach Kauf um jegliches Risiko auszuschließen ELEKTROANSCHLUSS Dieses Gerät ist konform mit den Europäischen Richtlinien 2006 95 EWG Niederspan nungsrichtlinie und 2004 108 EWG Elektromagnetische Verträglichkeit Während der Installation und Wartungsarbeiten muss das Gerät vom Stromnetz getrennt...

Page 61: ...ese hat die Funktion das Absaugsystem und das automatische Schließen der Ab saugtafel zehn Minuten nach Aktivierung der Taste automatisch abzuschalten Die eingestellte Funktion wird durch Blinken der Led angezeigt die der eingestell ten Geschwindigkeit entspricht Das Löschen des Timers erfolgt durch nochmalige Betätigung der Taste BOOST Es ermöglicht der Motor mit der maximalen Drehzahl für 6 Minu...

Page 62: ... zwecks Reinigung und Wartung sind alle elekt ronischen Ansaug und Antriebsfunktionen gesperrt Schutzvorrichtung gegen das Einquetschen sofern ein Hindernis das Einfahren der Ver senkklappe behindert wird das Einfahren unterbrochen und die Klappe läuft wieder nach oben Aufgrund der neuen UE 65 und EU66 Vorschriften wird das Produkt unter den 4 Gang Timer für 6 Minuten Wenn der 4 Gang gesetzt wird ...

Page 63: ...rd am Bedienfeld die Sättigung des Fettfilters durch Blinken der 4 Geschwindigkeits Leds ange zeigt Zum Rücksetzen ist die Timer Taste zu betätigen Die Reinigung der Fettfilter kann von Hand oder in der Spülma schine erfolgen Die Fettfilter müssen regelmäßig gereinigt werden da sie eine Brandgefahr darstellen können Die Fettfilter und die Fronttafel wieder ein setzen wobei darauf geachtet werden m...

Page 64: ...Pols 9 muss sichergestellt werden dass die Drähte einwandfrei in den Stecker eingeführt sind durch zu star ken Druck beim Anschließen können sich die Kontakte verbiegen Die Abzugshaube funktioniert nicht richtig Versichern Sie sich dass Die Motorgeschwindigkeit für die Rauch und Dampfmenge hoch genug gewählt ist Die Küche ausreichend belüftet ist um einen notwendigen Luftan sog zu gewährleisten De...

Page 65: ...65 1 2 3 5 4 ...

Page 66: ...66 6 7 8 9 ...

Page 67: ......

Page 68: ...91051201112 F 06 2015 Graphics by X TYPE ENGINEERING S r l BRANDT FRANCE SAS 89 91 Boulevard Franklin Roosevelt 92500 RUEIL MALMAISON France au capital de 1 000 000 Euros RCS Nanterre 801 250 531 ...

Reviews: