background image

DeCrane Aerospace Audio International


    DVD-9101-201-x Installation & Operation Manual 


Document # 540339, Rev B, 06/2009


Page 7 of 25 

installing  agency.  Correct  pin  assignments  as  outlined  in  Section 

3.8 are the responsibility of the installing agency.


3.2 

Unpacking and Inspection 


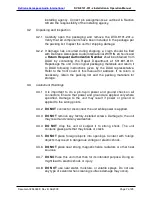
3.2.1  Carefully  open  the  packaging  and  remove  the  DVD-9101-201-x. 

Verify that all components have been included in the package per 

the packing list. Inspect the unit for shipping damage. 


3.2.2  If  damage  has  occurred  during  shipping,  a  claim  should  be  filed 

with DeCrane Aerospace Audio International WITHIN 24 hours and 

Return Request Authorization Number 

shall be obtained from 

DAAI  by  contacting  the  Repair  Department  at  501.801.8101. 

Repackage the unit in its original packaging materials and return it 

to  DAAI  following  instructions  given  by  the  DAAI  representative. 

Refer to the front cover of this manual for address. If no return is 

necessary,  retain  the  packing  list  and  the  packing  materials  for 

storage.


3.3 

Cautions & Warnings


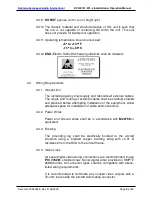
3.3.1  It  is  important  to  do  a  pin-to-pin  power  and  ground  check  on  all 

connectors. Ensure that power and ground are applied only where 

specified.  Damage  to  the  unit  may  result  if  power  or  ground  is 

applied to the wrong points. 


3.3.2 

DO NOT 

connect or disconnect the unit while power is applied. 


3.3.3 

DO NOT

 remove any factory-installed screws. Damage to the unit 

may result and void any warranties. 


3.3.4 

DO  NOT

  drop  the  unit  or  subject  it  to  strong  shock.  The  unit 

contains glass parts that may break or crack. 


3.3.5 

DO NOT

 place foreign objects into openings. Contact with foreign 

objects may result in dangerous voltage or electric shock.  


3.3.6 

DO NOT

 place near strong magnetic fields, radiators or other heat 

sources. 


3.3.7 

DO NOT

 use this unit other than for its intended purpose. Doing so 

might lead to electric shock or injury. 


3.3.8 

DO NOT

 use near water, moisture, or volatile sprays. Do not use 

any type of solvent when cleaning (surface damage may occur). 


Summary of Contents for DVD-9101-201 Series

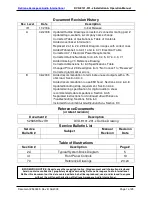
Page 1: ...00 Industry Drive North Little Rock AR 72117 Phone 501 955 2929 Fax 501 955 2988 www decraneaerospace com Installation and Operation Manual DVD 9101 201 x Serial Digital Video Disc Player Document 540339 ...

Page 2: ...a 75 ohm load Section 3 4 4 Added recommendation to use EMI hood Sections 3 4 4 3 8 Updated bonding strap requirement Section 3 4 4 Updated wiring specification for digital audio to show recommended cable impedance Section 3 4 5 Separated Instructions for Continued Airworthiness Troubleshooting Sections 5 0 6 0 Included Environmental Qualification Data Section 9 0 Reference Documents or latest rev...

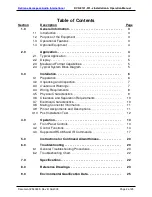
Page 3: ...eparation 6 3 2 Unpacking and Inspection 7 3 3 Cautions Warnings 7 3 4 Wiring Requirements 8 3 5 Physical Characteristics 9 3 6 Clearance and Separation Requirements 10 3 7 Electrical Characteristics 10 3 8 Mating Connector Information 11 3 9 Pinout Assignments and Descriptions 11 3 10 Post Installation Test 12 4 0 Operation 13 4 1 Front Panel Controls 13 4 2 Control Functions 14 4 3 Supported RS ...

Page 4: ...isc Players The DVD 9101 201 x contains three 3 SDI video outputs and three 3 AES 3 audio output channels Audio video and control commands are handled via DAAI s RS 485 data bus This device is designed to interface with equipment containing DAAI Serial Digital video and AES 3 audio equipment and is provided with power and ID strapping connections This unit incorporates four 4 ID strapping connecti...

Page 5: ...hat will perfectly complement the DVD 9101 201 x and will also be valuable and attractive additions to any cabin interior An optional cover bezel DVDKIT 9101 101 1 may be ordered to match the interior style of any aircraft The cover bezel is not an integral part of the player and must be ordered as a separate item Contact your DeCrane Aerospace Audio International representative for details 2 0 Ap...

Page 6: ...andards are constantly evolving some DVD discs may not play properly or may cause the unit to malfunction DAAI does not guarantee the DVD 9101 201 x is compatible with all media or formats Compatible Formats Standard DVD Video Standard CD Recordable DVD R RW DVD R RW Standard CD ReWriteable Video CD SVCD DVD Audio Standard CD Digital Audio SACD CD layer only DVD Plus Dual disc MP3 WMA9 JPEG Typica...

Page 7: ...perature humidity etc Length of cable runs Location of other aircraft systems oxygen delivery 3 1 2 The DVD 9101 201 x shall be installed to conform to the standards designated by the customer installing agency and existing conditions as to the unit location and type of installation 3 1 3 Mounting screws are required to secure the unit Mounting provisions are provided via four 4 10 32 UNF 2B threa...

Page 8: ...nual for address If no return is necessary retain the packing list and the packing materials for storage 3 3 Cautions Warnings 3 3 1 It is important to do a pin to pin power and ground check on all connectors Ensure that power and ground are applied only where specified Damage to the unit may result if power or ground is applied to the wrong points 3 3 2 DO NOT connect or disconnect the unit while...

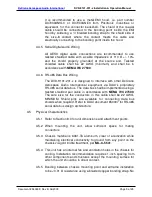
Page 9: ...length and routing of external cables shall be carefully studied and planned before attempting installation of the equipment Allow adequate space for installation of cable and connectors 3 4 2 Power Wires Power and Ground wires shall be in accordance with M22759 or equivalent 3 4 3 Bonding The grounding lug shall be electrically bonded to the aircraft structure using a braided copper bonding strap...

Page 10: ...e Audio International equipment via DAAI s proprietary RS 485 serial data bus The data bus shall be implemented using a twisted shielded pair cable in accordance with NEMA WC 27500 The wire size for the conductors in this cable shall be 22 AWG MINIMUM Shield pins are available for connecting data bus shields when required Refer to DAAI document 650007 for RS 485 serial data bus design architecture...

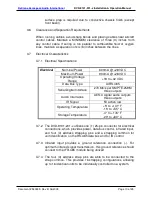
Page 11: ...r data bus control infrared input and four 4 address strapping pins and a strapping common for unit identification on the RS 485 data bus and for IR control 3 7 3 Infrared input provides a ground reference connection For optimum infrared signal transmission this ground reference should connect to the IFR 485 module being utilized 3 7 4 The four 4 address strap pins are able to be connected to the ...

Page 12: ...ial Data Bus B LO 6 RS 485 Serial Data Bus SHIELD 7 ID Common 8 ID 0 9 ID 1 10 ID 2 11 ID 3 12 Pause Input 13 Infrared Digital Input 14 AES3 Audio Output 1 15 AES3 Audio Output 1 16 AES3 Audio Output 1 SHIELD 17 AES3 Audio Output 2 18 AES3 Audio Output 2 19 AES3 Audio Output 2 SHIELD 20 AES3 Audio Output 3 21 AES3 Audio Output 3 22 AES3 Audio Output 3 SHIELD A1 SD SDI Video Output 1 A2 SD SDI Vide...

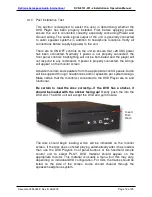
Page 13: ...properly connected the AI logo will appear on the monitor screen Activate monitors and speakers from the appropriate control panels Audio will be supplied through headphones and or speakers per system design Make certain that the monitor s connected to the DVD Player are on and functional Be certain to load the disc correctly if the DVD has a sticker it should be loaded with the sticker facing up ...

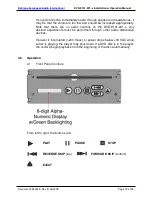
Page 14: ... there are no audio controls on the DVD 9101 201 x Any desired adjustments must be performed through other audio distribution devices If power is interrupted 200 msec or power drops below 18 VDC while a disc is playing the player may shut down If a DVD disc is in the player the unit will begin playback from the beginning of the disc automatically 4 0 Operation 4 1 Front Panel Controls From left to...

Page 15: ... also as an ENTER Button when selecting menu options REVERSE SKIP BUTTON During movie or audio play press to skip to the beginning of the Previous Chapter or Track Press and hold for approximately one 1 second to enter FAST REVERSE x8 Mode Also used to navigate as Left curser in DVD s Media Menu Press and hold for approximately five 5 seconds to navigate as Up curser in DVD s Media Menu REVERSE BU...

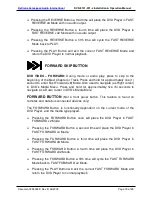
Page 16: ...ode Also used to navigate as Right curser in DVD s Media Menu Press and hold for approximately five 5 seconds to navigate as a Down curser in DVD s Media Menu FORWARD BUTTON Not a front panel button This feature is found on remotes and data bus connected devices only The FORWARD Button is functionally dependent on the current mode of the DVD Player and the media type played Pressing the FORWARD Bu...

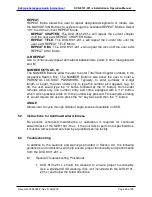
Page 17: ...Not a front panel option This function is accessible by remotes and data bus connected devices only The user can Step through the video by repeatedly pressing the PAUSE Button Normal playback can be resumed by pressing the PLAY Button DVD Audio Audio CD MP3 CD Press the PAUSE Button once to place the DVD Player in PAUSE Mode Normal playback can be resumed by pressing either the PAUSE Button or the...

Page 18: ...hot at different angles OSD LANGUAGE Select the language that the OSD setup screens are displayed in SPEAKER SETUP DOWNMIX Selects the DOWNMIX of the audio outputs The following settings are available Lt Rt Switch downmix to 4 channel output Stereo Switch downmix to 2 channel output Off Disable downmix CENTER Turn CENTER SPEAKER on off REAR Turn REAR SPEAKERS on off SUBWOOFER Turn SUBWOOFER on off...

Page 19: ...LE specifies the end user market PARENTAL Set movie rating lock out level Default password is 3308 PASSWORD Allows the parental password to be changed DEFAULTS Reset to system default settings SYSTEM INFO Provides system information SUBTITLE ON OFF Press to access the SUBTITLE Menu Cycle through available subtitles with the NAVIGATION Buttons Press SUBTITLE ON OFF to exit Note Subtitles are availa...

Page 20: ...dio material Material will scan while the button is held and depending on media video input may be available SKIP FORWARD NEXT During movie or audio play press to skip to the beginning of the Next Chapter or Track The SKIP FORWARD Button is functionally dependent on the current mode of the DVD Player and the media type played PAUSE STEP Press the PAUSE Button once to place the DVD Player in PAUSE ...

Page 21: ...f 2 digit length or longer the user needs only to type the number as it appears e g for 43 the user would type the 4 button followed by the 3 button Some older remotes allow only one number entry and come equipped with a 10 button which when pressed adds 10 to the number key pressed For example entering 21 would require the user to press the 10 key twice and then the 1 button ANGLE Allows user to ...

Page 22: ...und 0 1 to 0 2 VDC If any device is transmitting i e holding bus active then these typical measurements would be reversed for the A to Ground and B to Ground measurements This troubleshooting tool can help indicate a data bus lockup If this occurs remove the data bus from all other equipment one piece at a time As each is removed check the bus status to see if it is now functioning properly Once y...

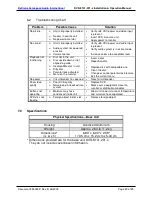
Page 23: ...unit Dirty disc Parental lock activated Menu on the monitor Insert a disc Reposition disc Replace disc with compatible one Clean the disc Change or cancel parental lock feature Exit the current menu No power Circuit breaker has opened Reset circuit breaker Poor video quality Poor DVD quality Noise being introduced into system Replace DVD Move source equipment closer to monitor or distribution modu...

Page 24: ...101 201 x Installation Operation Manual Document 540339 Rev B 06 2009 Page 23 of 25 8 0 Reference Drawings The following diagrams show the unit dimensions mounting locations and connector locations for the DVD 9101 201 x Cover bezel not depicted ...

Page 25: ...DeCrane Aerospace Audio International DVD 9101 201 x Installation Operation Manual Document 540339 Rev B 06 2009 Page 24 of 25 ...

Page 26: ...stallation Operation Manual Document 540339 Rev B 06 2009 Page 25 of 25 9 0 Environmental Qualification Data Manufacturer s Specification and or applicable Specification AI Document 620370 D 9460 ETL Revision Change Number of DO 160 E Date Tested 3 16 2007 ...

Reviews: