background image

9

Chapter 2

Installation

This Chapter details the LAN installation
process for the EtherSeries product.

Overview

The EtherSeries products may be configured via a serial port,
telnet, or web browser.  Initially, the configuration of an IP
address must be performed using the serial port unless the
default IP address of 192.168.1.1 is appropriate for your Ethernet
network.

To use LAN based configuration, either 

Telnet or Web Browser

based,

 an IP address must be configured. The default value of

192.168.1.1 may not work with your network.

Terminal Mode

 configuration may be performed at any time,

and no IP address is required. See Chapter 3 for details.

Quick Start

Quick start instructions are on the next page.  Installation is an
easy process that is basically… 

plug it in, configure IP,

configure MODBUS, and configure the serial ports

.

Summary of Contents for EMB-02

Page 1: ...Revised March 25 2004 Firmware Version 1 4 EtherSeries Modbus Gateway EMB 2 User s Guide ...

Page 2: ......

Page 3: ...e 2 This device must accept any interference received including interference that may cause undesired operation CE Marking Warning This is a class B product In a domestic environment this product may cause radio interference in which case the user may be required to take adequate measures Copyright 2002 2004 All rights reserved Version 1 0 All trademarks and trade names are the properties of their...

Page 4: ......

Page 5: ...ware Requirements 7 Chapter 2 Installation 9 Overview 9 Quick Start 9 Installation 10 Chapter 3 Terminal Telnet Configuration 11 Overview 11 Terminal Configuration 12 Procedure 12 Telnet Management 13 Terminal Telnet Interface 15 Entering Data 16 Menu Options 16 Main Menu Option 1 Setting IP Addresses 16 Main Menu Option 2 Set Manager Telnet IP Address 18 ...

Page 6: ...in Menu Option 9 Save and Exit 30 Main Menu Option 0 Exit without Saving 30 Chapter 4 Browser Management 31 Overview 31 Connection Procedure 31 Web based Interface 33 Serial Port Configuration Screen 34 Modbus Configuration Screen 35 LAN Configuration Screen 36 SNMP Configuration Screen 37 Configuration Summary Screen 38 Port Activity Screen 39 Chapter 5 Operation 39 Operation 39 Chapter 6 Trouble...

Page 7: ...ons 47 EtherSeries Gateway Specifications 47 RS 232 PIN Assignments 48 Control Signal Operation 49 CABLES 51 Appendix B RS 422 RS 485 Interface 53 Introduction 53 Changing the Setting 53 RS 422 4 Wire RS 485 Interface Pinout 54 2 Wire RS 485 Interface Pinout 55 RS 485 2 wire Fan out 55 ...

Page 8: ......

Page 9: ...us protocol designed to connect directly to computer asynchronous ports MODBUS has been extended to operate over Ethernet using the IP protocol suite This gateway converts between the MODBUS TCP IP protocol and MOBUS ASIII RTU protocols transparently Normal operation would consist of one or more Ethernet based computers functioning as Modbus Master and one or more MODBUS slave devices usually RTUs...

Page 10: ...DBUS has been extended to operate over Ethernet using the IP protocol suite This gateway converts between the MODBUS TCP IP protocol and MOBUS ASCII RTU protocols transparently The EMB 02 enables one or more MODBUS controllers to communicate with modes ASCII RTU based serial RTUs It will not allow MODBUS TCP RTUs to operate with a serial MODBUS controller Other Features Dual Serial Ports The EMB 0...

Page 11: ...mware Firmware upgrades are downloadable to the gateway The utility program required for this and the actual firmware upgrades are available from your dealer A Windows 95 98 XP NT workstation is required to run the download software ...

Page 12: ...anel is shown below Figure 1 EtherSeries EMB 02 1 Power port Connect the power adapter here 2 10 100Base T port Connect LAN cabling here 3 Red LED RUN Indicator 4 Red LED LAN Indicator 5 RS 232 Port 1 DE 9 DB 9 Serial Interface 6 RS 232 Port 2 DE 9 DB 9 Serial Interface ...

Page 13: ...is switch places the unit in configuration mode and is used only when configuring the unit via the serial port as explained in Chapter 3 Configuration Return from configuration mode by exiting the configuration menu or by power cycling the unit This switch may be depressed with a tiny screw driver or stiff wire A straightened paper clip works nicely ...

Page 14: ...rs The LAN LED is the Ethernet Status indicator It is lit when there is a valid 10 100BaseT Ethernet connection This LED flickers off and on with activity on the Ethernet even if the activity isn t directly to this unit The green LEDs flicker off and on with EMB 02 transmit activity on the two serial port The red RUN LED flickers off and on with ethernet transmit activity from the EMB 02 ...

Page 15: ...TCP on the Ethernet interface and MODBUS ASCII and MODBUS RTU on the serial ports It may be configured using any terminal or terminal emulation software on a PC via serial port one Any standard telnet program may be used to telnet to the unit for configuration or any standard web browser may be used for configuration once the unit has a valid IP address configured Since any terminal program or web...

Page 16: ......

Page 17: ...of 192 168 1 1 is appropriate for your Ethernet network To use LAN based configuration either Telnet or Web Browser based an IP address must be configured The default value of 192 168 1 1 may not work with your network Terminal Mode configuration may be performed at any time and no IP address is required See Chapter 3 for details Quick Start Quick start instructions are on the next page Installati...

Page 18: ...a screw terminal block 3 Configure an IP Address Information Using either the default address and telnet or a web browser OR using a serial port and a terminal emulation configure the IP and Modbus TCP information At a minimum the IP address and port number must be configured 4 Configure a Serial Port Configure the appropriate serial ports for the proper Modbus protocol slave address range and tim...

Page 19: ... following methods Web Browser After installing the unit in your LAN use your Web Browser for management See Chapter 4 Browser Configuration for details Terminal Mode Use a serial cable connection and a communication program This is often required prior to other modes in order to configure a compatible IP address into the unit Telnet Mode After installing the unit in your LAN manage it using Telne...

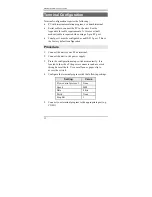
Page 20: ...an RS 232 port This is the factory default configuration Procedure 1 Connect the unit to your PC or terminal 2 Connect the unit to the power supply 3 Press the configuration setup switch momentarily It is located to the side of the power connector and accessed through a small hole Use a small pen or paper clip to access the switch 4 Configure the terminal program with the following settings Settin...

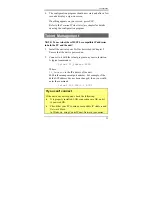
Page 21: ...hapter 2 Ensure that the unit is powered on 2 Connect to it with the telnet program on your workstation A typical command is telnet IP_Address 8000 Where IP_Address is the IP address of the unit 8000 is the management port number For example if the default IP address has not been changed then you would enter the command telnet 192 168 1 1 8000 If you can t connect If the unit does not respond chec...

Page 22: ...k the IP Address and Network Mask If your PC is NOT using an IP Address within the range 192 168 1 2 to 192 168 1 254 with a Network Mask of 255 255 255 0 then it will not connect to the default IP address 3 Refer to the following section for details on using command line management ...

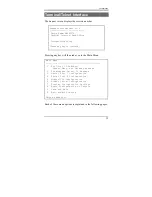
Page 23: ...will then take you to the Main Menu Main Menu 1 Set Local IP Address Subnet Mask and Gateway Address 2 Set Manager Telnet IP Address 3 Serial Port 1 Configuration 4 Serial Port 2 Configuration 5 Modbus TCP Configuration 6 Modbus Serial Configuration 7 Display Configuration Settings 8 Reset Configuration to Default 9 Save and Exit 0 Exit without Saving Choose a Number Each of these menu options is ...

Page 24: ... IP Addresses Selecting 1 1 Local IP Address from the Main Menu will result in a screen which is similar to the following Choose a Number LOCAL UNIT CONFIGURATION Local Address 205 166 54 141 Serial NO 00 60 E9 00 53 70 Gateway Address NOT SET Subnet Mask 255 255 255 0 Name of Contact Person Supervisor Device Name GW005370 Physical Location Head Office IP Fragmentation ALLOWED SET LOCAL UNIT CONFI...

Page 25: ...re 3 Subnet Mask The network mask indicates what class of TCP IP network you have The default value is for a class C network with up to 255 users This value should work in small networks If in doubt consult your network administrator 4 Name of Contact Person Supervisor This is a text field It can be used to store the name of the person responsible for the unit 5 Device Name This is a text field It...

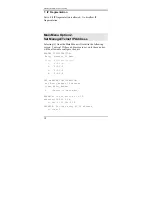
Page 26: ...result in the following screen Caution If these addresses are set only those nodes will be allowed to configure the unit ANAGER CONFIGURATION Entry Manager_IP_Addr 1 0 0 0 0 2 0 0 0 0 3 0 0 0 0 4 0 0 0 0 SET MANAGER CONFIGURATION set Entry_Number IP_Address clear Entry_Number 0 Return to main menu EXAMPLE To set entry 3 to IP address 138 239 0 24 set 3 138 239 0 24 EXAMPLE To clear entry 2 IP addr...

Page 27: ...n the table cannot be edited but commands are provided to insert SET and delete CLEAR entries Main Menu Options 3 4 Serial Port Configuration Selecting 3 from the Main Menu will result in the following screen for port 1 Selecting 4 from the Main Menu will result in a similar screen for port 2 PORT 1 CONFIGURATION Baud Rate 38400 RTS CTS Handshake No Parity EVEN Delay after RTS Active 0 ms Data 8 B...

Page 28: ...S 0 5000 ms 0 Return to previous menu EXAMPLE To set the baud rate to 19200 1 4 Enter Command This screen configures the settings for the serial ports The settings used should match the device connected to the serial ports of the gateway Baud Rate Speeds between 300 bps and 230 4Kbps are supported Parity Configure parity bits for either NONE ODD or EVEN to match your serial devices Data Bits Confi...

Page 29: ... minimum amount of time to delay after asserting RTS before checking the state of CTS Set to a value between 0 and 5000 msec 5 seconds Wait CTS Active This parameter sets the maximum amount of time to wait for CTS to go active If CTS does not go active within this time period the transmission will be aborted Set to a value between 0 and 5000 msec 5 seconds Delay After CTS Active This parameter set...

Page 30: ...EtherSeries EMB 02 User s Guide 22 ...

Page 31: ...lave Address 0 Broadcast Fixed Slave Address 0 SET MODBUS TCP CONFIGURATION 1 TCP Port 2 Connection Timeout 10 3600 seconds 3 Return Modbus TCP Exceptions 0 no 1 yes 4 Discard Multiple Polls 0 no 1 yes 5 Slave Address 0 0 Map to Addr 1 1 Broadcast 6 Fixed Slave Address 0 Not Fixed 1 247 Fixed address 0 Return to previous menu EXAMPLE To set the Connection Timeout to 75 seconds 2 75 Enter Command U...

Page 32: ...s NO Discard Multiple Polls When enabled this parameter will cause the Gateway to discard a second query from a host to a Slave Address if a previous query is currently in process This is to guard against a situation where the poll rates are set too high for network conditions causing the host queries to get out of step with the slave responses Slave Address 0 This parameter controls how Modbus TC...

Page 33: ...sed Main Menu Option 6 Modbus Serial Configuration Selecting 6 from the Main Menu will result in the following screen MODBUS SERIAL CONFIGURATION Port 1 Modbus Protocol RTU Port 2 Modbus Protocol RTU Port 1 Slave Address Low 1 Port 2 Slave Address Low 1 Port 1 Slave Address High 247 Port 2 Slave Address High 247 Port 1 Response Timeout 2000 Port 2 Response Timeout 250 Port 1 Character Timeout 50 P...

Page 34: ...s on this port Select either 0 for RTU or 1 for ASCII Slave Address Low Configures the lowest address of an RTU on this port Slave Address High Configures the highest address range of an RTU on this port If the ranges of port one and port two overlap addresses in the overlap will be sent to port one Response Timeout This parameter specifies the maximum amount of time to wait for the first characte...

Page 35: ...Configuration 27 specification defines this to be 3 5 character times but in practice this is usually too short as 5 to 10 msec delays are common ...

Page 36: ...ay Address NOT SET Subnet Mask 255 255 255 0 Name of Contact Person Supervisor Device Name GW005370 Physical Location Head Office IP Fragmentation ALLOWED MANAGER CONFIGURATION Entry Manager_IP_Addr 1 0 0 0 0 2 0 0 0 0 3 0 0 0 0 4 0 0 0 0 Press any key to continue PORT 1 CONFIGURATION Baud Rate 38400 RTS CTS Handshake No Parity EVEN Delay after RTS Active 0 ms Data 8 Bits Wait CTS Active 0 ms Stop...

Page 37: ...oadcast Fixed Slave Address 0 MODBUS SERIAL CONFIGURATION Port 1 Modbus Protocol RTU Port 2 Modbus Protocol RTU Port 1 Slave Address Low 1 Port 2 Slave Address Low 1 Port 1 Slave Address High 247 Port 2 Slave Address High 247 Port 1 Response Timeout 2000 Port 2 Response Timeout 250 Port 1 Character Timeout 50 Port 2 Character Timeout 50 Press any key to continue CURRENT STATISITCS Network packets ...

Page 38: ... restore defaults with menu item 8 and then BEFORE REBOOTING change the IP information by using submenu 1 so your PC will still be able to connect to the gateway when it reboots Main Menu Option 9 Save and Exit Selecting 9 from the Main Menu will store the configuration details in the gateway and exit the configuration program If using Telnet the connection will be lost when rebooting If you have ...

Page 39: ...led in your LAN and have a compatible IP address before this configuration method can be used Most Browsers will work The only requirement is that they support HTML tables and forms If your browser uses a proxy the proxy function may need to be disabled Connection Procedure To establish a connection to the gateway follow this procedure 1 Install the unit in your LAN as described in Chapter 2 Ensur...

Page 40: ...is properly installed LAN connections are OK and it is powered ON Check that your PC is using a compatible IP Address and Network Mask In Windows98 using Control Panel Network to examine the Properties for the TCP IP protocol can check the IP Address and Network Mask If your PC is NOT using an IP Address within the range 192 168 1 2 to 192 168 1 254 with a Network Mask of 255 255 255 0 it will not...

Page 41: ...o Figure 2 Figure 1 Sign on Screen Use the menu bar on the left to navigate to the desired screen On line help is available on each screen Each screen is explained in the following sections Details for each field are given in the previous chapter under similar sections ...

Page 42: ...This screen allows you to configure the Serial Ports one and two The settings used should match the device connected to this serial port See Chapter 3 for details on these settings There will be one screen for each serial port The screen will only include the field RS 485 if the port is jumpered for RS 485 ...

Page 43: ...iguration Screen Figure 3 Modbus Configuration This screen is used to configure all Modbus parameters Note that two menus are used for these values in the Telnet Configuration method Configure Modbus TCP and Configure Modbus Serial ...

Page 44: ...EtherSeries EMB 02 User s Guide 36 LAN Configuration Screen Figure 4 LAN Configuration Screen This screen is used to configure the LAN parameters See Chapter 3 for details ...

Page 45: ...een Overview This screen may be ignored if SNMP is not used The text fields commonly used in SNMP Simple Network Management Protocol Programs to identify this device when browsing the network are required for SNMP operation The community name should be changed from the default ...

Page 46: ...on shown Operation This screen displays all current settings for this gateway Clicking the Set to Defaults button will restore ALL values to their factory default values When this is done the unit will reboot and the existing connection will be lost You must reconnect using the default IP Address of 192 168 1 1 ...

Page 47: ... RTUs to communicate and interoperate with MODBUS TCP based controllers The MODBUS standard protocol is an asynchronous protocol designed to connect directly to computer asynchronous ports MODBUS has been extended to operate over Ethernet using the IP protocol suite This gateway converts between the MODBUS TCP IP protocol and MOBUS ASIII RTU protocols transparently Normal operation would consist o...

Page 48: ...ns to them If you follow the suggested troubleshooting steps and the EtherSeries gateway still does not function properly please contact your dealer for further advice Hardware Problems Before anything else check that all cables are wired correctly and properly connected P All the LEDs are off S Check the power supply or power connection P When using 10 100Base T cabling the unit does not work S C...

Page 49: ...the LAN connection are OK the problem is in the LAN addresses or routing The most common problem cause is incorrect IP addressing Make sure the workstation and gateway have compatible IP addresses It may be that your arp table contains invalid entries You can clear the arp table by rebooting or on Windows95 by typing the following command at the command prompt or Run dialog box arp d Check that yo...

Page 50: ...e cases smart hubs and switches must be power cycled to clear their internal arp cache This is often a problem on test bench setups where IP addresses are moved between different equipment or a unit is moved between ethernet switch receptacles ...

Page 51: ...he gateway end of the cable to verify program operation and the proper COM port The most common problems causing this symptom are incorrect RS 232 wiring or the Windows Hyperterm program not operating correctly P Can t drive more than three RS 485 2 wire loads S Read the section on RS 422 2 wire fan out and configure the unit appropriately P Unable to poll some addresses S Read the section on modb...

Page 52: ...ser If it looks good then 3 Attempt a poll from the Modbus polling master computer If that works correctly you re ready to continue with Modbus operation IF not 4 Check the gateway s statistics to see if it received the LAN activity and passed the polls to a serial port If not there is likely a problem with IP addressing or the host computer is not configured correctly for the gateway s LAN If the...

Page 53: ...Troubleshooting 45 ...

Page 54: ......

Page 55: ...32 Buffer 4 Kbytes RS 232 485 two male DE 9 connectors PC DB 9 RS 232 speed Up to 230 Kbps Network Ethernet 10Base T 100Base T CPU 16 Bit Power 9 to 36 VDC 12VDC 260 ma or Optional power supplies Switch Configuration Mode LED indicators 4 multi purpose Default IP address 192 168 1 1 Telnet management port 8000 Operational Temperature 40C to 70C ...

Page 56: ...t It operates as a DTE device The chart below details signal directions and names Serial Port Pin Assignments Pin Signal Name Type 1 Carrier Detect CD In 2 Receive Rx In 3 Transmit Tx Out 4 Data Terminal Ready Out 5 Signal Ground GND Power 6 Data Set Ready DSR In 7 Request to Send RTS Out 8 Clear to Send CTS In 9 RingIndicator RI Not used In ...

Page 57: ...rted when the unit is powered on Signal Ground Common ground DSR Input ignored RTS Output If handshaking is disabled this signal is always asserted If handshaking is enabled it will be asserted when the gateway has a packet to transmit on the serial port and it will be de asserted when transmission is complete CTS Input When handshaking is disabled this signal is ignored When handshaking is enable...

Page 58: ...EtherSeries EMB 02 User s Guide 50 Ring Indicator Not used ...

Page 59: ...or configuration and is available from your dealer This is commonly called a PC to PC null modem cable Gateway to RTU Since RTUs vary in pinout configuration no standard cable may be specified Since the gateway pinout is similar to a PC COM port when configured in RS 232 mode a PC to RTU cable may be used that is the same cable that works between YOUR PC and YOUR RTU Note that if the RTU has a pin...

Page 60: ...EtherSeries EMB 02 User s Guide 52 ...

Page 61: ...tion The 9 pin serial connector may be used for either RS 232 or RS 422 4 wire RS 485 point to point operation by changing internal jumpers Changing the Setting Remove the main board from the case by removing two screws from the rear panel There is a row of jumpers and three rows of pins adjacent to the serial connector RS 232 Setting ALL jumpers should be placed in the positions nearest the board...

Page 62: ...urthermost from the board edge RS 422 4 Wire RS 485 Interface Pinout Serial Port Pin Assignments Pin Signal Name Type 1 No Connection N A 2 No Connection N A 3 Receive Data Rx In 4 Transmit Data Tx Out 5 Signal Ground GND N A 6 No Connection N A 7 No Connection N A 8 Receive Data Rx In 9 Transmit Data Tx Out ...

Page 63: ...ction N A RS 485 2 wire Fan out Since this unit is most often used as an RS 485 2 wire end point it is delivered with terminating resistors installed internally With this termination installed the RS 485 2 wire interface will reliably drive three RS 485 loads If more than 3 devices are required the terminating resistor pack may be removed Without the terminating resistor pack up to 31 devices may ...

Page 64: ...EtherSeries EMB 02 User s Guide 56 ...

Reviews: