background image

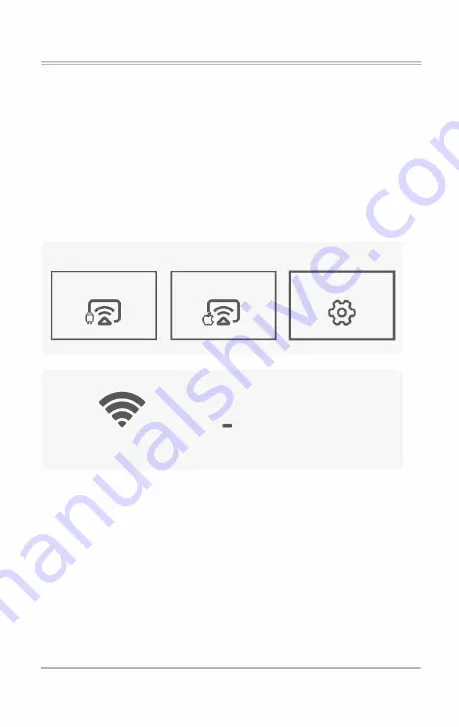
SYNCSCREEN SETTING 

Step 1: 

Select SyncScreen Setting from syncscreen. 

Step 2: 

Choose the setting you want. 

[email protected] 

The settings include three functions: 

WIFI / System Upgrade/ More Setting. 

WIFI: 

Search and Cormect WiFi. 

System Upgrade: 

OTA upgrade / USB upgrade. 

More Setting: 

System Reset 

Mirror Mode/ Airplay Mode/ Language. 

S Y  N  C S  C  R  E  E  N 

Android Screen 

iOS Screen 

SyncScreen Setting 

0

WIFI 

System Upgrade 

More Setting 

-23-

Summary of Contents for RD-821

Page 1: ......

Page 2: ......

Page 3: ......

Page 4: ......

Page 5: ...rt MHL and an MHL to HDMI cable is required iPhone iPad need a Lightning to HDMI cable adaptor 3 To connect the mini projector to PCs or laptops please adjust the PC laptop display resolution to 1280 720 for best clarity 4 Please note that it is only suitable for use in dark rooms 5 Dolby is not supported Please tum off Dolby digital in your device ACCESSORY LIST 1 x AV signal cable 1 x Remote con...

Page 6: ...any material Please keep the projector away from water or any other liquid as it is not waterproof Please don t put the projector in wet or moist conditions to prevent electric shock Please tum off and unplug from the power supply if not using the projector for a long time Please use the original packing foam or other anti shock material when relocating the projector Please contact our customer su...

Page 7: ...input 5 Source 6 Menu 10 o 0 11 13 14 7 Power indicator 8 OK 9 Direction buttons 10 ESC 11 Power button 12 IR 13 VGA 03 ma support dbpowershop com 19 c i AV use OUT5V HDMI 1 5 16 17 18 14 Earphone slot 15 AV 16 USB input slot 17 USB output slot SV power supply 18 HDMI 19 SD ...

Page 8: ...Enter 11 Retum 12 Volume Up 13 Mute Caution Do not submerge the remote control in water Do not put the remote control near fire or in weVhot places Do not use old and new batteries together in the remote control Please take the batteries out if not using the remote control for a long time to avoid battery leakage Please point the remote control at the IR receiver 04 ...

Page 9: ...USER MANUAL 4 1 Connecting the projector to power 4 1 1 Connect the power cable to the projector m support dbpowershop com 4 1 2 The projector will display an indicator light when connected to power 05 ...

Page 10: ...m support dbpowershop com 4 2 Power ON OFF Press the C button on the projector or on the remote control to power on Projector 06 0 0 Remote Control ...

Page 11: ...m support dbpowershop com 4 3 Multimedia boot screen After 10 20 seconds the multimedia screen will be displayed Q HOME I I Memory Card HDMI Screen Mirroring rn I Ill I m VGA Multimedia I Q I AV 07 ...

Page 12: ... keystone correction 4 4 1 Image focusing m support dbpowershop com Make sure the projector is horizontal to the projector screen and adjust the focus by pressing button 2 You can displayvideo or the menu to check adjustment 08 ...

Page 13: ...not have a horizontal keystone correction function The projector must be placed horizontally to the projection screen If you encounter this problem it is probably because the projector has not been placed horizontally to the projection screen or the projection screen is not vertically positioned Solution Adjust the projector s position so that it is horizontal to the screen 09 ...

Page 14: ...CONNECTIONS 5 1 Connections m support dbpowershop com a o o 1 11 1 C7 AV USB HDMI X 0 HD Connect multiple devices and applications ...

Page 15: ...B SD card 5 2 1 Insert the USB SD card into the slot picture 5 2 2 Choose Memory Card or Multimedia from the HOME screen i HOME I Memory Card Screen Mirroring rn m I Multimedia I 11 m support dbpowershop com C I HDMI I VGA Q I AV ...

Page 16: ...file JPG PNG BMP JPEG MP4 MKV MOV WMV RMVB RM AVI FLV TRP Multimedia Video file VOB 3GP DIVX TP TS MPG M2TS F4V OAT Text file lXT 5 2 3 Choose the content which you need to display Video music photos text e e 0 a MOVIE MUSIC PHOTO TEXT 5 2 4 Choose the file you want to display Press OK to display 12 ...

Page 17: ...m support dbpowershop com I I Memory Card HDMI Screen Mirroring I VGA Multimedia g I AV I L y C Jt mi Supports NTSC PAL 13 ...

Page 18: ...n 5 4 1 Use the HDMI slot to connect computers and HDMI compatible devices Once connected select the HDMI signal source Q HOME I I Memory Card HDMI Screen Mirroring cu m I I VGA Multimedia I Q I AV Video Format Resolution 576P 480P 720P 1080P 14 ...

Page 19: ...5 3 5mm audio connection 5 5 1 Use the 3 5mm audio jack to connect headphones and speaker equipment Note This projector does not support Dolby sound 0 0 0 L J0 5 6 Other connection USB output 5V for mobile table power supply J 15 ...

Page 20: ...ur needs and press the OK key to confirm 6 2 Sub menu functions 6 2 1 PICTURE Picture Mode Color Temperature Aspect Ratio Noise Reduction PC Adjust Reduce Display Size Projection Direction 6 2 2 SOUND Sound Mode Balance Surround Sound 6 2 3 TIME Clock Sleep Timer 6 2 4 OPTION OSD Language Restore Factory Default Color Range Sostware Upadate USB G HOME C o J Memory Card HDMI Screen Mirroring m Ill ...

Page 21: ......

Page 22: ...t dbpowershop com Step 3 After entering into the interface select the function you need Note To return to HOME screen from Screen Mirroring interface press the Home key on remotecontrol G HOME I C I Memory Card HDMI Screen Mirroring rn I I m VGA Multimedia I Q I AV SYNCSCREEN Android Screen IOS Screen SyncScreen Setting 18 ...

Page 23: ...ctor and click to connect and wait a few seconds then the mirroring will be successful Note Diferent Android device have diferent positions and names for the screen mirroing function please refer to the manual of the Android device CD The SSID is the device name of the projector The instructions of Android Screen Android Screen Android D ISSID DBPOWER_OBlF I Waiting for connection D G 1 On your An...

Page 24: ...ll d ipps wak with this use xtt UII Learn l1 IO t bout t hls 81 hllQ l medi1Uol lech 4 e loper com 2300 1 ilet 1Jl pk tcast aplic CANCl 1 1 IEW Step 4 Your Android device will pop up below NeatCasr window slelect OK NeatCa st 01 4 11 NM1Ci si whtot 1 11 s use aoce 1s ooonected II U e cl l11ol1 1 Lh 1 USEI ll l ch J lft il 1 151 nu Ltql f ii rloo 1Rl C NCEL OK Step 5 When your Android device pop up...

Page 25: ...enter the password 12345678 then your iOS device will connect to the projector Step 3 Tum on Screen Mirroring on your iOS device select the device name of the projector CD The device name and password of the projector Projectot to Wi Fi router connection indicator The instruction of iOS Screen iOS Screen SSID DBPOWER_OBlF G password 12345678 Waiting for connection 1 On your iOS device turn on Wi F...

Page 26: ...BPOWER_OBlF password 12345678 Waiting for connection 1 On your iOS device turn on Wi Fi and connect to NETGEAR 0045 2 Open Control Center and Screen Mirroring 3 Select DBPOWER_OBl F Version 1 3 a_20200910 7 2 3 Method 3 Wired connection Enter iOS Screen connect your iOS device to the projector OUT5V portwith a USB cable Your iOS device will receive a trust prompt confirm trust then the screen mirr...

Page 27: ...bpowershop com The settings include three functions WIFI System Upgrade More Setting WIFI Search and CormectWiFi System Upgrade OTA upgrade USB upgrade More Setting System Reset I Mirror Mode Airplay Mode Language S Y N C S C R E E N Android Screen iOS Screen SyncScreen Setting 0 WIFI System Upgrade More Setting 23 ...

Page 28: ...as been connected press the OK key and three options will pop up Disconnect Disconnect the Wi Fi connection this time but it will be automatically connected after restarting Forget Forget the password After restarting it will not automatically connect The password must be entered again for re connection Cancel Exit the menu 0 More Setting I 1 NETGEAR 01 NETGEAR 0045 2 MIDVPN2 4G 3 DIRECT Fb J I I ...

Page 29: ......

Page 30: ......

Page 31: ......

Reviews: