background image


pg. 8


Room Correction Process 

YouTube Video 

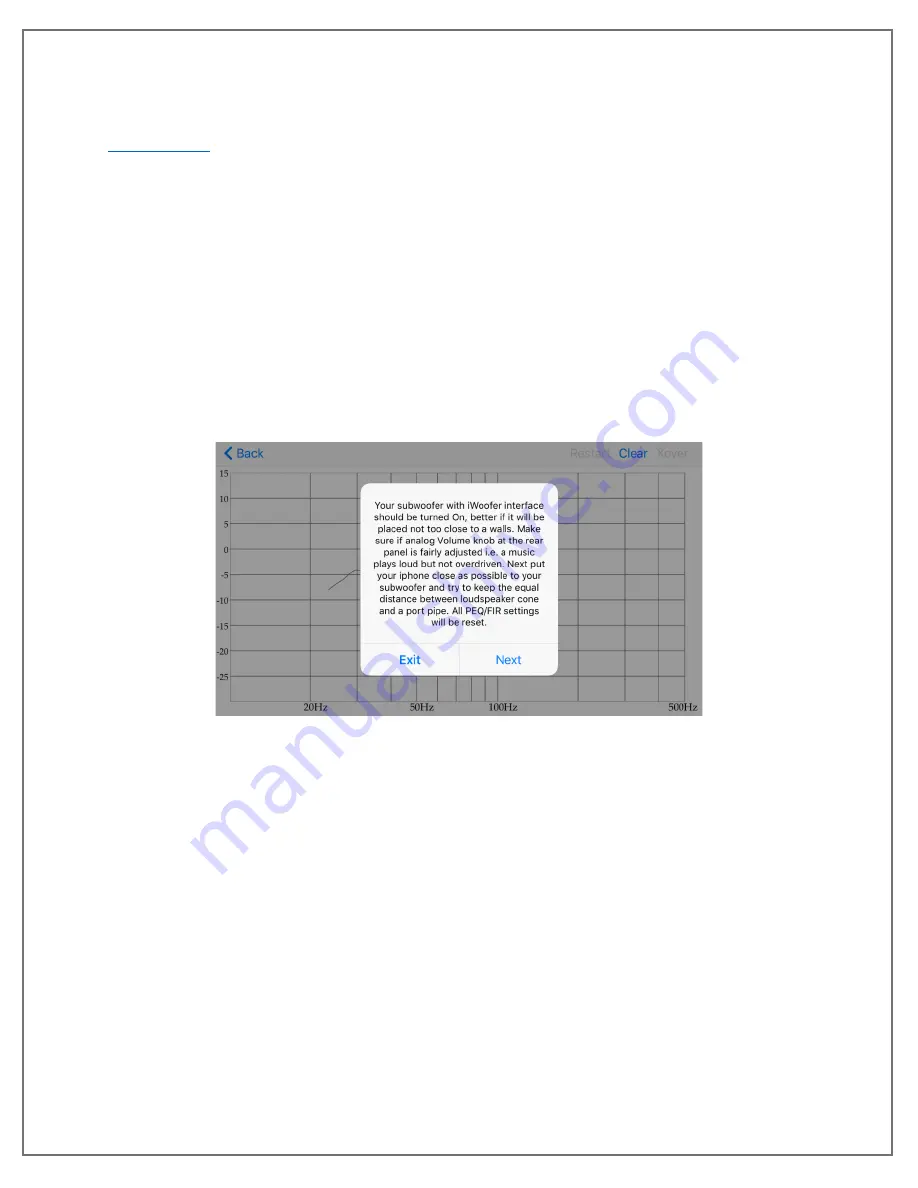
Once you have done everything in the "before you start" section and adjust the "room correction 

settings" menu, click the "wizard" section in the room correction menu, which will bring you to the 

screen below. 

Note:

 Remain quiet and block out outside noises as much as possible during this whole process for 

optimal response. A loud noise during your measurements will not ruin the measurements. However, 

it's recommended to restart if noise interference occurs while measuring. 

Note:

 The intention of this algorithm is not to correct the response of an entire room, but rather a single 

listening position (for example, an area of a few square feet, like an armchair or at most an entire 

couch). Although the algorithm isn't optimized for it, and Dayton Audio does not recommend it, you can 

try to use it to correct the sound across the entire room by averaging responses across the room in the 

2nd step.  Ultimately, if you like the way it corrects your room, you can call it successful! 


There are three main steps that the wizard will take in order to do room correction.  

1)


The first step is a near field measurement of your subwoofer that will occur right when you 

press next on the screen above. This measurement gives the app knowledge about the initial 

response of your subwoofer, without any of the effects of room acoustics. You will hear it first 

make a few rapid sweep sounds at varying volumes while it figures out how loudly it should 

perform the real sweep. You will then hear it play a longer sweep, the length of which depends 

on the "frequency step delay setting." 

a.


You will have the option to average as many responses together as you want. We 

recommend averaging at least three measurements for optimal response. Keep the iOS 

device close to the subwoofer, but move it around for each measurement, especially if 

your subwoofer has a port.


2)


The second step is to choose the correction type and to take measurements in your listening 

position. A description of each correction type is below. Because the correction process is quick 

and easy, it's recommended to try each of the three types to see what kind of sound you like 

Summary of Contents for DSP-LF

Page 1: ......

Page 2: ...Input Audio Signal 2 Output Audio Signal 2 AV Receiver and Subwoofer Amplifier Settings 3 iWoofer App Quick Start 4 Notes about the iWoofer App 5 Automatic Room Correction with iWoofer Pro 6 Before you start 6 Room Correction Settings 7 Room Correction Process 8 Bass Shaker Tuning Guide 11 Revision Log 12 ...

Page 3: ...at can be compensated for in software Android microphones are not as predictable as an iOS microphone due to the number of manufacturers and different implementations The premium version of iWoofer also adds extra settings for the limiter compressor and dynamic bass control Device Connection and Setup Power Because of its minimal current draw and convenient 5V micro USB power connection the DSP LF...

Page 4: ... AV receiver and subwoofer amp to prevent interference between your plate amp crossover and the iWoofer crossover It is recommended to use the iWoofer software crossover as opposed to the crossover on your subwoofer amp a Note A low pass filter means that all of the frequencies below this value will pass through and frequencies above this value will be attenuated and then altogether eliminated Thi...

Page 5: ...u of the app Press this one or if you don t yet have a DSP LF press demo mode to view the app If you have multiple DSP LF devices they will all show up here Troubleshooting The device will enter standby after a while if it does not sense any input signal and will not show up on this screen If this happens to you either unplug your device and plug it back in or provide an input signal to kick it ou...

Page 6: ...you MUST turn these settings off again as they might be activated by the factory reset Notes about the iWoofer App When it asks to import presets from DSP if you press yes that means it will import the settings currently set on device to your app If you say no it will use the default or locally stored settings stored in the app You will get this message if you make initial adjustments with one sma...

Page 7: ...hat your near field response will look more like a flat line while your listening position measurement will likely look more ragged as represented by dips and peaks throughout Depending on which type of correction you choose the app will apply equalization to make your listening position more faithfully represent the original audio signal Before you start For optimal results take off any case you ...

Page 8: ...ting affects how optimistic the iWoofer is about the limits of your subwoofer as in how low it is capable of playing If you re confident your subwoofer can handle extremely low notes you can increase the optimism If you re unsure leave the setting at the default or off Frequency Step Delay The frequency step delay setting will affect how long the sweeps are The lower the delay number the shorter t...

Page 9: ...ur room you can call it successful There are three main steps that the wizard will take in order to do room correction 1 The first step is a near field measurement of your subwoofer that will occur right when you press next on the screen above This measurement gives the app knowledge about the initial response of your subwoofer without any of the effects of room acoustics You will hear it first ma...

Page 10: ... into your listening position Linear Suitable for high class and high performance subwoofers this mode will equalize the entire frequency spectrum of your subwoofer s response to create an ideal flat response much like what is found in mastering studios This mode will significantly reduce the effects of room reflections and also will equalize the initial response of your subwoofer to an ideal flat...

Page 11: ...a completed correction process This measurement was completed using the linear mode of correction and three measurements averaged together for both near field and listening position The result also used all of the settings found in previous screenshots ...

Page 12: ... this filter around 100 Hz so you get the bass shaker effects from the entire bass range If you are adding bass shakers to your setup to augment a setup with existing high quality subwoofers you might want to make the filter much lower to avoid a rumble interference from your subwoofer and bass shakers hitting your chair at the same notes PEQ When used with bass shakers the PEQ is an essential fun...

Page 13: ...pg 12 Revision Log Version 1 0 Initial Guide ...

Page 14: ......

Reviews: