


MIRcat OPERATION
•
D11-00028-02-A
Page
27
of
54
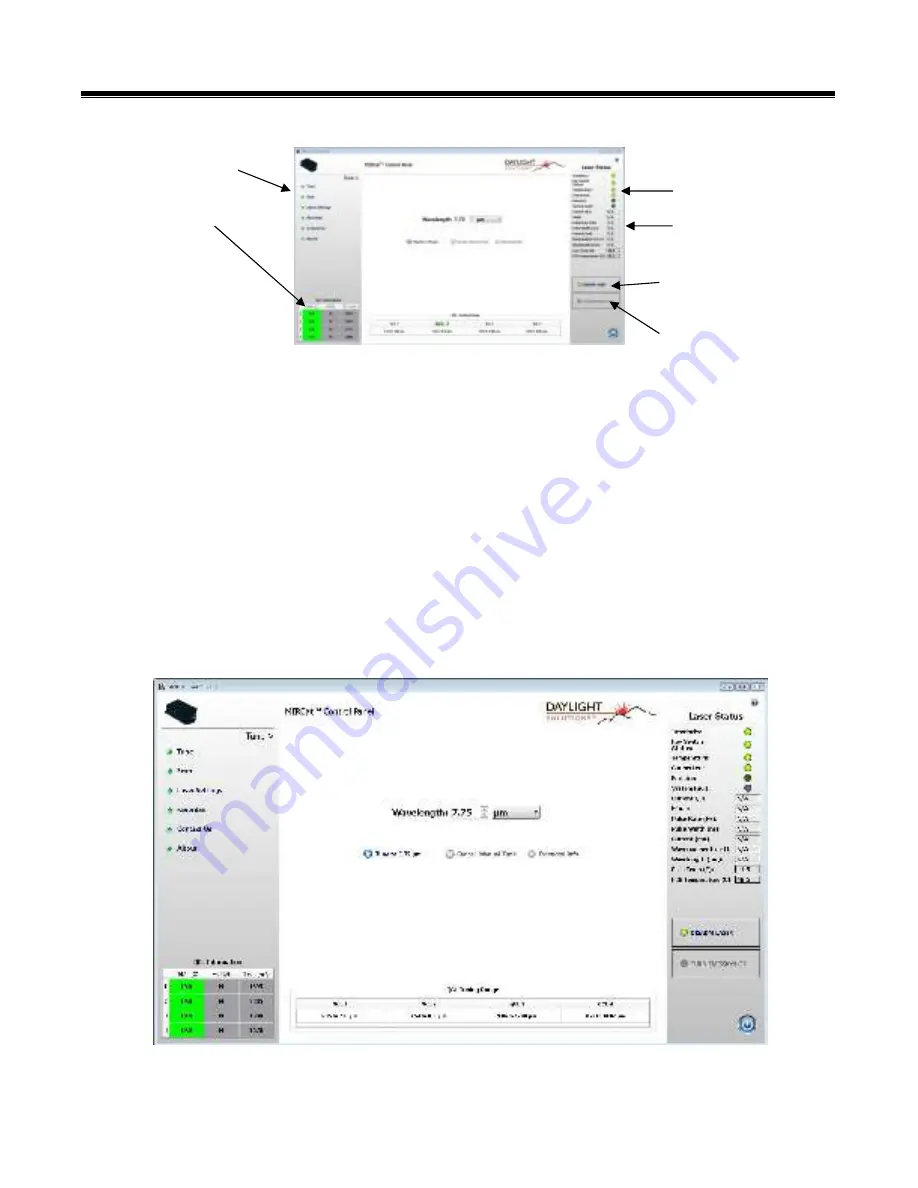
Menu Template
The standard menu template allows the user to monitor the MIRcat from each of the six main menus. The
left side bar allows the user to navigate between menus and monitor each QCL module temperature and
active status. On the right side, there is a Laser Status section that quickly allows the used to see green
lights for all major interlocks required for the laser to emit light, as well as the value of the selected QCL
module, wavelength and wavenumber, etc. The user can also Arm the laser, and enable laser light emission
from the right side. The bottom bar lists the four QCL module tuning ranges as a quick reference for the
user. Clicking on a QCL Header makes that the preferred QCL for tuning. The entire tuning range will be
used for that Preferred QCL during manual or scan modes. See the Next Section for preferred tuning. Please
note: if your MIRcat system was purchased with the visible aiming beam option, an ‘Enable Red
Laser’/’Disable Red Laser’ command will be present on the GUI sidebar (as shown in Figure 11).
Tune Menu
Laser Status
Arm Laser
QCL Module
Status
Menu
s
Turn Laser
Emissions ON/OFF
Laser Parameters


