background image

2

Tools and Materials Needed

You may need some of the following tools and materials to install the rain collector.

• Wire cutter
• Drill with 3/32” (2


mm) drill bit

• Medium Phillips screwdriver
• Cable clips or weather-resistant cable ties with screw holes or other means for 

mounting

• Small hammer

Prepare the Rain Collector

1. Turn the rain collector upside down. Remove 

the cone from the base by rotating the base 
until the latches on the cone line up with the 
latch openings in the base, then lifting the base 
away from the cone.

Tip:

It might be easier to remove the cone if you steady it between your knees.

2. Carefully cut and remove 

the plastic tie which holds 
the tipping spoon in place 
during shipping.

Cable 

Tie

Sensor 

Cable 

(black)

-

1

1

Note: Be careful to not accidentally cut the sensor cable.

Test the Rain Collector

Before installing the rain collector, test the unit. If you are replacing a rain collector 
you previously installed, make a note of the total rainfall amount displayed. You 
may want to reenter this amount after you test the rain collector.

Summary of Contents for 6464

Page 1: ...USER MANUAL Davis Instruments 3465 Diablo Avenue Hayward CA 94545 2778 U S A 510 732 9229 www davisinstruments com R Product numbers 6464 and 6464M Rain Collector with Flat Surface Mount ...

Page 2: ......

Page 3: ...e at www davisinstruments com Note Model number 6464 is factory calibrated to take rain measurements in 0 01 inches The metric version of the rain collector number 6464M comes factory calibrated to take measurements in 0 2 mm Components Rain collector cone latched onto base Base with tipping mechanism and 40 12 m cable Four 8 x 3 4 screws Debris Screen 16 3 5 9 cm bird spikes optional RAIN CONE 40...

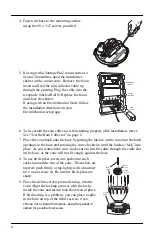
Page 4: ... on the cone line up with the latch openings in the base then lifting the base away from the cone Tip It might be easier to remove the cone if you steady it between your knees 2 Carefully cut and remove the plastic tie which holds the tipping spoon in place during shipping Cable Tie Sensor Cable black 1 1 Note Be careful to not accidentally cut the sensor cable Test the Rain Collector Before insta...

Page 5: ...ain collector For accurate readings you must mount the rain collector so that it is level A bubble level is built in to the base to simplify this process Be sure there is an unobstructed path for water runoff from the drain screens The rain collector contains a magnet operated switch which may not operate cor rectly if you mount the rain collector on or near any object which is attracted to a magn...

Page 6: ...e base by putting the latches on the cone into the latch openings in the base and rotating the cone clockwise until the latches lock into place As you reattach the cone make sure to run the cable through the cable slot int he base or the cone will not fit snugly against the base 8 To use bird spikes insert one spike into each socket around the rim of the cone The sockets are tapered push firmly or...

Page 7: ...oth to clean pollen dirt and other debris from the cone drain screens and spoon 4 Use a pipe cleaner to clear the funnel hole in the cone and the drain screens in the base When all parts are clean rinse with clear water 5 Reattach the cone and replace the debris screen Reconnect the rain collector cable to the sensor interface Troubleshooting Guide Rainfall is not registering on the console or the...

Page 8: ...se do not return items to the factory for repair without prior authorization Online www davisinstruments com See copies of user manuals product specifications application notes software updates and more E mail support davisinstruments com Telephone 510 732 7814 Monday Friday 7 00 a m 5 30 p m Pacific Time Specifications Sensor Type Tipping spoon with magnetic switch Output Contact closure Attached...

Reviews: