


5
Prepare the ISS for Installation
Follow the steps in the order they are presented as each builds on tasks completed in
previous steps. These steps apply to all versions of the ISS, unless otherwise noted.
Tip:
Use a well-lit work table or work area to prepare the ISS for installation.
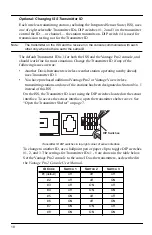
Assemble the Anemometer
The anemometer measures wind direction and speed. The anemometer arm comes
partially assembled with the wind vane attached.
Note:
Do not remove the vane.
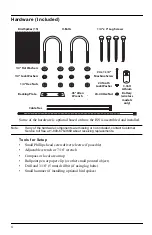
Please locate the following parts to prepare the anemometer:
•
Anemometer arm (wind vane and cable already attached)
•
Anemometer base
•
Wind cups
•
Allen wrench (0.05")
•
#4 machine screw, #4 tooth-lock washer, #4 hex nut
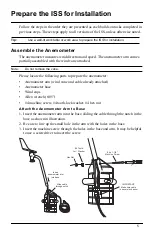
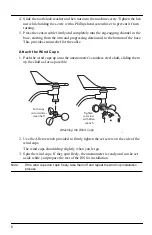
Attach the Anemometer Arm to Base
1. Insert the anemometer arm into the base, sliding the cable through the notch in the
base as shown in illustration.
2. Be sure to line up the small hole in the arm with the holes in the base.
3. Insert the machine screw through the holes in the base and arm. It may be helpful
to use a screwdriver to insert the screw.
Insert
anemometer arm
into base
Slide cable
through notch
#4 Tooth
Lock Washer
Hex Nut
#4 x 1-1/8”
Machine Screw
IMPORTANT:
Make sure cable
is secure in channel
Summary of Contents for 6322C
Page 47: ......