Setup Mode
7
• Press the < and > keys to move to the different segments
and options in the Setup Mode screens.
• Press the + and - keys to scroll through the different
options available.
• Press 2ND and UNITS to change units of measure when
applicable.
• Exit Setup Mode by pressing and holding DONE until
the Current Weather screen displays. See “Current Weather Mode” on
page 15 for more information.
Screen 1: Time & Date
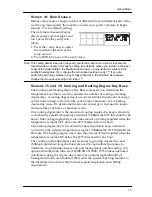
The very first time you power-up the console, you should enter the correct date
and local time.
To change the time and date:
1. Press the < and > keys to select
the hour, minute, month, day or
year segments. The selected
time or date setting blinks on
and off.
2. Press the + and - keys to adjust
a value up or down.
To choose between a 12-hour or
24-hour clock, first select either
the hour or minute setting, then
press 2ND and immediately
press UNITS
.
This toggles the
clock setting between the two clock types.
To choose between a MM/DD or DD.MM display for the date, first select
either the day or month setting, then press 2ND and immediately press
UNITS.
This switches the console from one date display to the other.
3. Press DONE to move to the next screen.
Screen 2: Time Zone
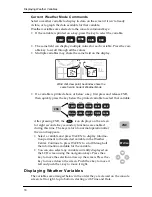
The console is pre-programmed
with a combination of US time
zones and the names of major cities
representing time zones around the
world. You can also configure your
time zone using the Universal Time Coordinate (UTC, also known as
Greenwich Mean Time or GMT) offset.
Note: UTC offset measures the difference between the time in any time zone and a standard
time, set by convention as the time at the Royal Observatory in Greenwich, England.
Hayward, California, the home of Davis Instruments, observes Pacific Standard Time.
The UTC offset for Pacific Standard Time is -8:00, or eight hours behind Universal Time
(UTC). When daylight saving time is observed, an hour is added to the offset time
automatically. Use this function in correlation with “Screen 3: Daylight Saving Settings” on
page 8.
UNITS
TIME
2ND
am
YEAR
Screen 1: Time & Date
Summary of Contents for Vantage VUE
Page 1: ......


