18
Chapter 3
Preparations
In this chapter, we will describe various essential devices to be connected to iCast 10NDI in order to
complete the system setup. If you possess the skills for setting up the production system, feel free to
skip this chapter and proceed to
3.1
Power
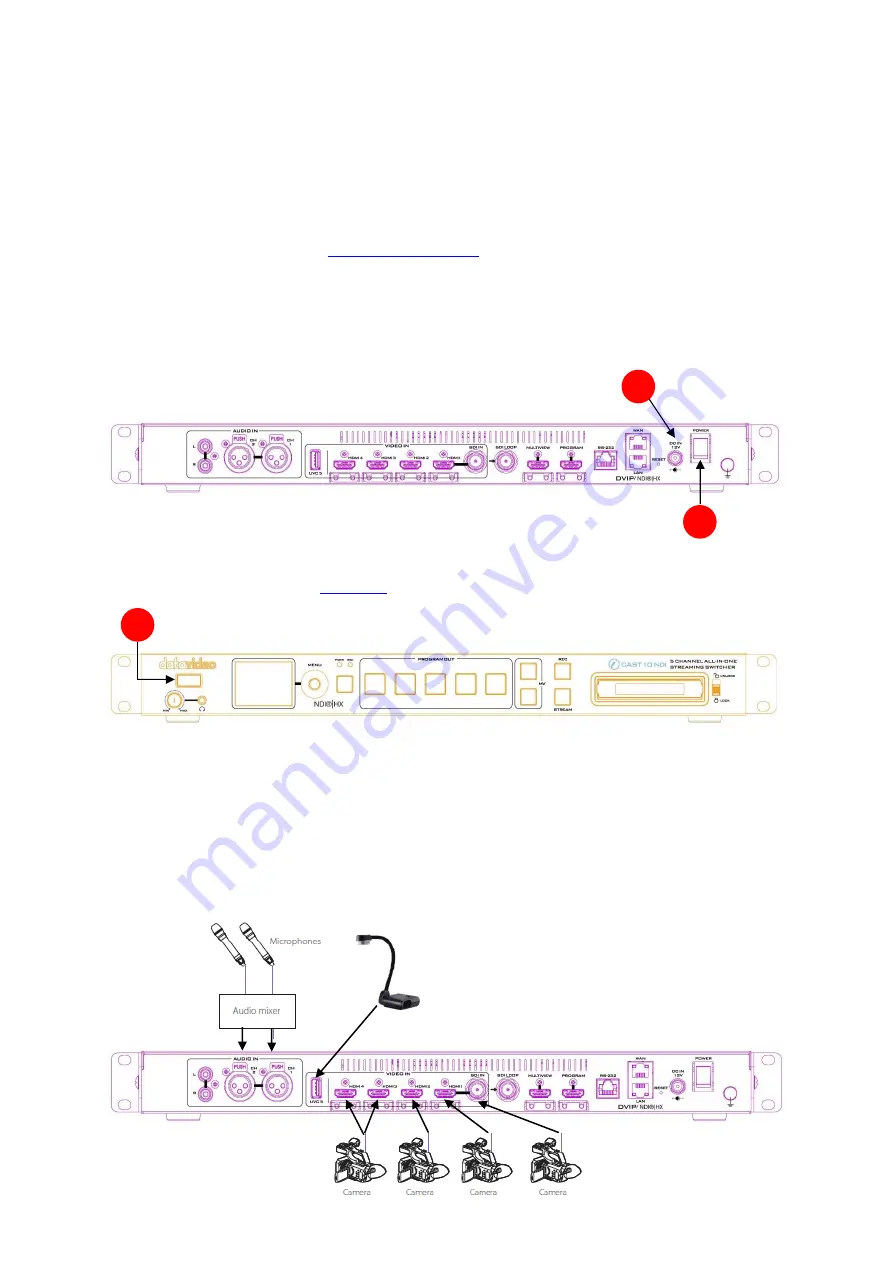
1. Connect the supplied 12V PSU to the DC Power Input on the rear of the iCast 10NDI. The
connection can be secured by screwing the outer fastening ring of the DC In plug to the socket.
2. Turn ON the power switch to turn ON the 2” LCD screen showing device status and the OSD menu
which are described in detail in
3. Press the power button to turn on the device’s button functions.
3.2
Connecting Input Devices
Looking at the rear panel of the iCast 10NDI, you should find five input video channels with channel
1 being an only SDI/HDMI selectable channel. Channel 5 or the UVC channel is a USB 3.0 port
designed for connecting a document camera. External audio sources such as microphones can be
connected to XLR balanced audio input ports.
1
2
3
Summary of Contents for iCast 10NDI
Page 1: ...1 STREAMING SWITCHER 5 CHANNEL ALL IN ONE iCast 10NDI Instruction Manual...
Page 10: ...10 1 2 System Diagram...
Page 11: ...11...
Page 73: ...73...
Page 91: ...91 Appendix 4 Dimensions All measurements in millimeters mm...
Page 94: ...94 Notes...
Page 95: ...95 Notes...


