Guidebook | Page 5
Refer to detailed focus
instructions on page 5, section 2 to
get an accurate setup
Calibration Settings:
The numbers on your SpyderLensCal ruler indicate precisely how
many centimeters the camera is front or back focusing. This will allow you to correct the focus
millimeter by millimeter. If you need to correct a front focusing issue, go forward. Reverse for
back focusing calibration. Note that the numbers on the ruler do not correlate to the numbers
in the adjustment menu on the camera.
2
Check and calibrate
a
test your Lens Accuracy
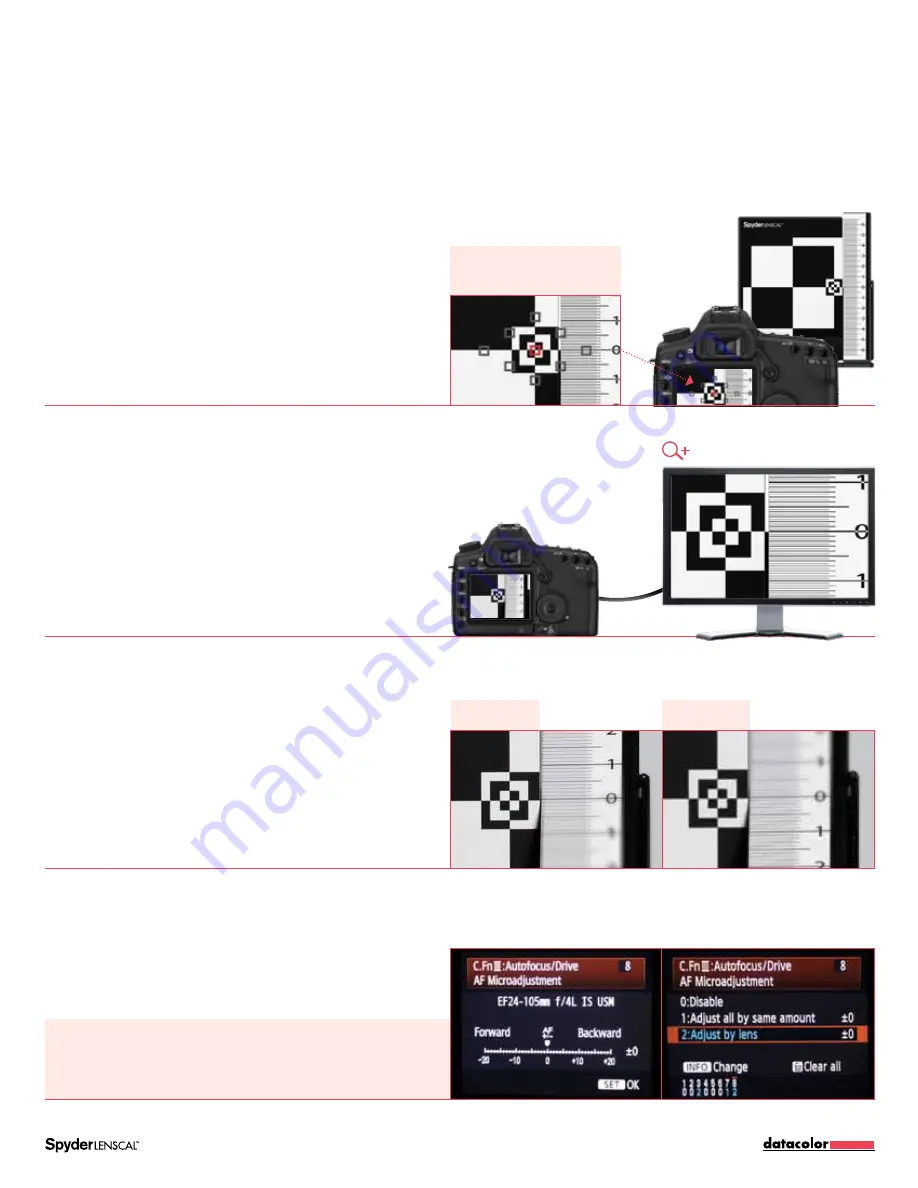
Aim your camera at the small bullseye of the SpyderLensCal
at the right edge of the vertical target and take one or more
shots. Look through the viewfinder to ensure no red indicator
dots are targeting the ruler. A red dot in the center square of
the viewfinder will confirm that the autofocus system is locking
onto the target area. If your camera highlights the focus point
chosen, the target plane has been selected as the intended
focal plane.
Choose your target shot on the camera’s LCD screen.
Zoom in on the section of the ruler next to the target. With the
camera at maximum zoom, take a look at the markings and
numbers on the ruler to see which one is sharpest. This mark
represents the center of focus determined by your camera
and lens autofocus system. To see the test image in a larger
format, you can transfer it to a computer.
If your camera and lens combination is correctly calibrated
then the line at “0” should be in sharp focus. If the picture is
not sharp at “0” your camera/lens combination is not on.
Check the ruler to see whether the front or the rear section is
sharper. If the lines behind the “0” mark are sharper, the lens
is back focusing. If the lines in front are sharper, the lens is
front focusing.
To calibrate a back or front focusing issue, enter the autofocus
correction menu on your camera and select “adjust by lens.”
b
review your test Image
c
check your focus
d
correct your Autofocus
Back Focusing
Front Focusing


