background image


11 


How to store selected camera positions 

 
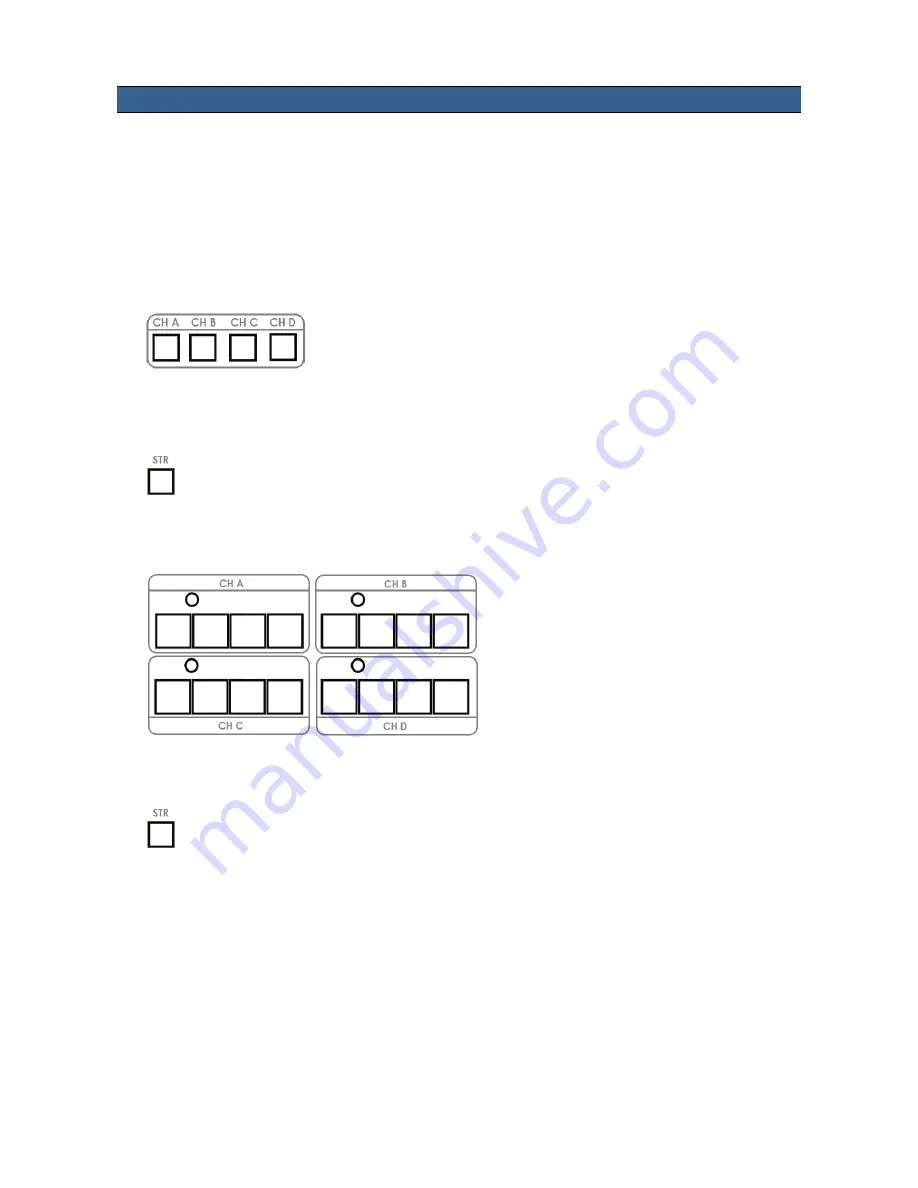
The RMC-180 allows you to store up to four camera positions for each of the four possible cameras, CH A, B, 
C and D. This means, with four PTZ cameras connected to the RMC-180, up to sixteen camera positions can 
be stored. 
 

NB:

 The position and settings are stored in the camera and not in the RMC-180. 


To store a cameras position: 


1.  Select the camera that you wish to use CH A or CH B or CH C or CH D. 


2.  Move the camera to the desired position or view using the joystick. Set the focus, Iris and zoom so you 

are happy with the camera’s video output. 
 

3.  Push the STR (store) button and it will be illuminated. 


4.  Choose one of the selected camera’s four memory buttons to save the current settings for position, Iris, 

focus and zoom. The selected memory button will be illuminated. 


5.  Push the STR (store) button again to turn off the store feature and return the RMC-180 to normal 

operation.  


Summary of Contents for RMC-180

Page 1: ......

Page 2: ... Datavideo Technologies cannot exclude that some information in this manual from time to time may not be correct or may be incomplete This manual may contain typing errors omissions or incorrect information Datavideo Technologies always recommend that you double check the information in this document for accuracy before making any purchase decision or using the product Datavideo Technologies is no...

Page 3: ...that the total of the ampere ratings on the products plugged into the extension cord do not exceed the extension cord rating 10 Make sure that the total amperes of all the units that are plugged into a single wall outlet do not exceed 15 amperes 11 Never push objects of any kind into this unit through the cabinet ventilation slots as they may touch dangerous voltage points or short out parts that ...

Page 4: ...n how to register please visit www datavideo com or contact your local Datavideo office or authorized Distributors Certain parts with limited lifetime expectancy such as LCD Panels DVD Drives Hard Drives are only covered for the first 10 000 hours or 1 year whichever comes first Any second year warranty claims must be made to your local Datavideo office or one of its authorized Distributors before...

Page 5: ...s Gain and other functions over Ethernet Multiple preset for Pan Tilt Zoom for each individual camera Full remote control of each camera via serial communication over affordable network cabling Compatible with Datavideo s switcher tally indicators Compact design for easy installation Easy integration with Datavideo HD switchers for an affordable multi camera solution Compatible Control Standards D...

Page 6: ...se dials FOCUS To manually control focus adjustment first press the AUTO MANUAL button so it is illuminated or ON The FOCUS dial can then be turned to achieve the desired focus If the AUTO MANUAL button is not illuminated or OFF then the camera will use its own Auto Focus feature if it has this function Mode Select MODE The selected PTC 100 camera will output colour bars A B Save MODE A or MODE B ...

Page 7: ...ZOOM Twist the joystick clockwise to the right or anti clockwise to the left to have the selected camera zoom in or out Speed The speed at which the selected camera moves can be chosen by pressing one of three speed buttons STR Pressing this button toggles RMC 180 into or out of STORE MODE When active this allows the current camera position to be stored within a chosen Channel Memory Button Channe...

Page 8: ...ignals the RMC 180 can turn on an LED on the keyboard giving the camera operator an indication which camera is currently live at the switcher DC In Socket Connect the supplied 12V 0 5A PSU to this socket The connection can be secured by screwing the outer fastening ring of the DC In plug to the socket The connection is centring positive Power On Off Switch Switches the unit On Off Grounding Termin...

Page 9: ... Setting the camera tilt direction control is normal or reversed UP DOWN 11 ZOOM DIRECTION Setting the camera zoom direction control is normal or reversed ZOOM IN ZOOM OUT Turn the joystick left or right is control camera zoom in or zoom out 12 FOCUS DIRECTION SET Setting the camera focus direction control is normal or reversed LEFT RIGHT FOCUS setting has 4 kinds speed let you select Step 1 Push ...

Page 10: ...on LED will light on Step 2 Push button the button will twinkling Step 3 Push button select IRIS control speed Step 4 Push and turn button control the camera iris 14 JOYSTICK SENSITIVITY Setting the joystick controls sensitivity 18 RMC 180 FW VERSION Display the RMC 180 firmware version 19 AW HE100 FW VERSION Display the AW HE100 firmware version 20 EXIT Exit the set up menu mode ...

Page 11: ...s position 1 Select the camera that you wish to use CH A or CH B or CH C or CH D 2 Move the camera to the desired position or view using the joystick Set the focus Iris and zoom so you are happy with the camera s video output 3 Push the STR store button and it will be illuminated 4 Choose one of the selected camera s four memory buttons to save the current settings for position Iris focus and zoom...

Page 12: ... Once started the update process should not be interrupted in any way as this could result in a non responsive unit As well as a working RMC 180 you will need The latest Firmware Update This can be obtained from your local Datavideo office A cable USB A to USB A no longer than 2m A Windows computer with a USB 2 0 port 1 Power off RMC 180 and then connect the USB A cable from the port on the RMC 18...

Page 13: ...0_U38 storage icon and then delete bootcode bin file within the next window 7 Paste the new firmware bin file into the same place on the RMC 180_U38 removable storage 8 Reset the power on the RMC 180 The LCD will then display as below 9 The unit should now be ready to use with your chosen camera ...

Page 14: ...14 Notes ...

Page 15: ...15 Notes ...

Page 16: ...16 ...

Reviews: