Chapter 3: Installation
27
Hardware Installation
•
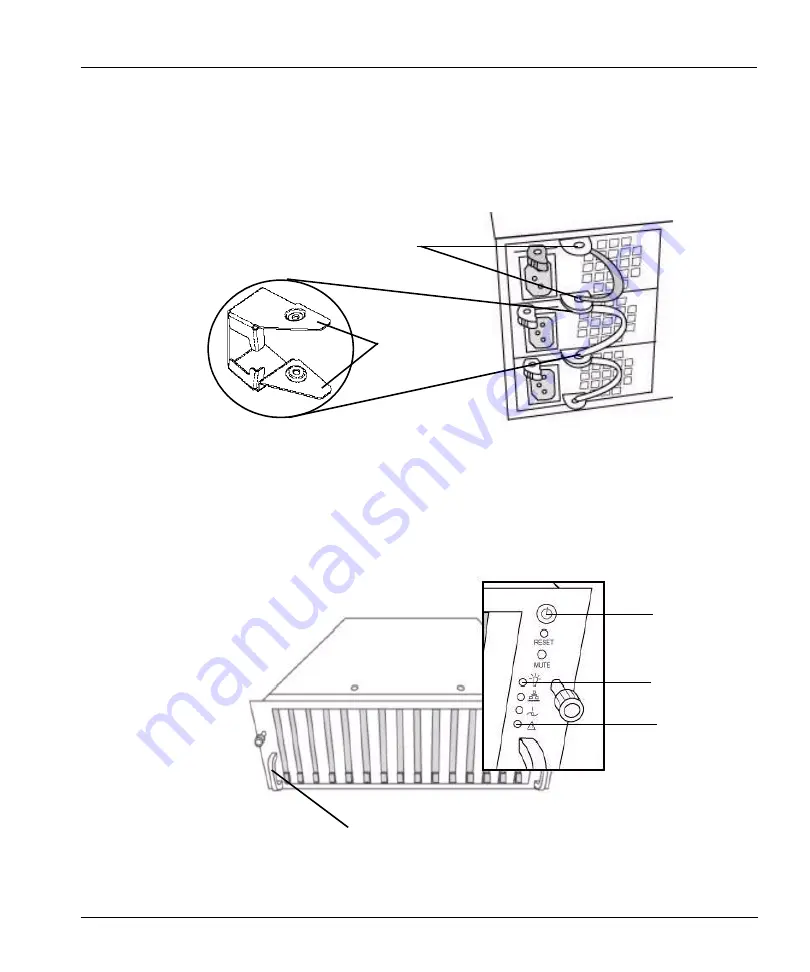
For each power cord, slide a power cord retainer bracket over the cord.
•
Pinch the two “wings” on the bracket and slide the bracket down over the power cord plug and
flush with the back of the power unit so that the wings secure the plug by clicking into the
power unit handle brackets. See Figure 12.
•
Plug in the three power cords to a power source.
•
Start the Restorer. Push the power button (the top button) on the right-side control panel on the
front of the system. See Figure 13 on page 27 for the location.
•
After the restorer starts, the power-on LED glows green. See Figure 13 for the location.
Figure 12: Power cord retainer bracket
Power unit handle brackets
Retainer
bracket
wings
Power
button
Side bracket
Figure 13: Restorer front panel
Power unit
failure
indicator
Power-on LED
Summary of Contents for DD400 Series
Page 1: ...Software Version 3 1 2 DD400 Series Restorer User Guide ...
Page 4: ......
Page 38: ...Regulatory Standards Compliance xxxviii DD400 Series Restorer User Guide ...
Page 54: ...Hardware System Level Interfaces 16 DD400 Series Restorer User Guide ...
Page 60: ...Display the Space Usage Graphs 22 DD400 Series Restorer User Guide ...
Page 96: ...The License Command 58 DD400 Series Restorer User Guide ...
Page 102: ...Return Command Output to a Remote machine 64 DD400 Series Restorer User Guide ...
Page 128: ...Clean Operations 90 DD400 Series Restorer User Guide ...
Page 138: ...Display the History of Disk Failures 100 DD400 Series Restorer User Guide ...
Page 182: ...CIFS Command 144 DD400 Series Restorer User Guide ...
Page 194: ...Procedure Replace a Replica 156 DD400 Series Restorer User Guide ...
Page 210: ...Send Log messages to Another System 172 DD400 Series Restorer User Guide ...
Page 228: ...Operations for Trained Service Personnel 190 DD400 Series Restorer User Guide ...


