


First Installation
12
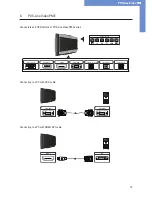
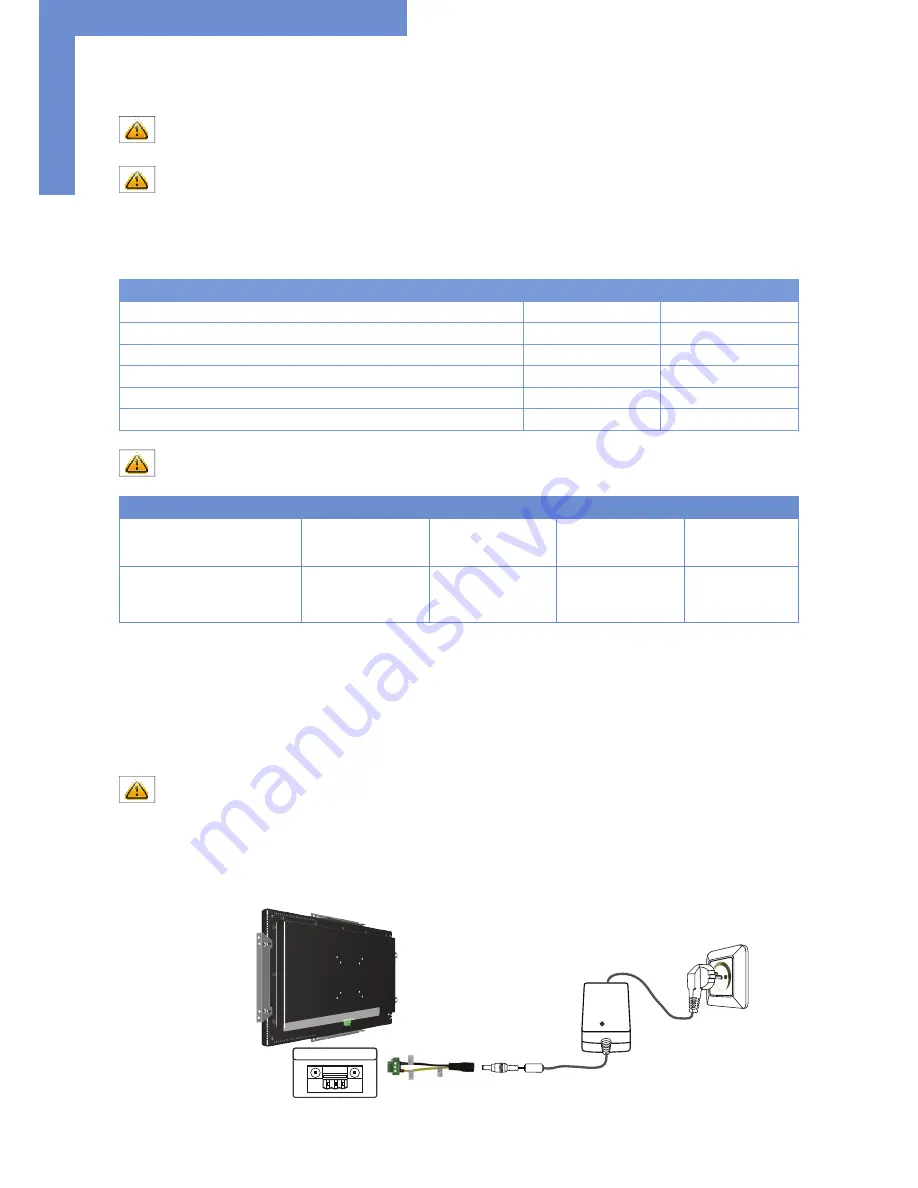
Connecting to Power
Note: The operating power of the POS-Line monitor depends on the choosen controller and on selected options. Please read
the lable regarding the power supply before connecting the monitor to the power.
Note: All the POS-Line monitors requiring 12V DC power are shipped with an appropriate power supply. The POS-Line moni
-
tors with 24V DV power requirements are shipped without power supply. Please read the chapter “Connecting to an existing
power supply” carefully.
Depending on controller and on ordered options, POS-Line monitors have different power requirements. The following table lists all the
POS-Line versions and their operating power:
Monitor Version
Operating Power
Power Supply Included
POS-Line Video ECOIII (for standard video signals VGA, DVI)
12V DC/ 24V DC
yes/ no
POS-Line Video PME (for standard video signals VGA, HDMI, DP)
12V DC
yes
POS-Line Video PIII (for standard video signals VGA, DVI, S-Video, CVBS)
12V DC/ 24V DC
yes/ no
POS-Line IQ Ontario
12V DC
yes
POS-Line Core-i
9V DC - 24V DC
yes
POS-Line VideoPoster
12V DC
yes
Note: The POS-Line displays of the IQ series (with integrated PC) larger or equal to 48cm (19“) are shipped with a more
powerful power supply.
Display
Input voltage
Output voltage
Output current
Power
Power supply für POS-Line
(not for IQ-Core i series as well as IQ-On
-
tario 19“, 21.5“ and 23“)
100-240 V AC
12V DC
5 A
60 Watts
Power supply for POS-Line series
IQ-Core-i series
IQ-Ontario: 19“, 21.5“, 23“
100-240 V AC
12V DC
7 A
84 Watts
The power is connected to the display via the green female connector at the back side.
Specification of the power connector:
Female connector: Phoenix Contact DFK-MSTB-2,5 / 3-GF
Male plug: Phoenix Contact MSTB 2,5 / 3-STF
Connecting to power with included power supply
Note: Connect the data cables to external devices before plugging the display to the power.
•
Connect the adapter cable to the display.
•
Connect the adapter cable to the 12 V connector of the power supply.
• Insert the power cable into the power supply.
•
Connect the power cable to a power socket.
Power supply
12V nc GND


