


Quick start guide
Service and Maintenance
15
EN
GLIS
H
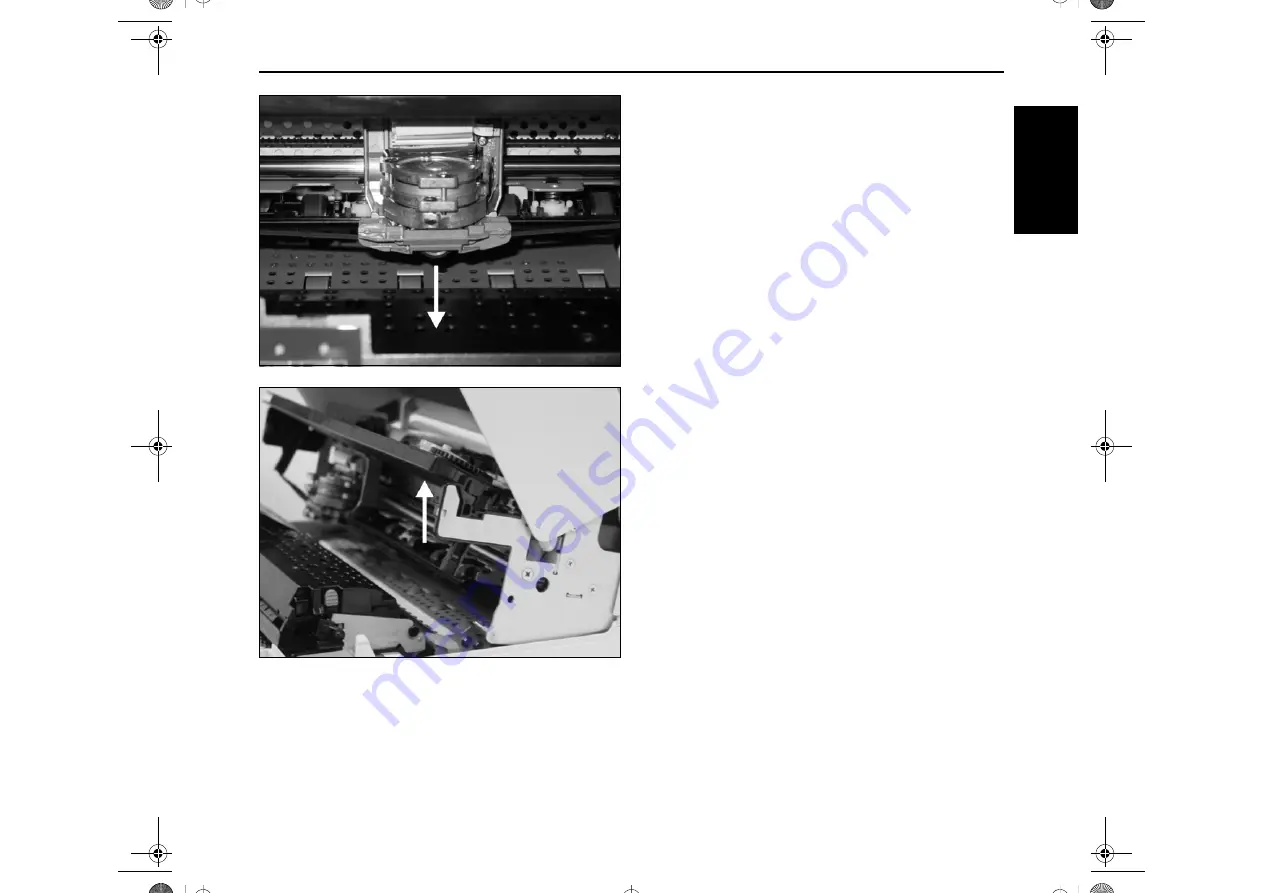
Remove the colored ribbon guide from the print head by pull-
ing it downwards.
Raise the front end of the ribbon cassette on both sides.
Take the ribbon cassette out of the printer.
Quick Start-en.book Seite 15 Dienstag, 5. Dezember 2006 10:48 10


